
17 Aug 2017
Textile Conservator Nora Meller reflects on her two weeks at the Victoria and Albert Museum’s Textile Conservation studio in spring
This was a fantastic opportunity as the V&A studio runs quite differently from our studio, being much larger, with more textile conservators and display specialists working in one space. I was eager to see how the studio operates and to learn new techniques that would help me in my day-to-day job.
PART ONE - Conservation cleaning: an immersive experience
- Project 1 - Cleaning an 18th-century damask napkin
- Project 2 - Cleaning a 19th-century christening robe
- Project 3 - Cleaning a colourful early-20th century bathing suit
- Project 4 - Cleaning a length of printed mid-20th-century cotton fabric
PART TWO - Smart costume packing: inspiring solutions
PART ONE - Conservation cleaning: an immersive experience
The first area I immersed myself in (not literally!) was wet cleaning (or washing), using a water bath with other additives to clean historic textiles.
I was keen to practice and learn new techniques in wet cleaning as we don’t wash textiles very regularly in our studio. The majority of our textile collection is wool based uniforms which do not like to be immersed in water, and dirt is often considered a historically important part of these textiles, for example Nelson’s blood-stained clothing.
The cleaning projects I worked on at the V&A had their challenges, from stubborn dirt to potential colour bleeding and large size.
Project 1: Cleaning an 18th-century damask napkin
The damask napkin is going to be displayed in the V&A Museum of Design Dundee. This cleaning seemed fairly straightforward, except for the ink writing in one corner which we wanted to preserve, and the heavy dirt layer that we aimed to remove.
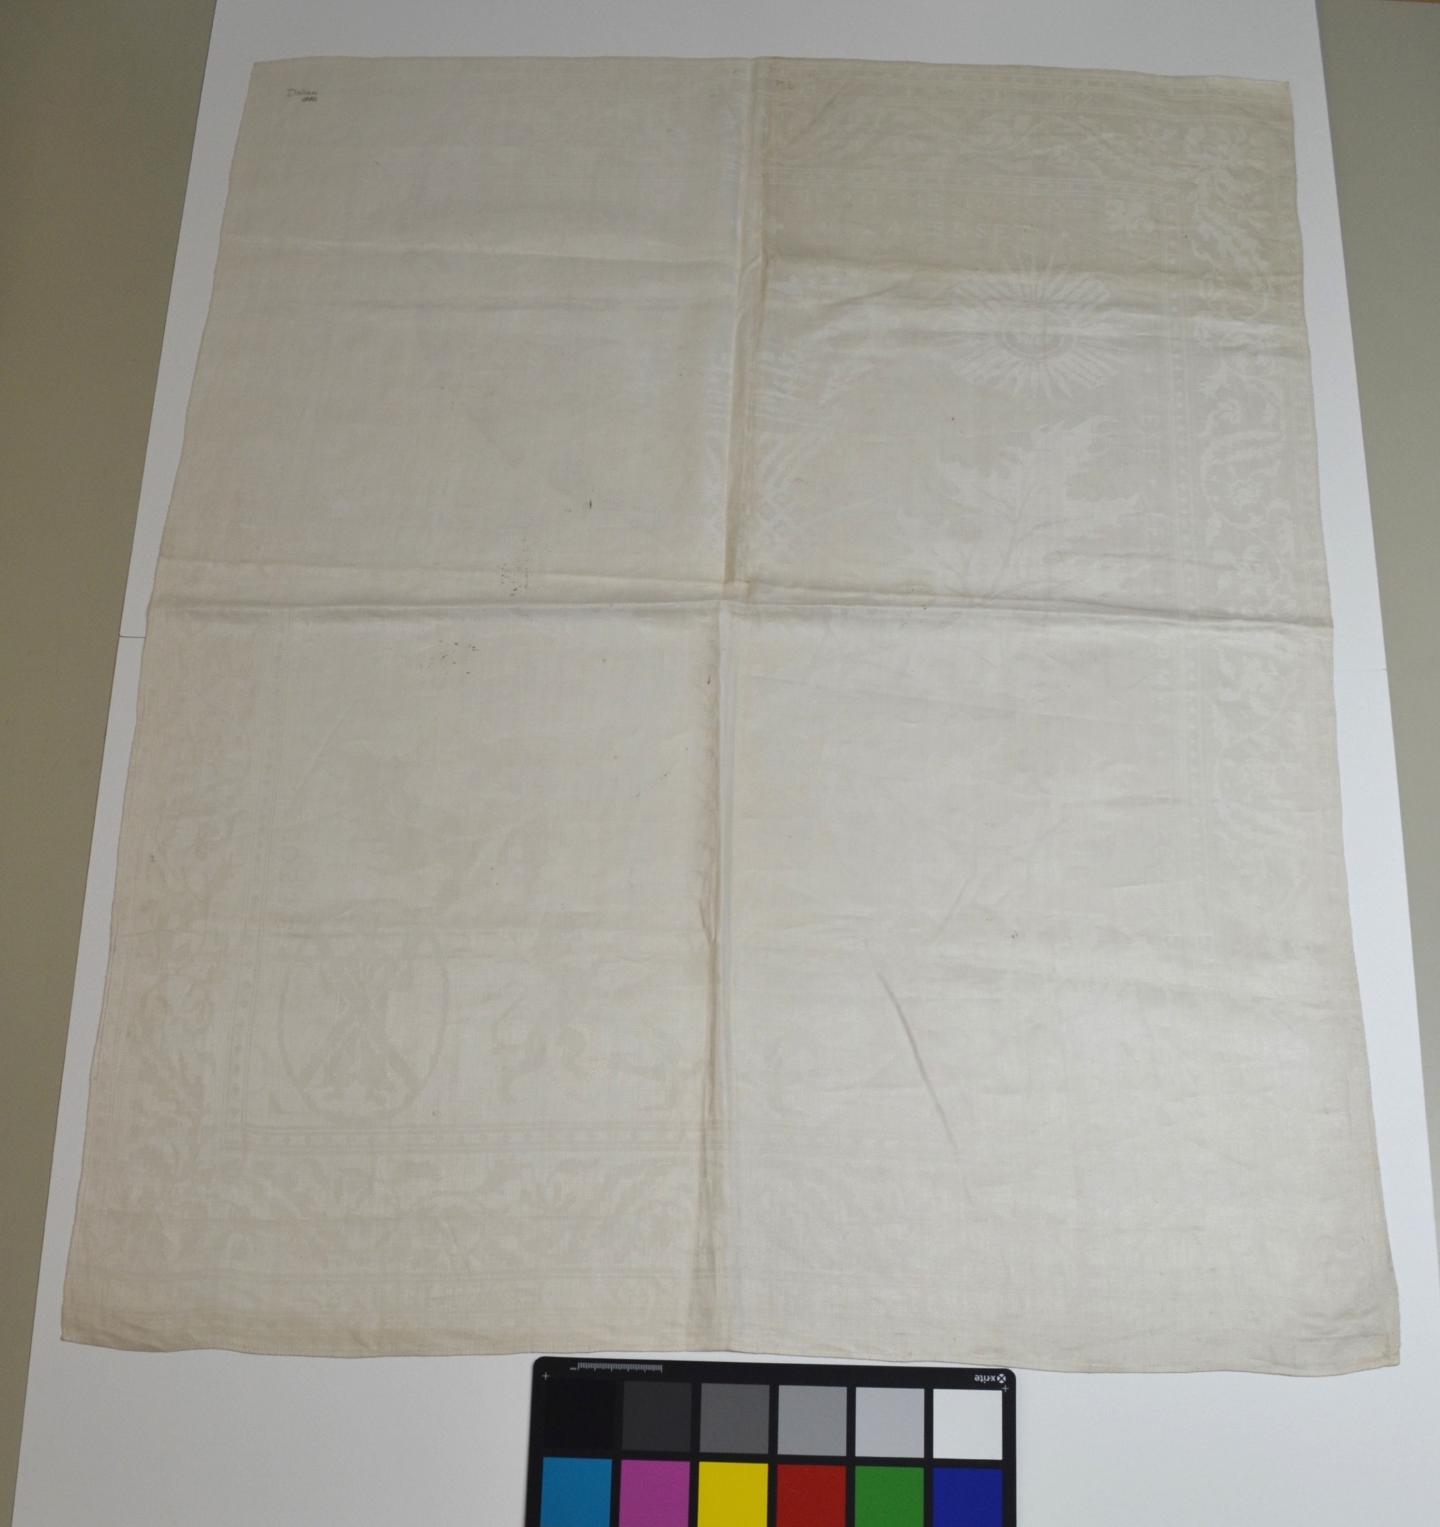
The napkin with ink writing in its top corner, before treatment
To make sure that the ink was not going to move in the process, water, detergents, and a chelating agent (which usually helps remove carbon-based, sooty dirt) were tested on it beforehand. We found that an anionic detergent with a chelating agent worked well, so we mixed these with water to form the cleaning solutions.

To test the fastness of the ink, I placed cotton wool buds dampened in the solutions onto it, and put a glass weight on top
We created a pool not much larger than the object, inside the studio’s metal wash table that can be tilted to aid rinsing. We gently sponged the napkin with the cleaning solutions and thoroughly rinsed it.
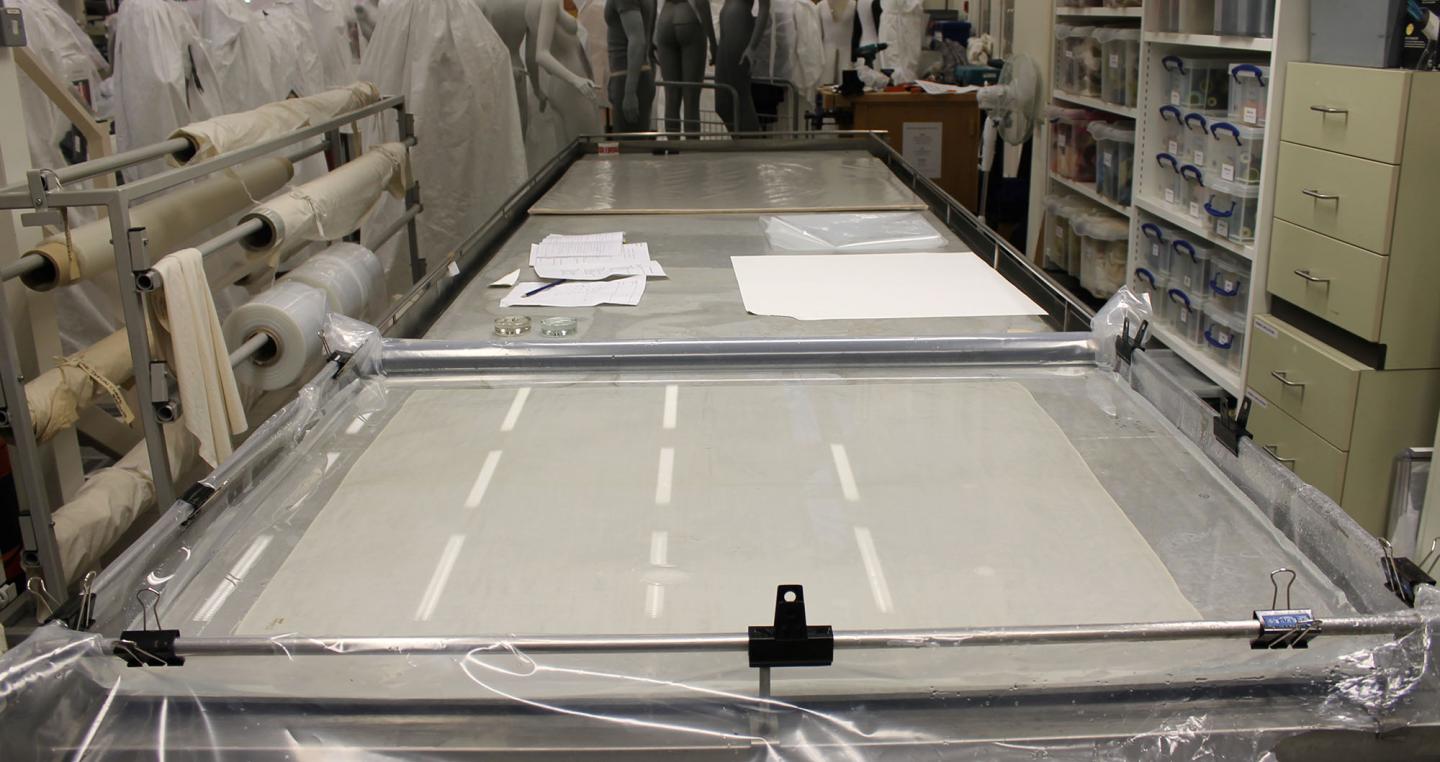
The napkin laid out in the bath
The cleaning went without surprises as the ink stayed in place. The napkin was pinned out with stainless steel pins to a plastic-covered soft board to dry in the correct shape.
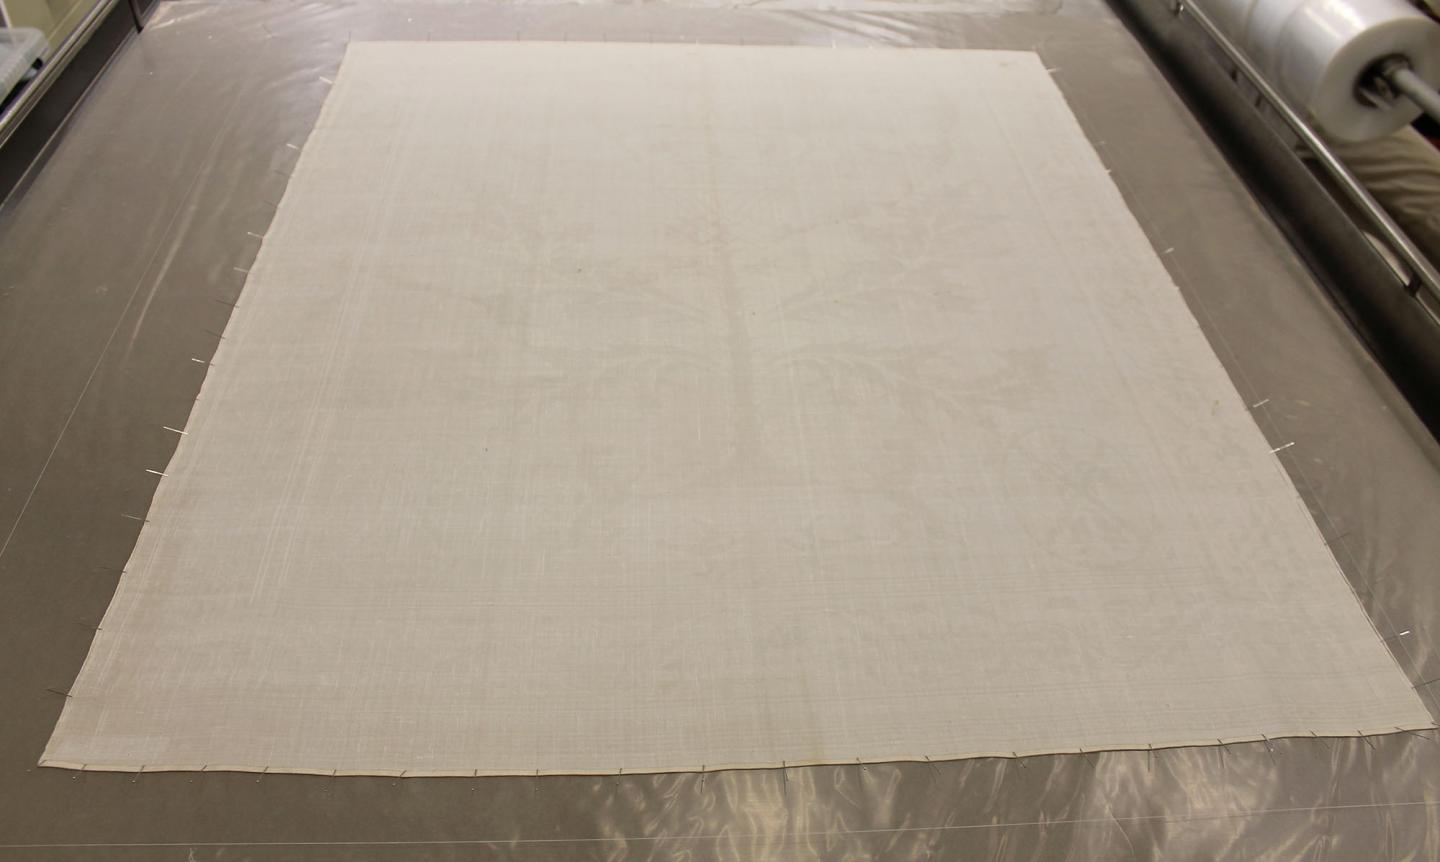
The napkin pinned out onto a soft board
Project 2: Cleaning a 19th-century christening robe
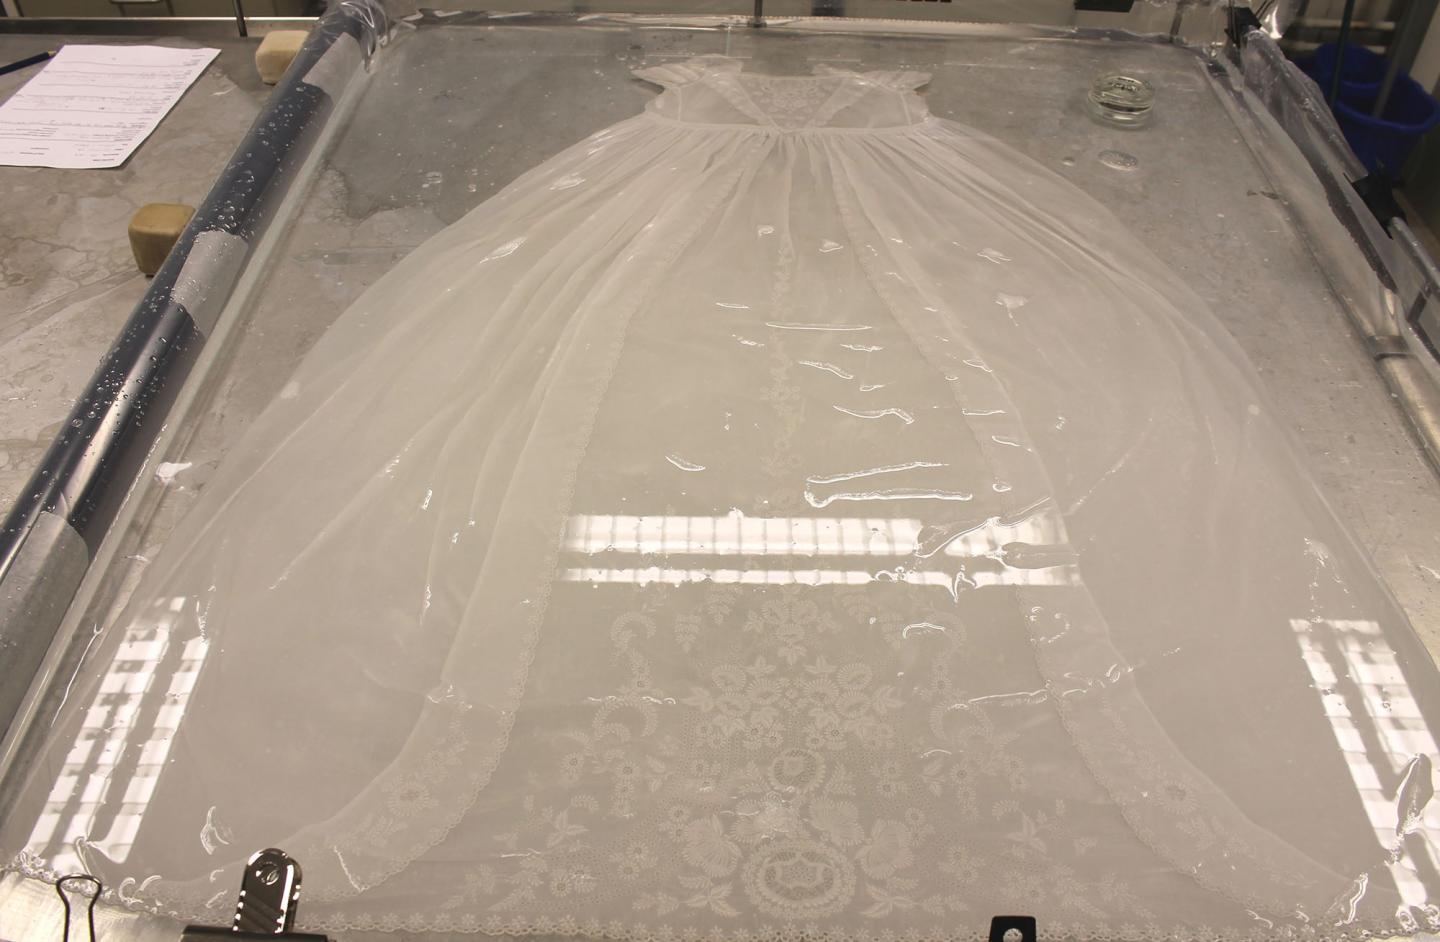
The christening robe was also awaiting a clean before it could be displayed in the V&A Museum of Design Dundee. A beautifully hand stitched and embroidered garment, it must have seen some water when it was new!
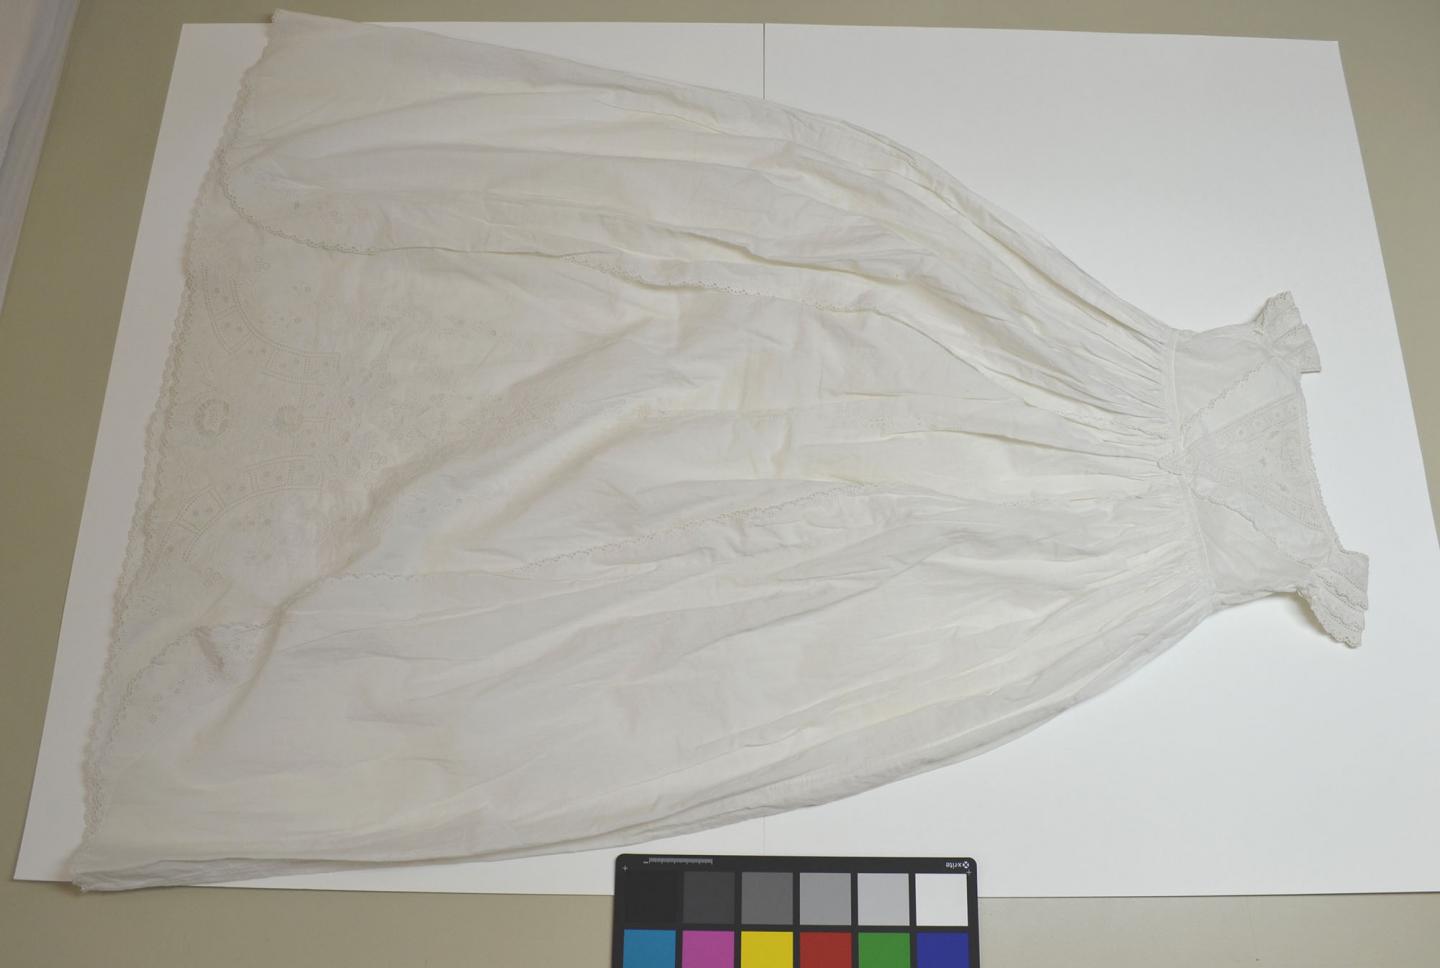
The christening robe before treatment
Once again we used the anionic detergent and chelating agent in the cleaning solution. The challenge here was how best to handle the fine cotton fabric as it became increasingly vulnerable when it was wet and heavy. Two people could turn it around in the water safely by sandwiching it between large polyester sheets.
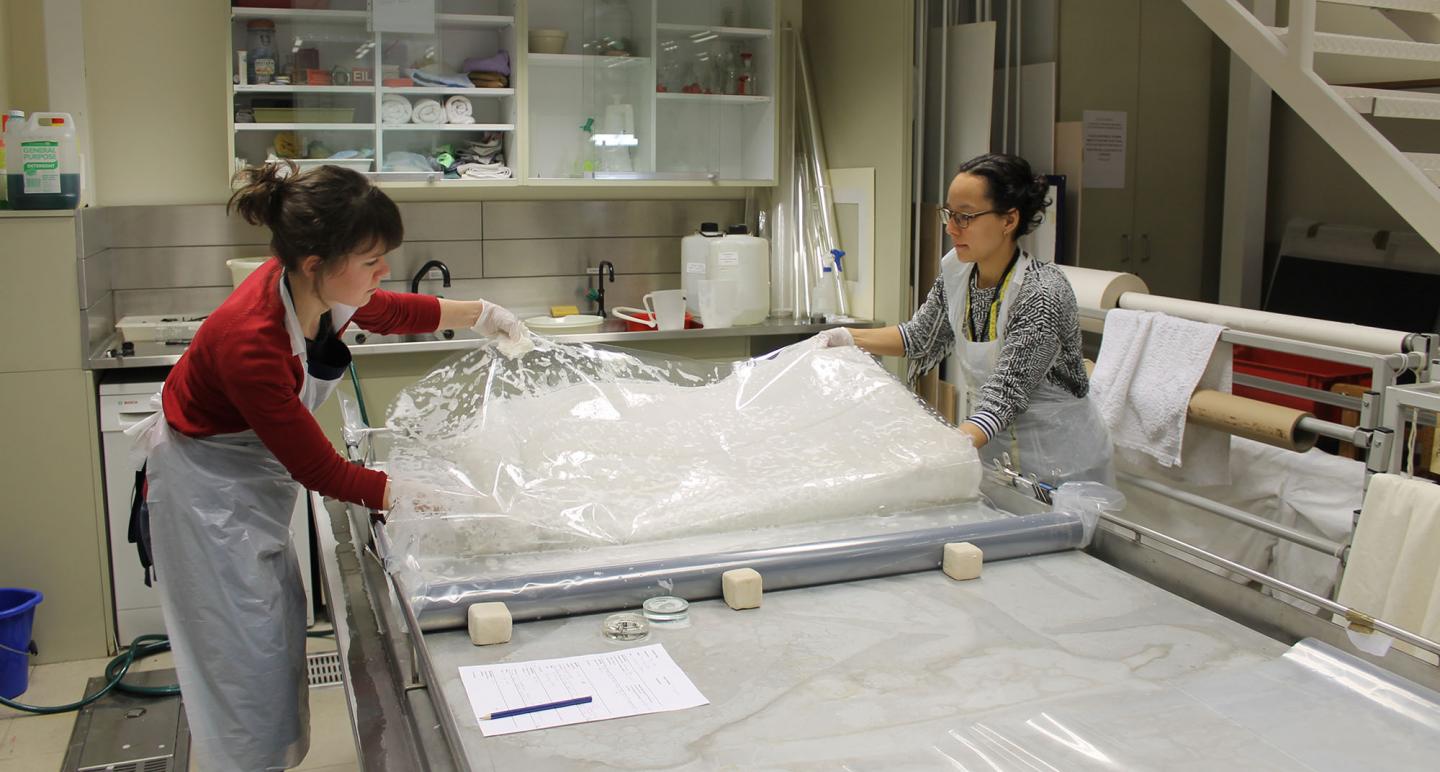
Turning the robe around in the bath
We spent a long day with washing, as the christening robe was not small and its many pleats retained the detergent very efficiently. In fact, we spent 4 hours just on rinsing!
Rinsing the christening robe in a clean water bath
When we took it out from the water we stuffed soft nylon net inside the robe and used cold air from hairdryers to make the drying process quicker. This also prevented creases coming back.
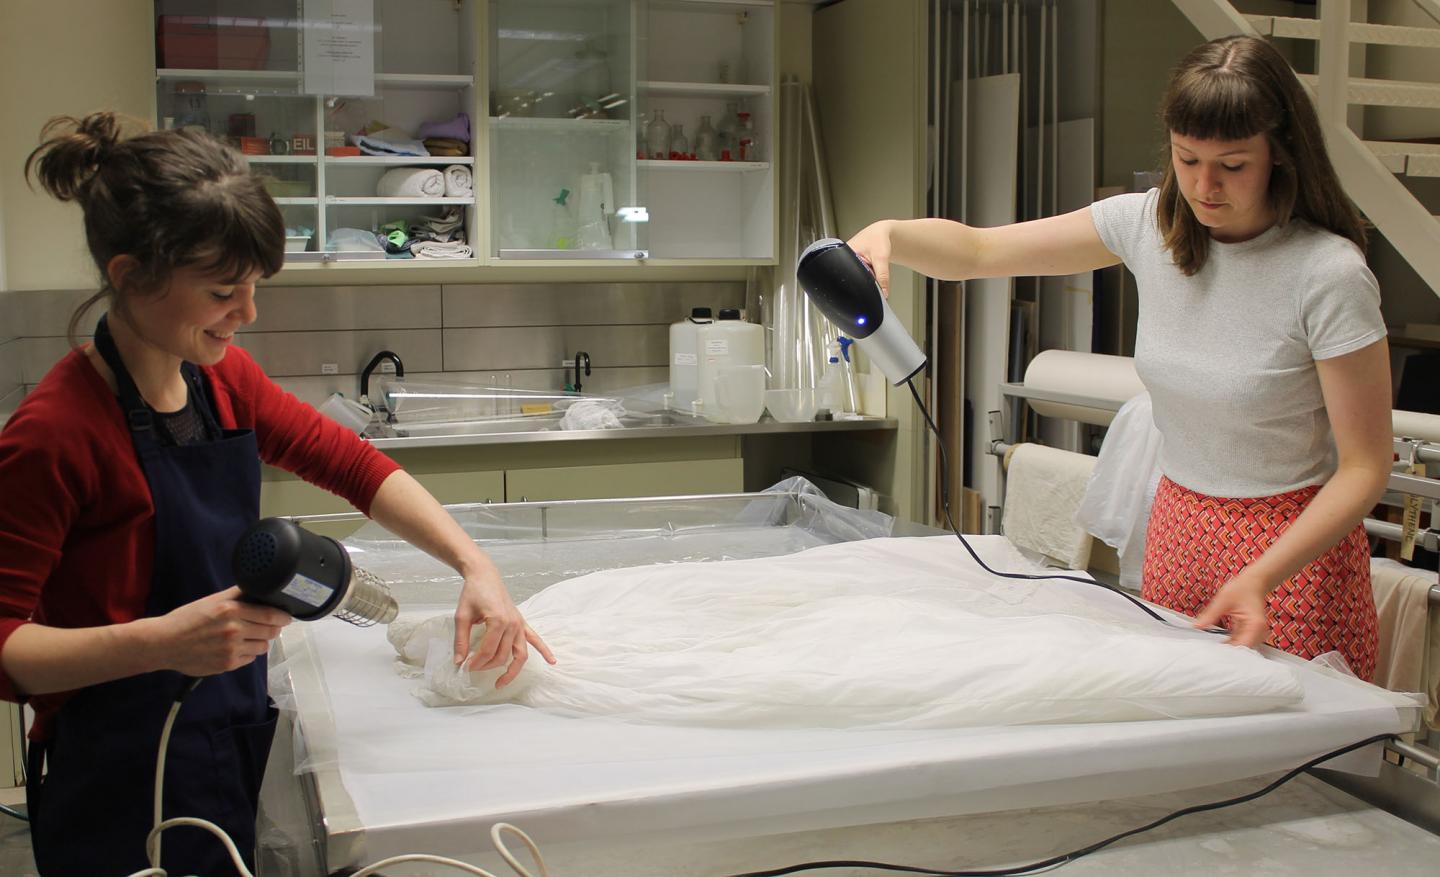
Drying the christening robe with cold air from hair dryers
Project 3: Cleaning a colourful early-20th century bathing suit
Now some colour was bound to come into play: a stylish black, orange and white cotton bathing suit, with a modesty skirt was waiting to be cleaned. It is going on display in the Fashion Galleries.
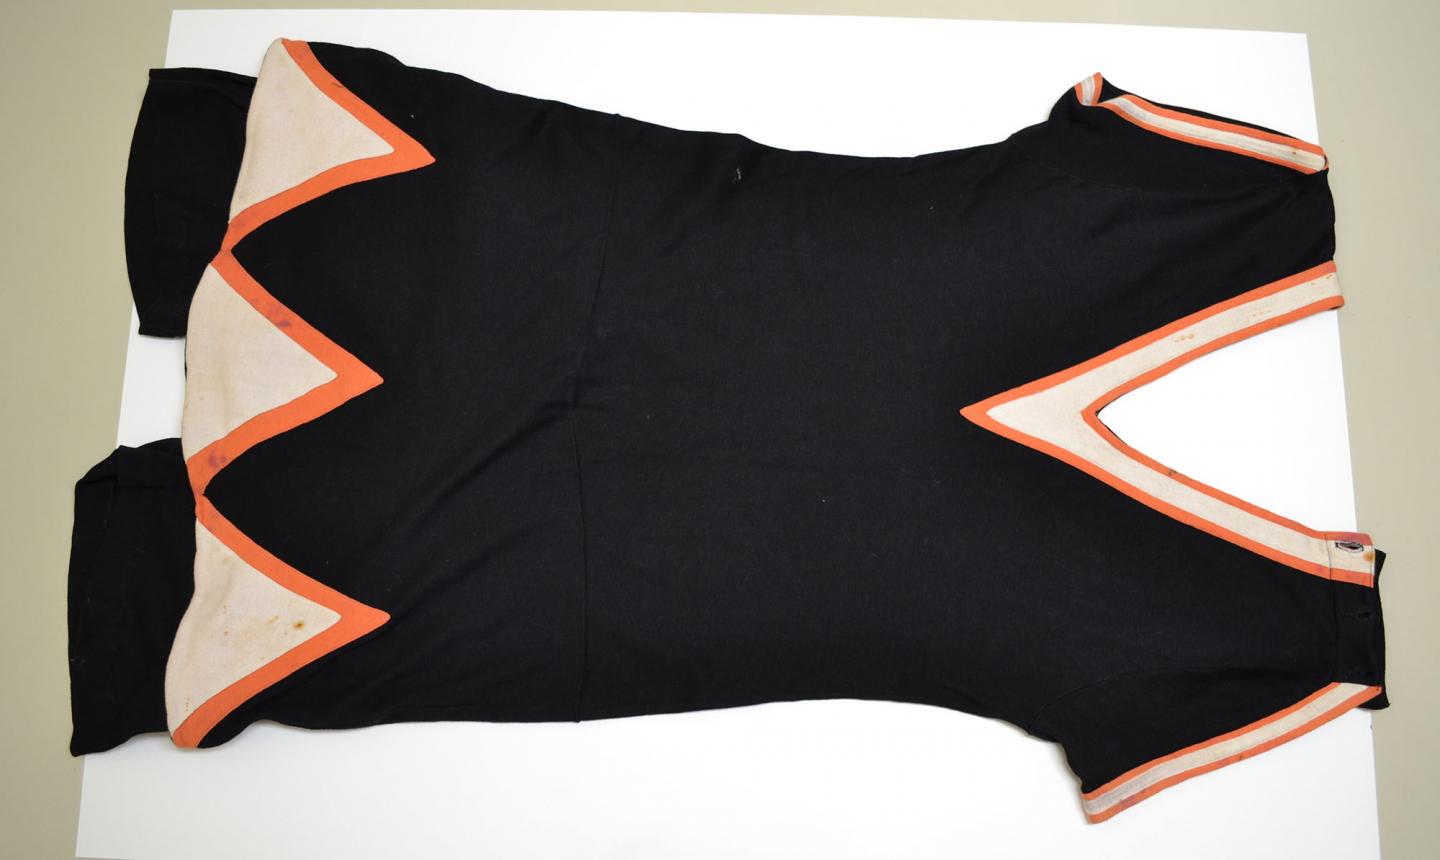
The bathing suit laid out for colour fastness testing
We made several tests on the colours and found that the black fabric bled a pink colour if a detergent was added. This was probably some excess dye that was not so tightly bound to the textile fibres. However, using a chelating agent the bleeding lessened, this was likely to be due to the change in pH of the water.

The bathing suit in the water
We went ahead with the washing knowing that we would need to be fast to minimize dye loss. Thanks to the quick changeovers of wash water the loss of dye was limited and did not affect the strength of the colour.
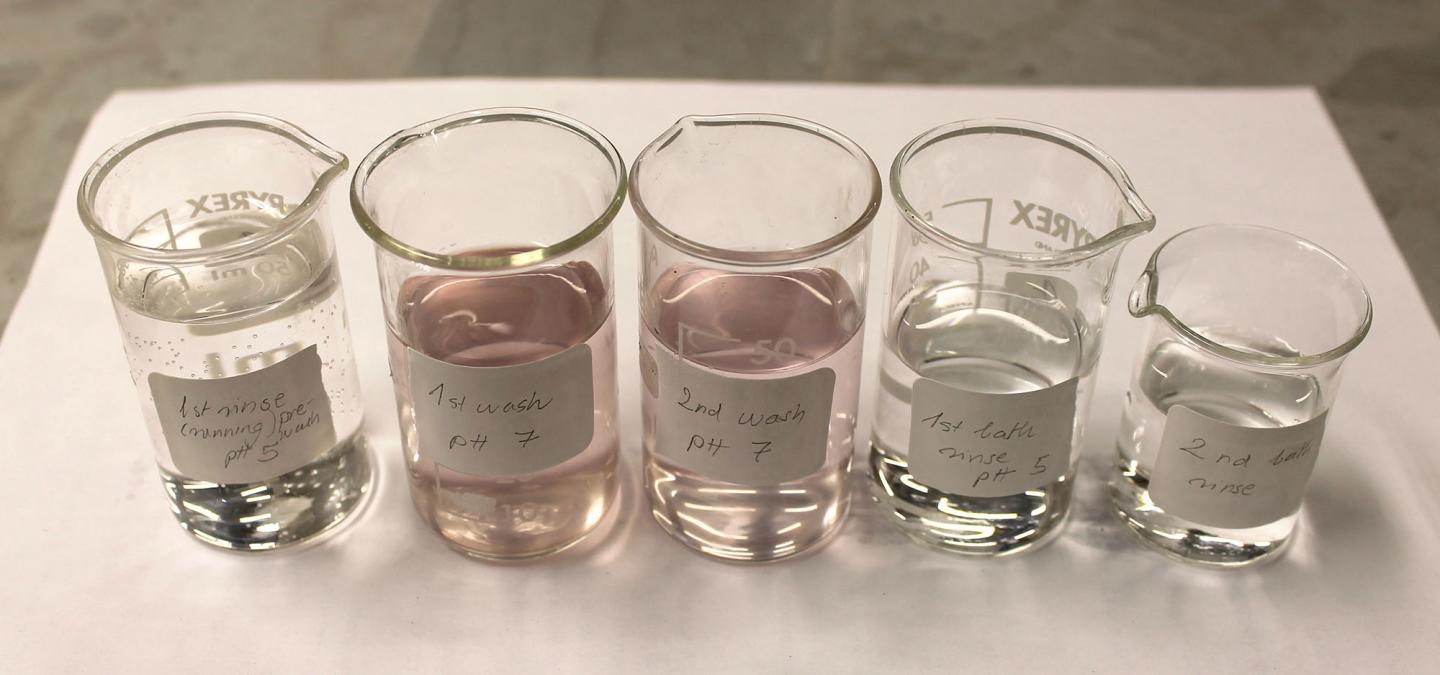
Slight pink discolouration of the wash water samples
As the colours tend to migrate towards the drier areas, we dried the black fabric first with cold air hairdryers, and only then the oranges and whites. The strategy was successful and the bathing suit dried without any colour movement.
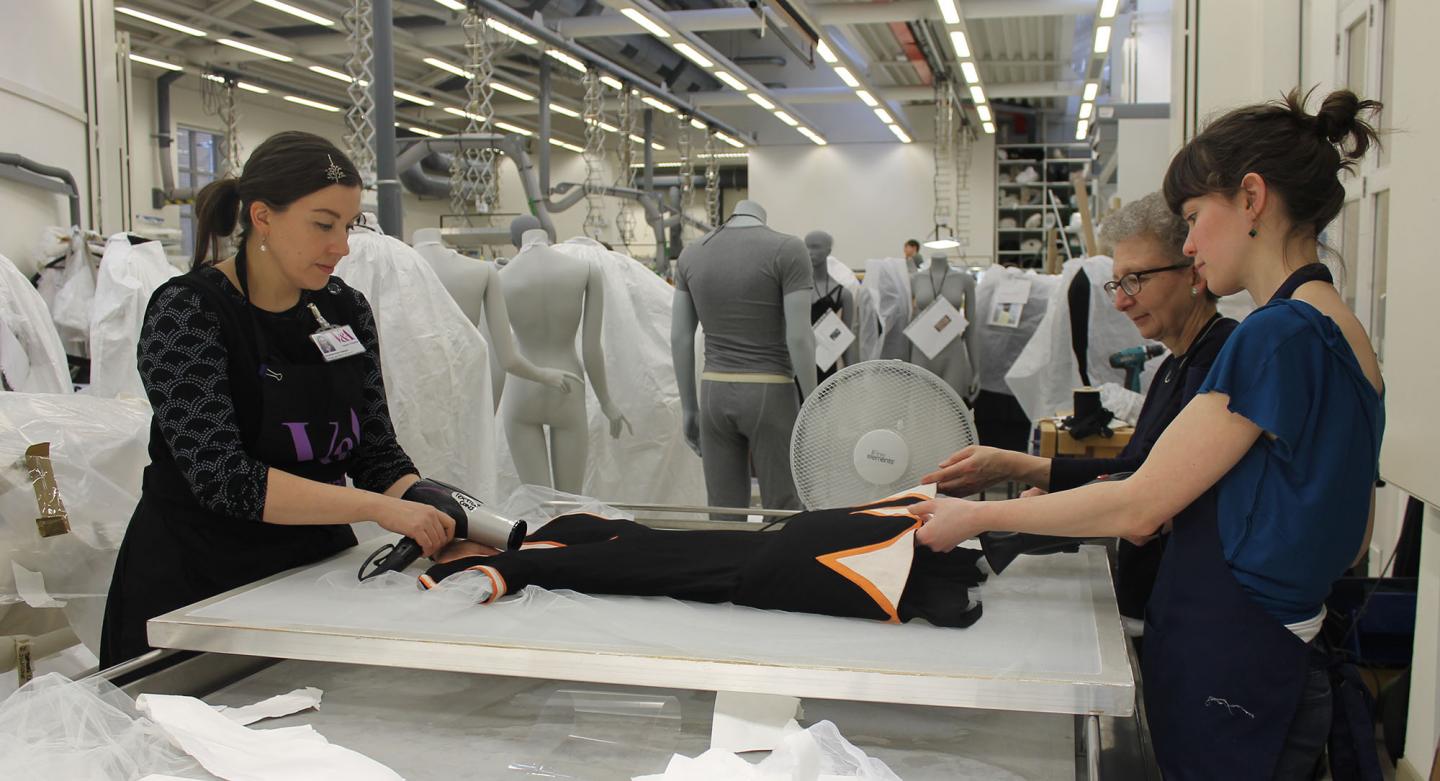
Drying the bathing suit with cold air from hair dryers
Project 4: Cleaning a length of printed mid-20th-century cotton fabric
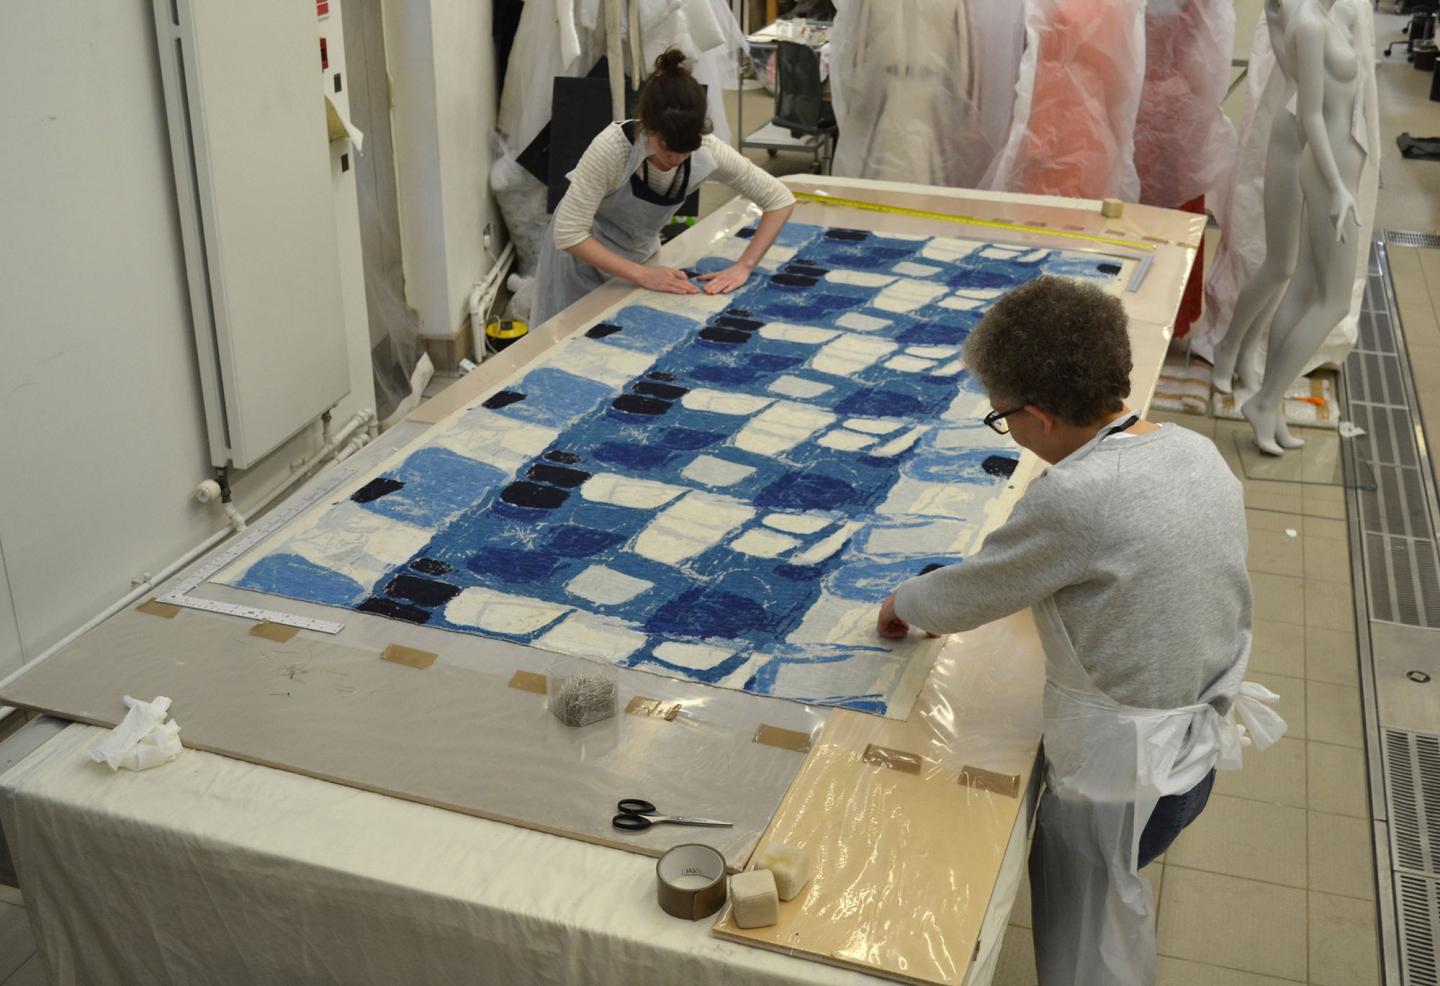
The fourth cleaning project was a large, multi-coloured, printed fabric designed by William Scott for the Scottish Weavers Ltd. It is going on display in the V&A Museum of Design Dundee.
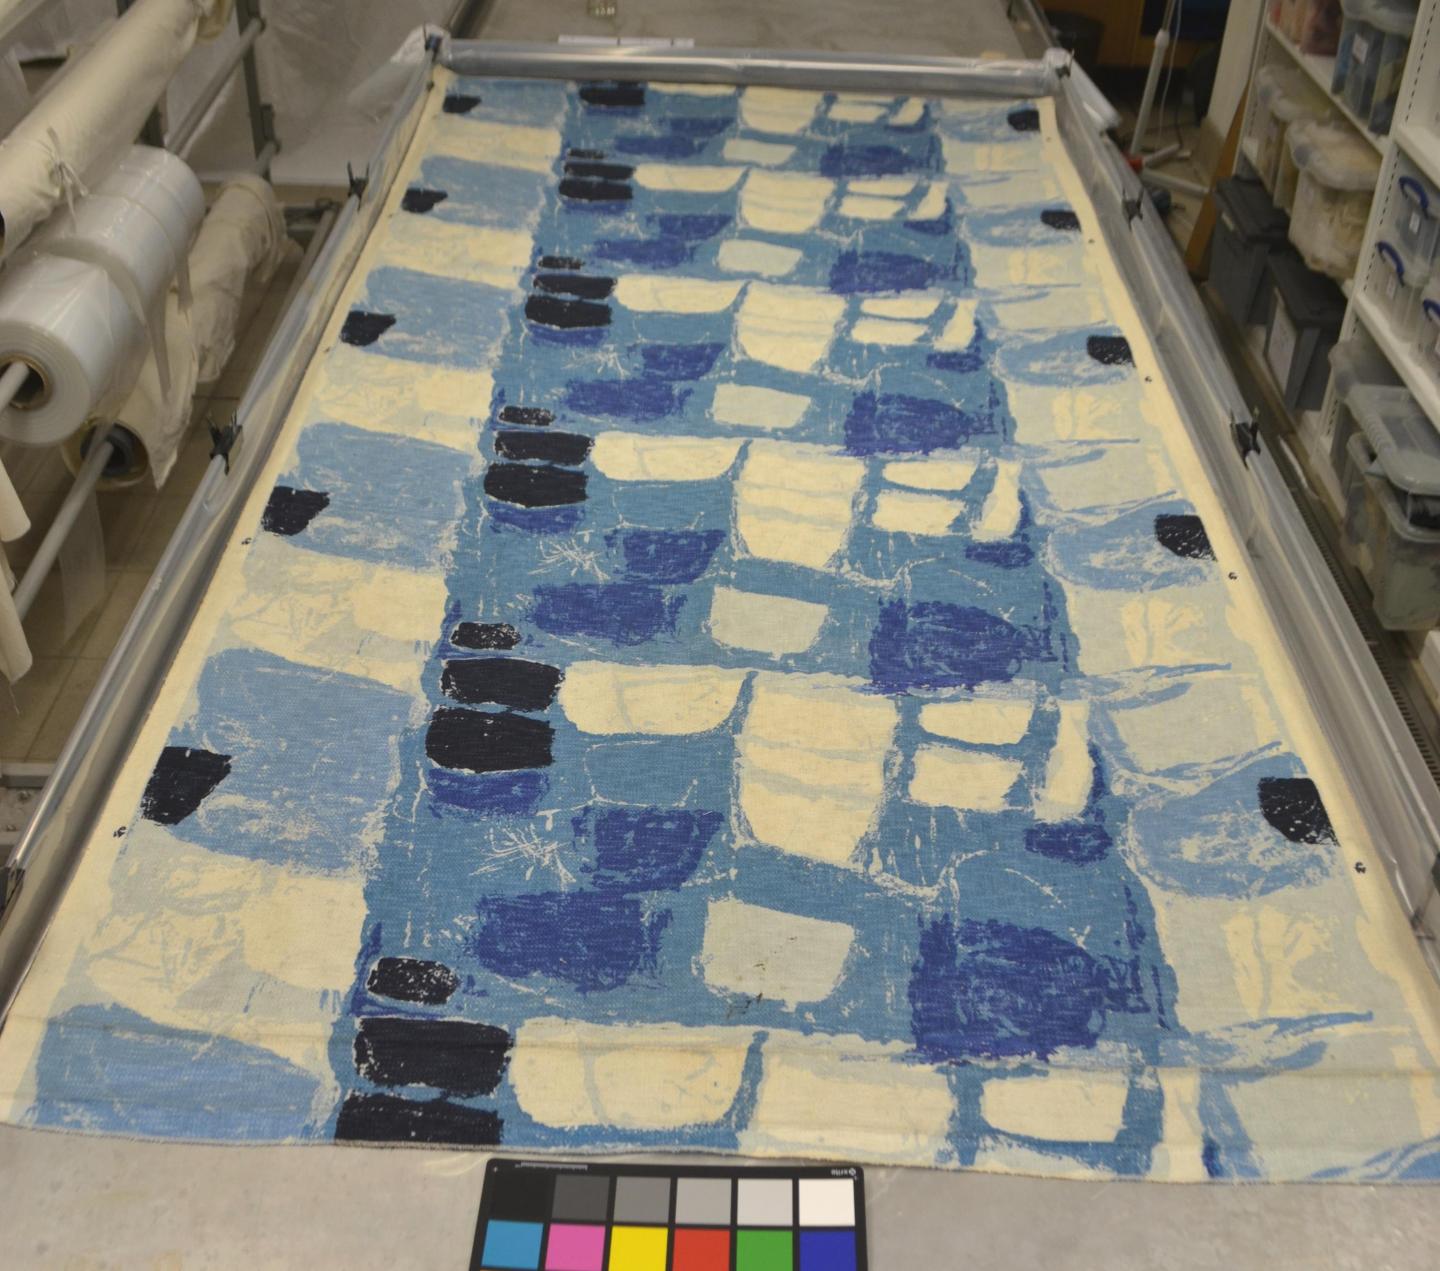
The printed textile before treatment
All colours had to be tested in the cleaning agents, and our tests showed that we could use an anionic detergent and chelating agent together to achieve effective cleaning. Because the printed surface was more delicate, we mostly sponged the reverse side of the fabric.

Sponging the reverse of the textile systematically
We used a plastic tube to roll the fabric when we turned it over between washes and rinses.
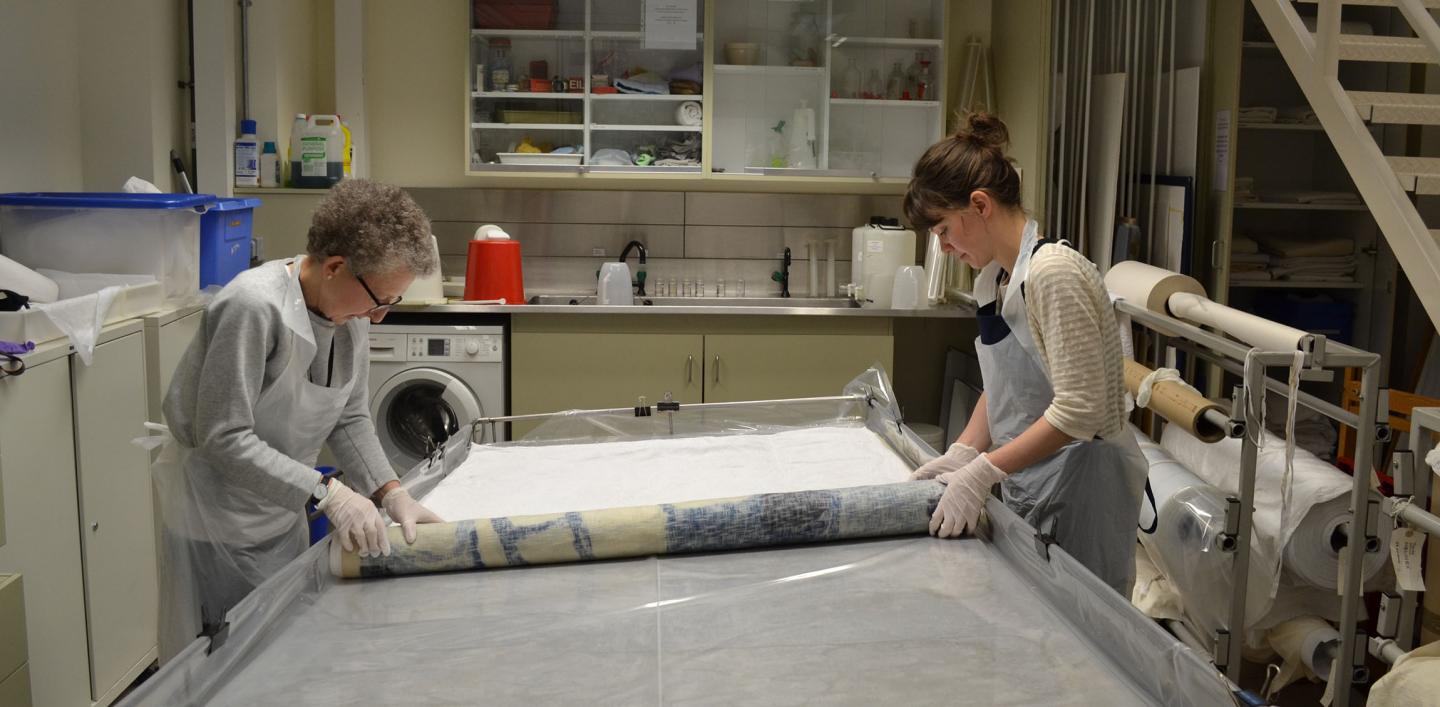
Rolling the textile between washes and rinses
The textile released a good amount of dirt in the washing process which lasted for 9 hours.
We pinned it out to dry on several plastic-covered soft boards. After it dried it certainly looked more vivid and the dark lines of dirt along the shorter edges had almost disappeared.
Pinning out the printed textile to dry
In these few days of wet cleaning in the V&A Textile Conservation studio, I came across a few challenges: inks and fugitive colours, large objects to handle wet and to pin out… All of the difficulties were solved thanks to the help of my placement supervisor Elizabeth-Anne Haldane, and also Frances Hartog, Katy Smith and Rachael Lee (also seen on the photographs).
PART TWO - Smart costume packing: inspiring solutions
Besides wet cleaning (PART ONE of this blog) I was also hugely keen to learn some of the V&A Textile Conservation studio’s techniques for packing costumes for travel. The studio is well known for their expertise in preparing smart packing solutions for touring textile exhibitions.
The RMG’s conservation studios are moving to a new site in August 2017, the Prince Philip Maritime Collections Centre, so we will mount costumes to move from the Textile Conservation studio to the main museum site. We are also keen that more of our garments travel mounted when they are going on loan to other institutions.
Draped in Tyvek®
Costumes are generally transported inside wooden crates but they need to be protected from abrasion and dust. In the V&A studio each costume is custom-packed inside the crates, often using smooth silk and soft padding materials. To finish off, an outer cover encloses the garments, made of Tyvek® (a non-woven polyethylene fabric) often with a Melinex® (a transparent or milky white polyester sheet) base.
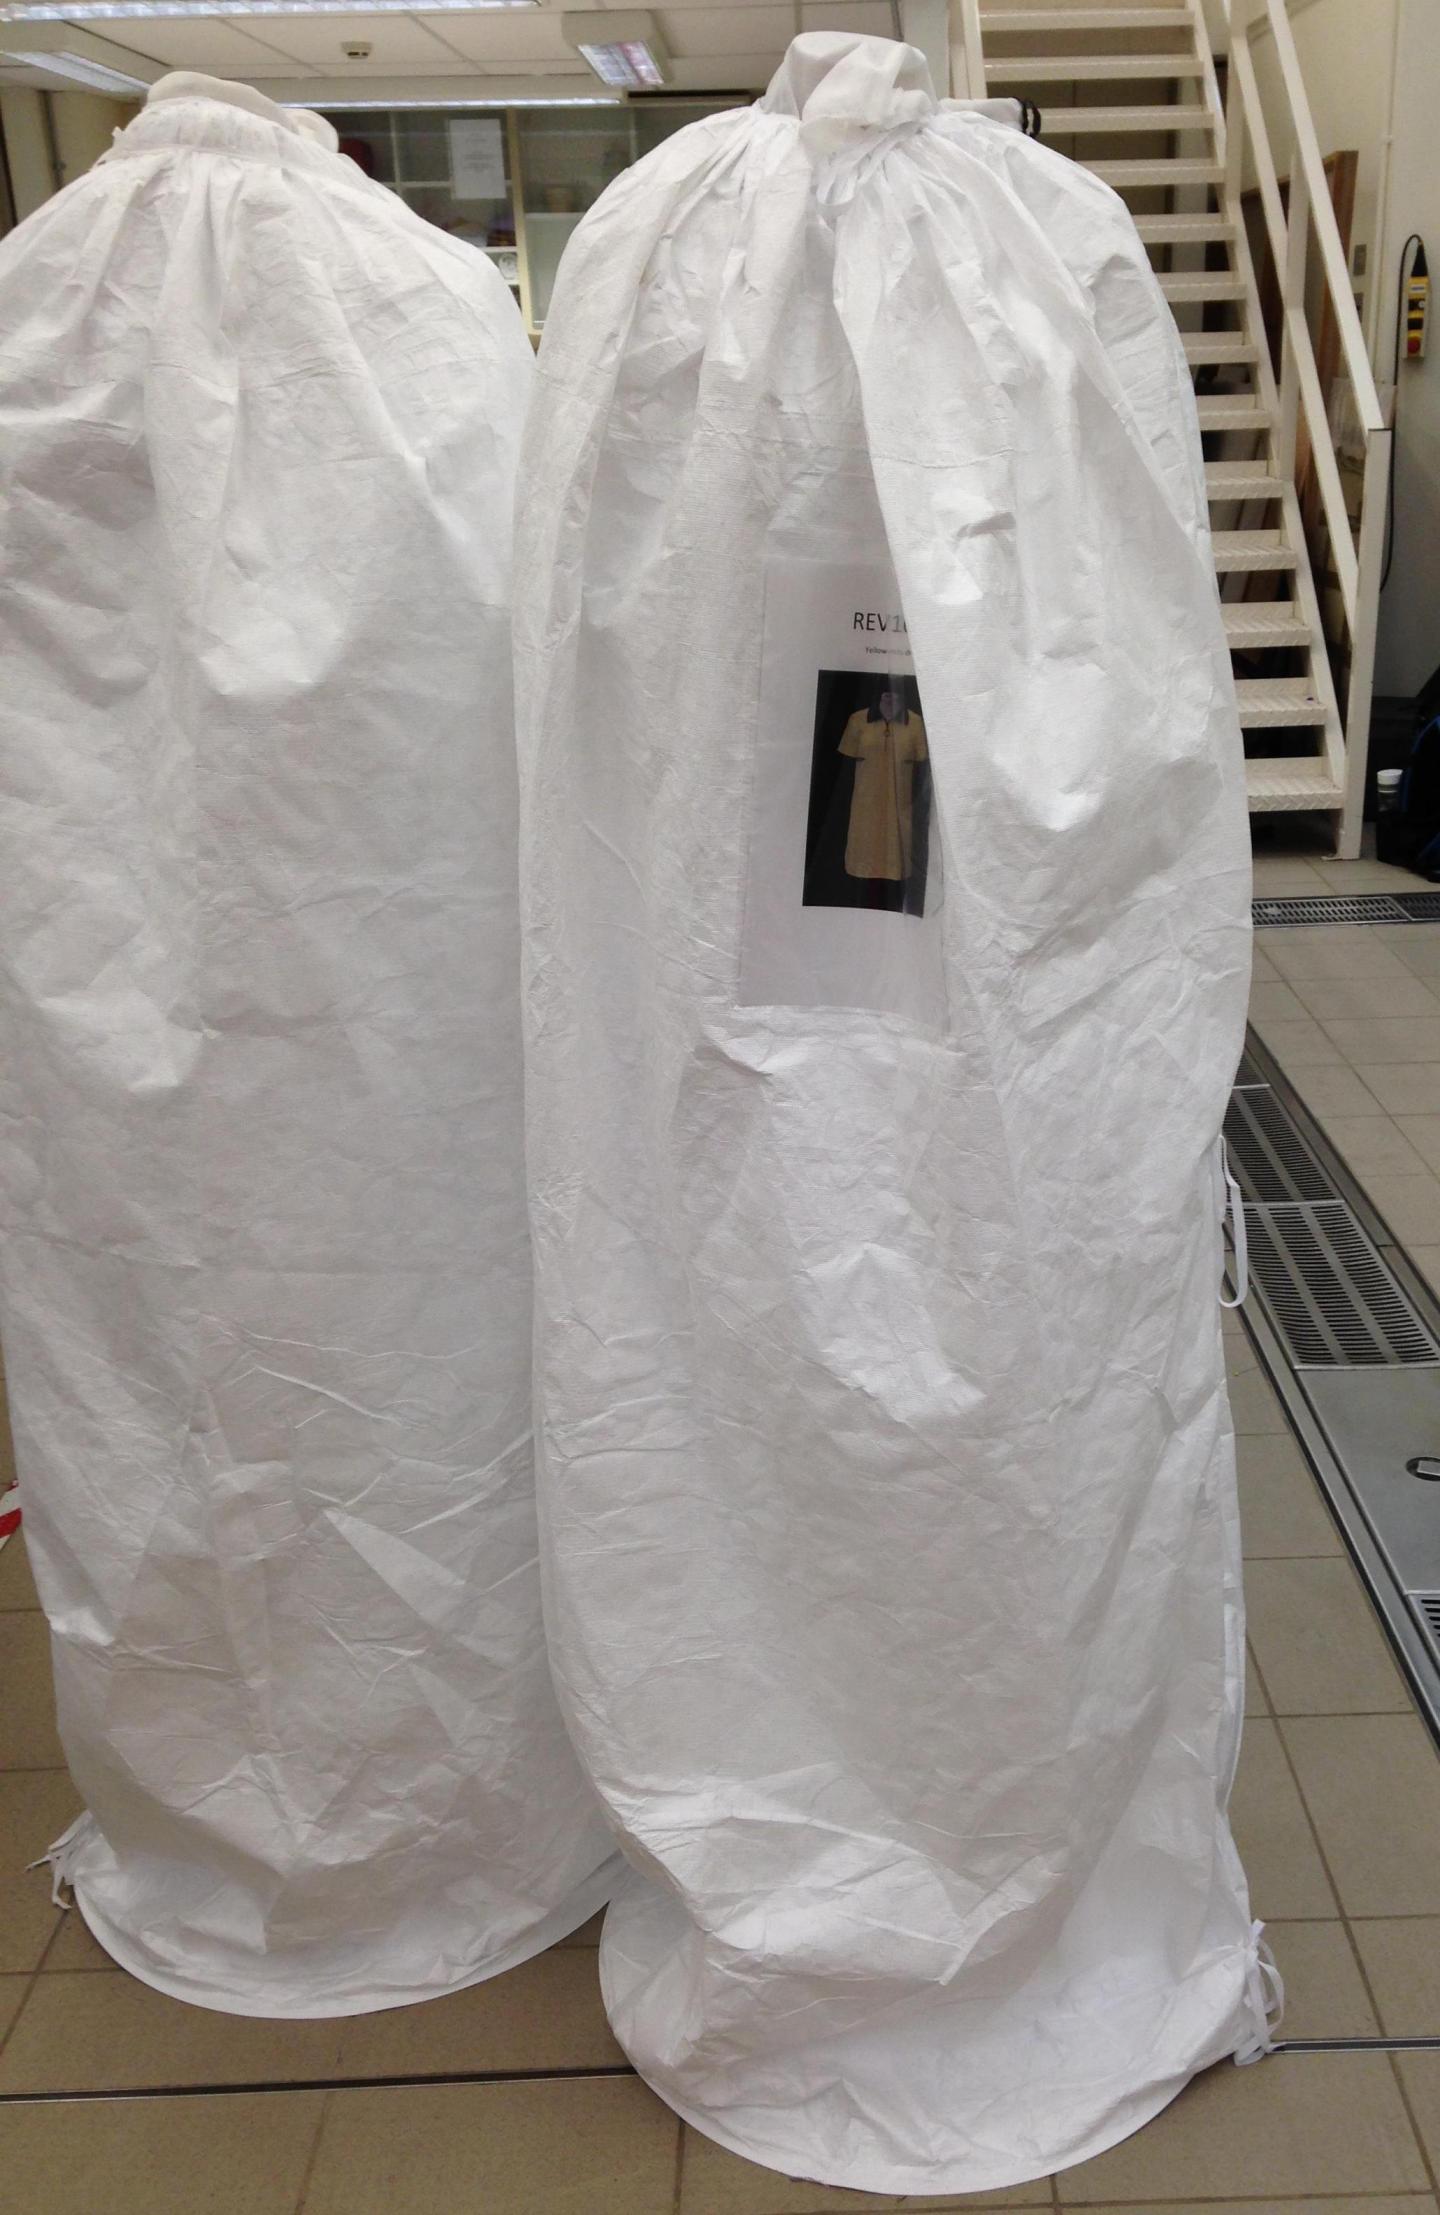
Some items with Tyvek® covers in the V&A studio
I set out to make my very first Tyvek® cover for a mannequin with two poles forming the legs.
I created a round Melinex® base which goes around the mannequin poles and fastens with Velcro®.
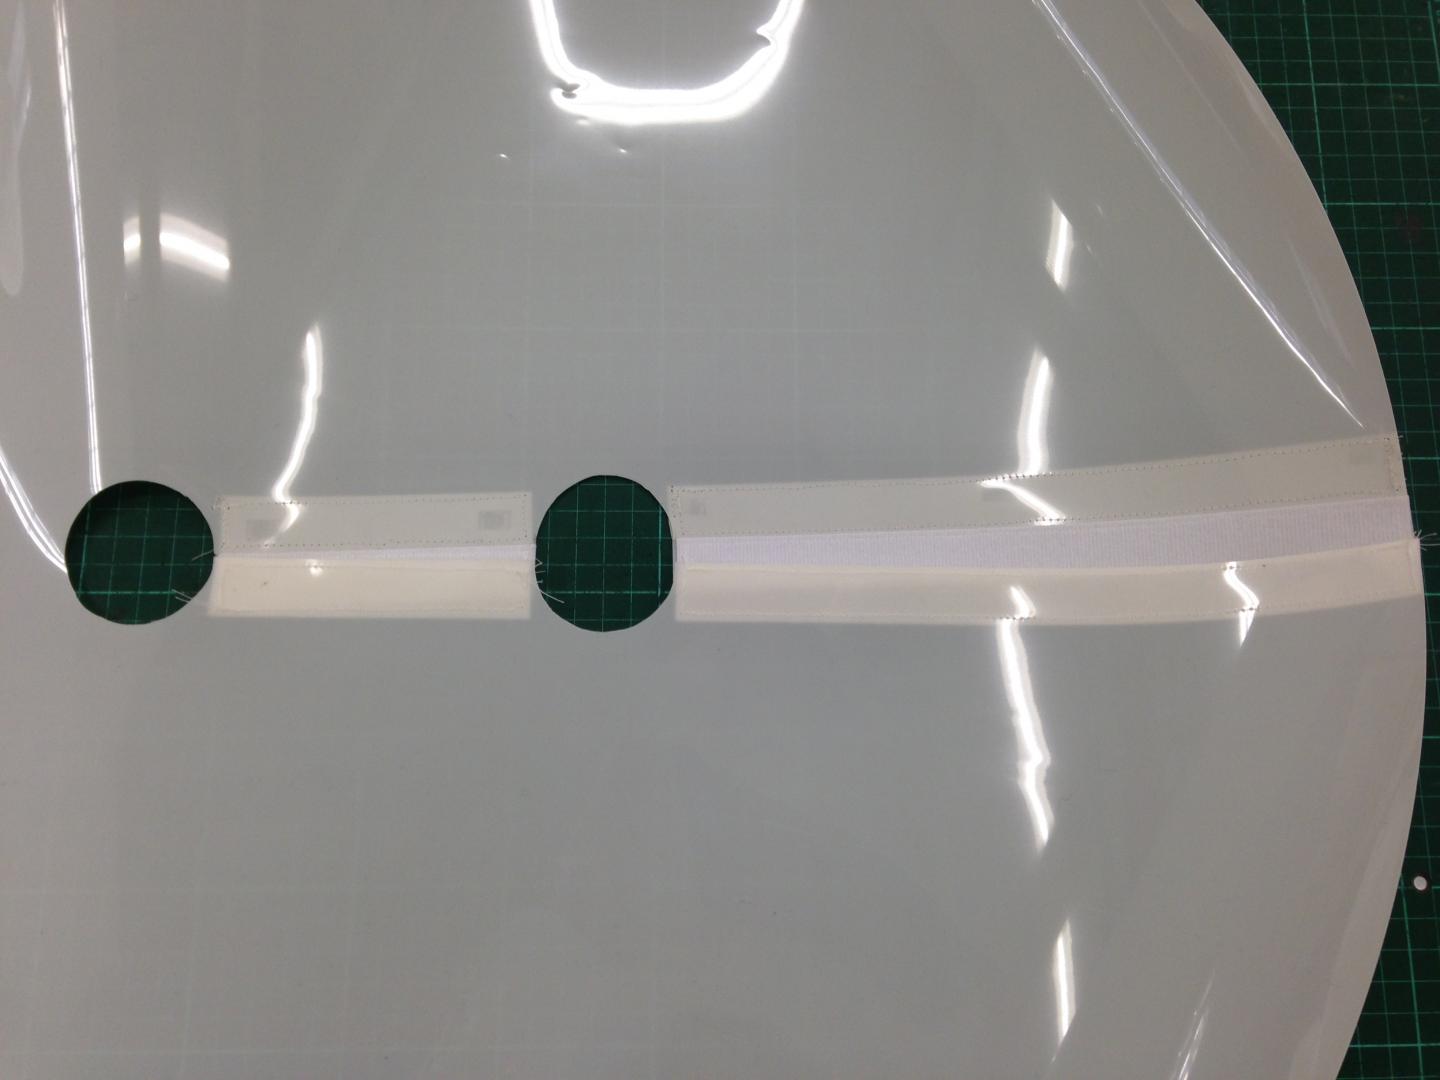
Melinex® base with two holes and Velcro® fastener
I stitched two long overlapping Tyvek® sheets to the Melinex® base and gathered the Tyvek® along the top. By attaching cotton tapes to the top ends, the cover will fasten around the mannequin’s neck.
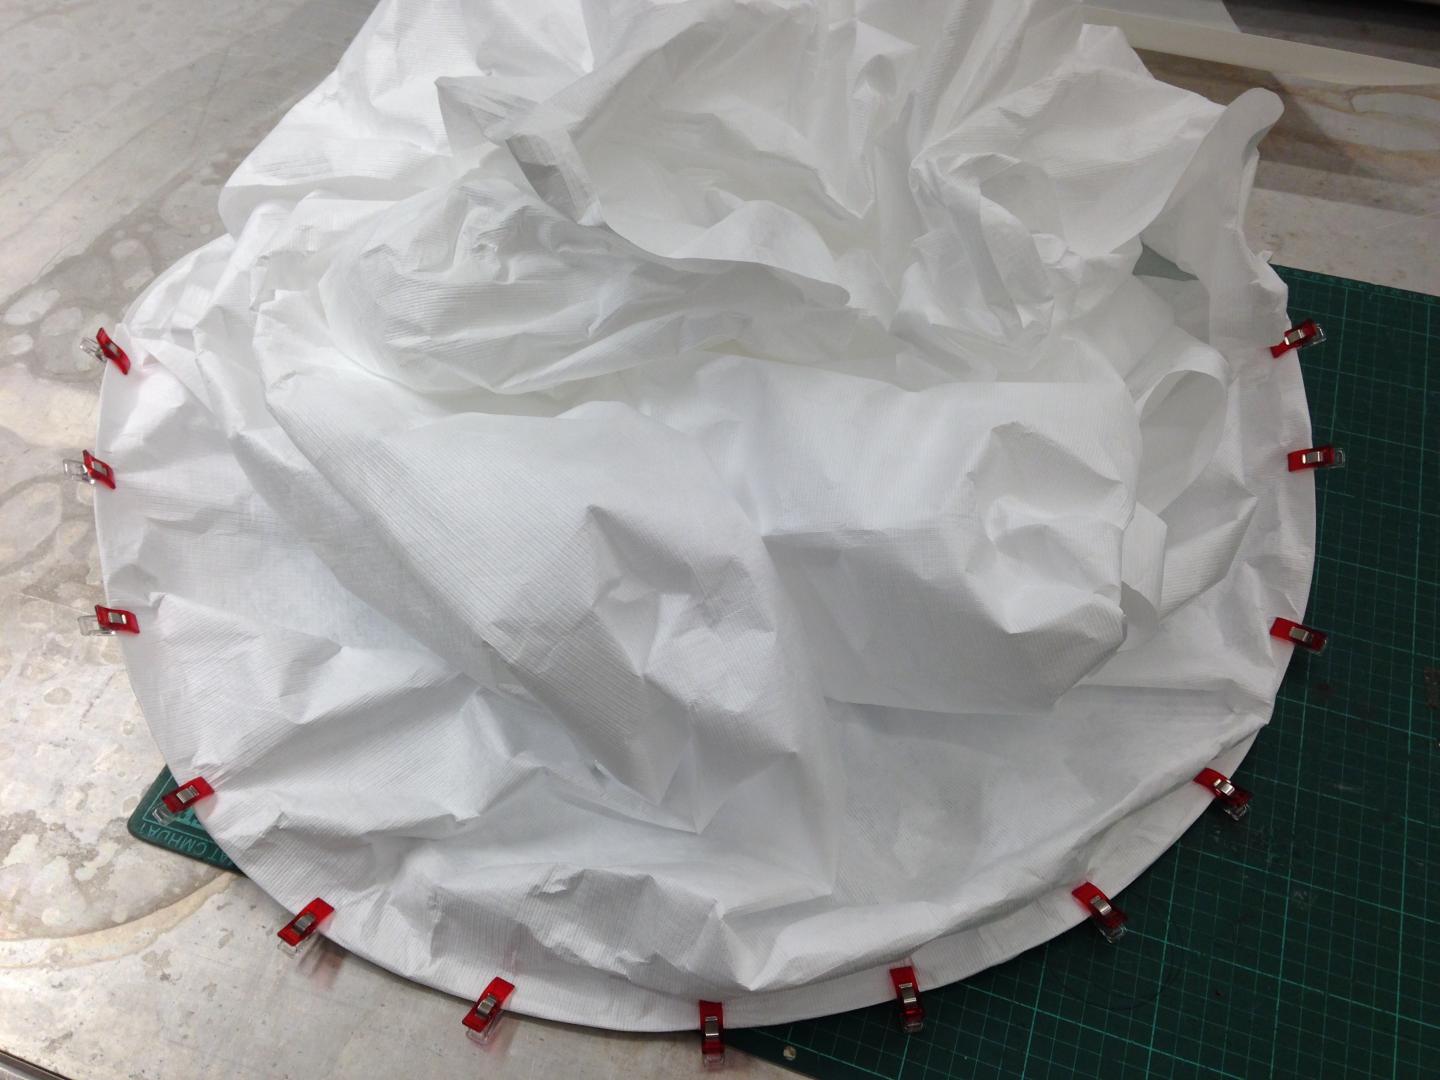
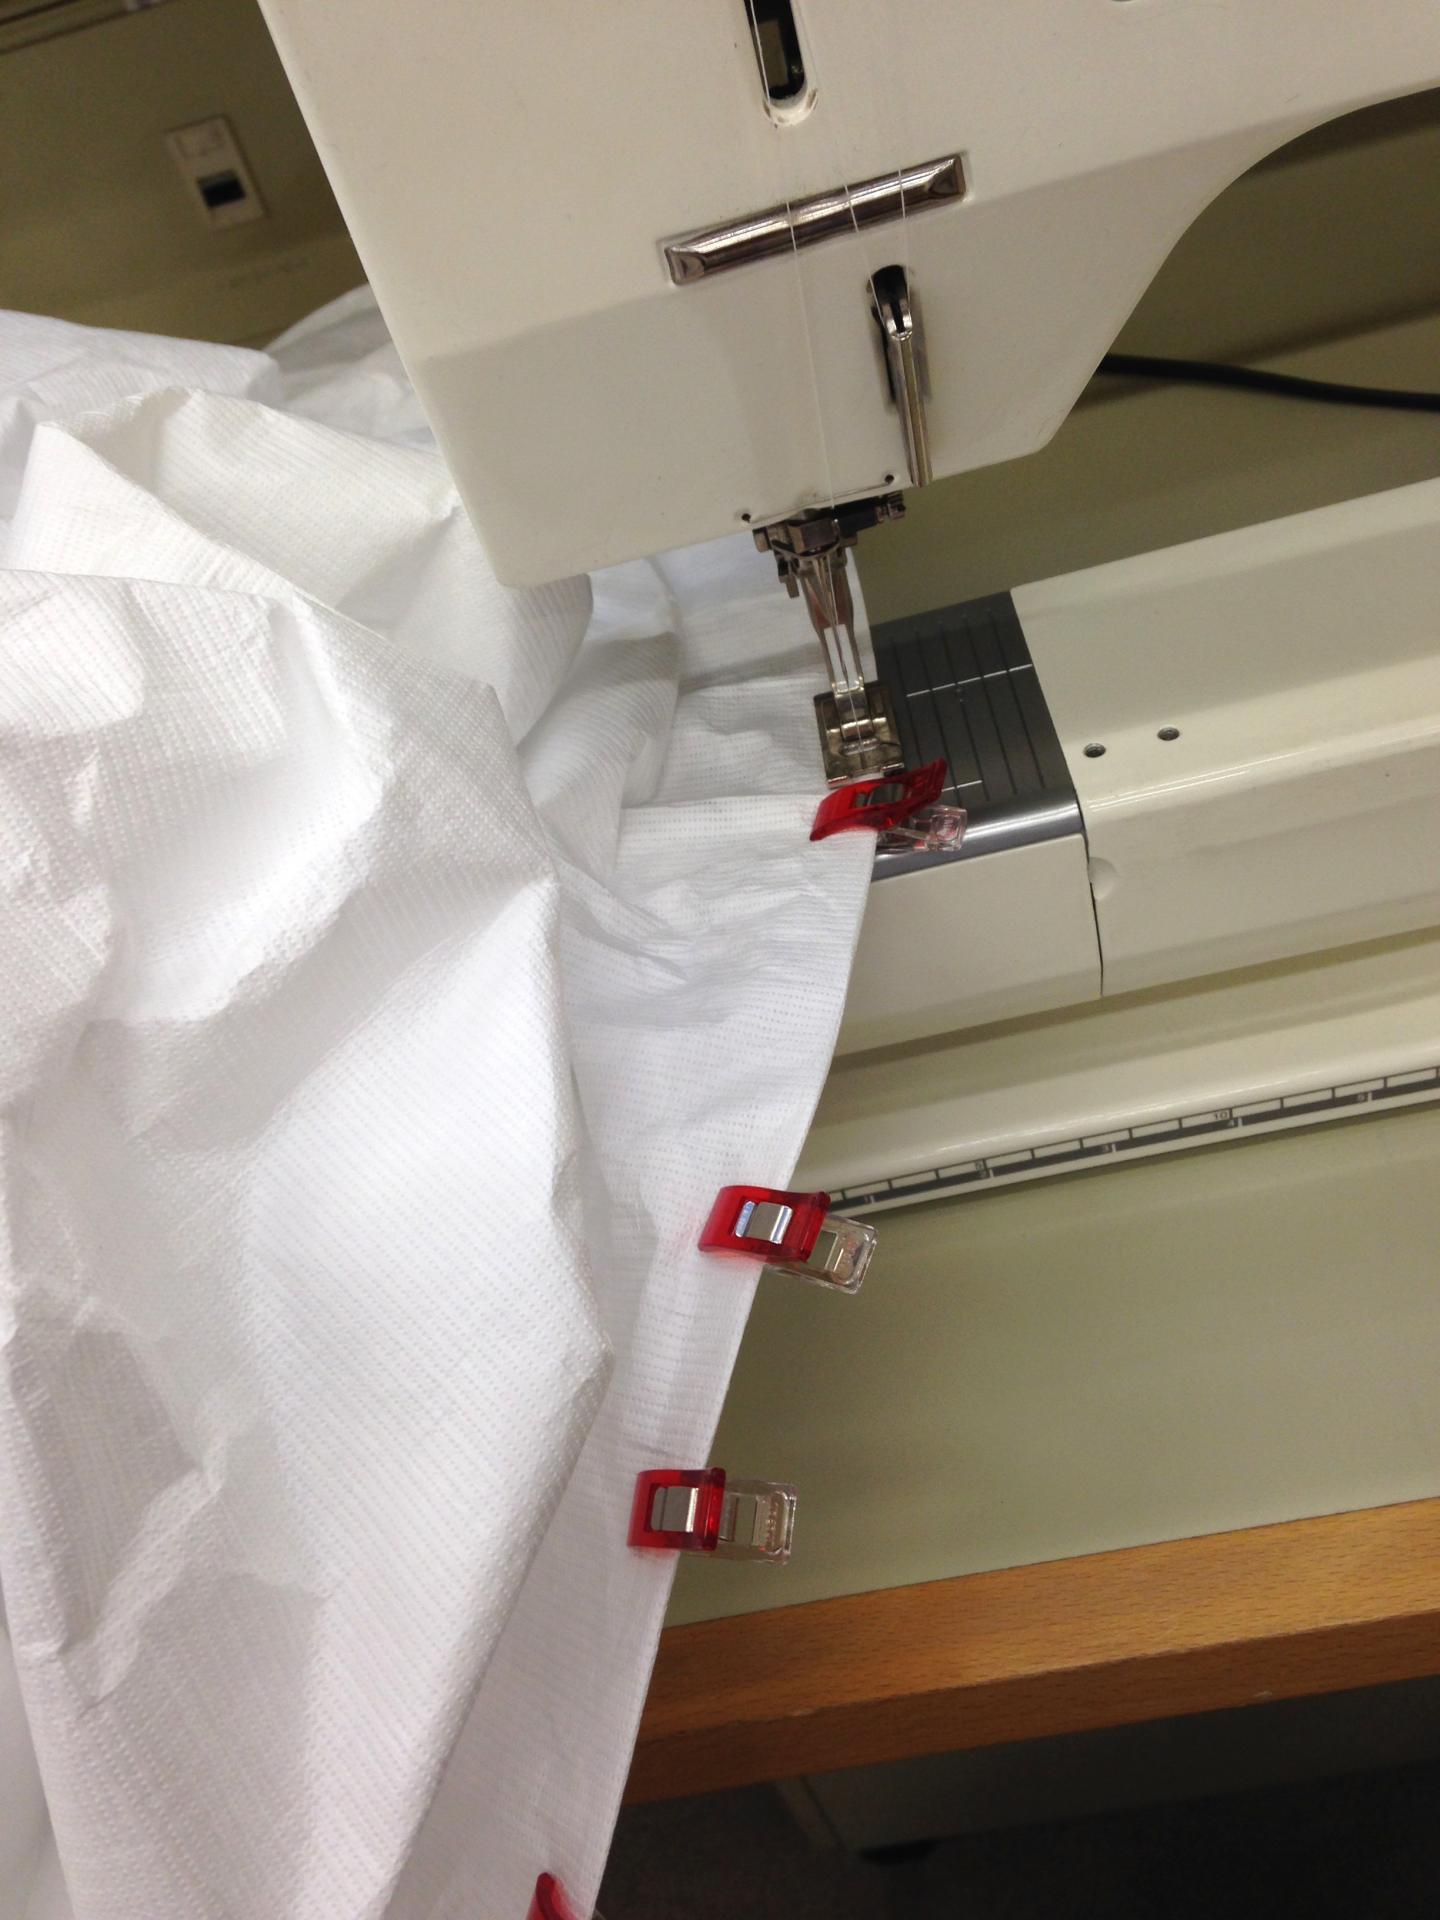
Attaching the Tyvek® sheets to the base
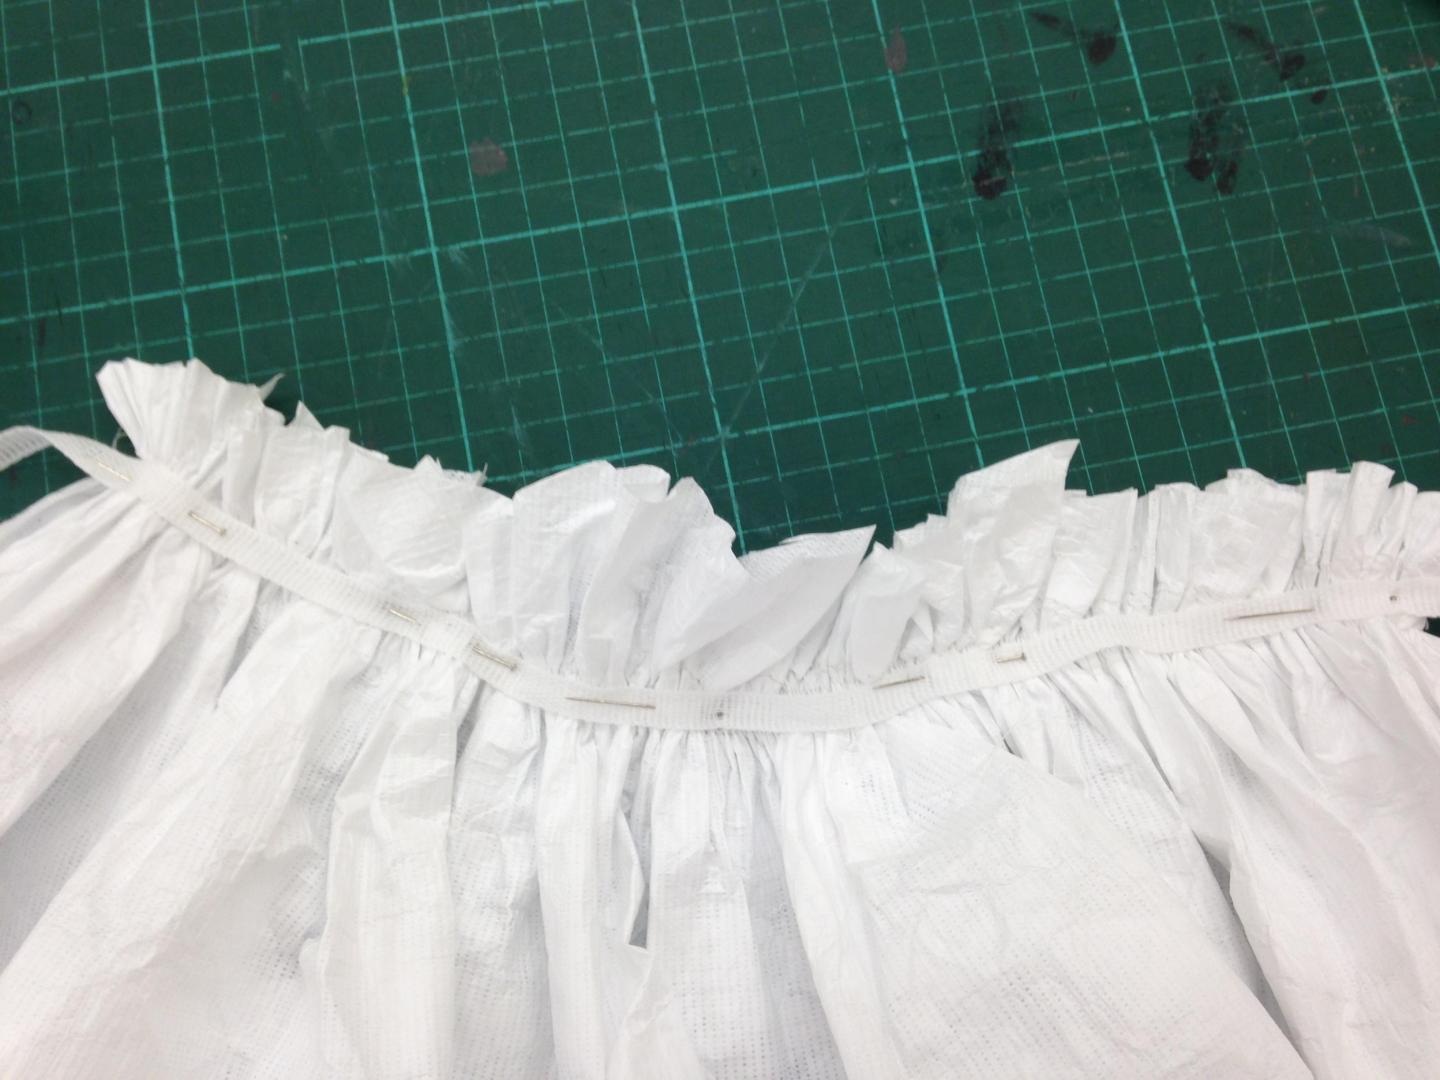
Gathering the Tyvek® along the top, attaching the cotton tape
The process took me a day although I am sure that I could get faster with practice!
Cushioned arm bags
When transporting dressed mannequins, body parts may need to be taken off for safety: otherwise they may become loose and cause damage to the costume inside the crate. For example, arms are placed into custom made padded bags at the V&A. I made some myself using cotton fabric padded with polyester wadding, with a draw-string at the top. The plastic sleeve you can see in the bottom left corner will be used to store information about the mannequin that the arms belong to.
Two arms can slot into the bag which would be either transported separately or secured inside the travel crate.
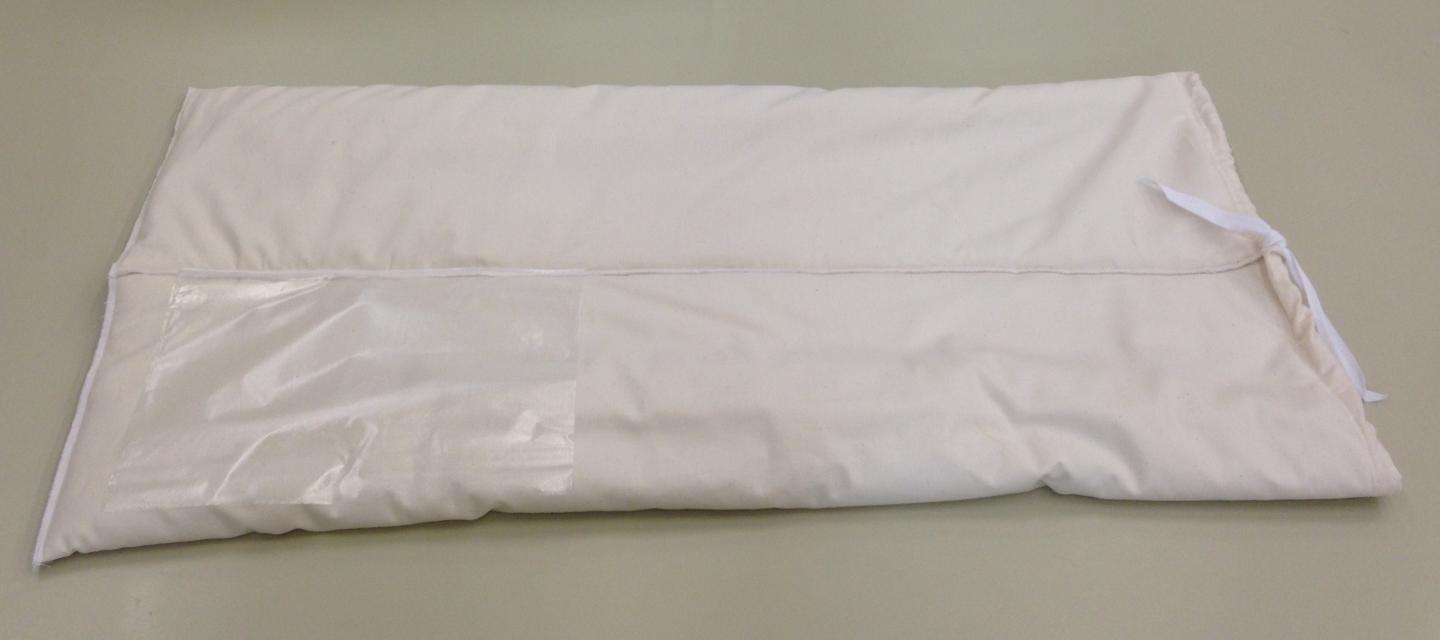
The cushioned arm bag with draw string and information sleeve
Riveted bodies
I learned that rivets can help to safely transport articulated fibreglass mannequins (see the V&A blog Riveting Rivets by Lilia Prier Tisdall).
The rivets hold the body parts, like a torso and legs, together and prevent them from twisting and unlocking inside a travel crate. I was shown the process on a mannequin from the ‘Undressed’ exhibition.
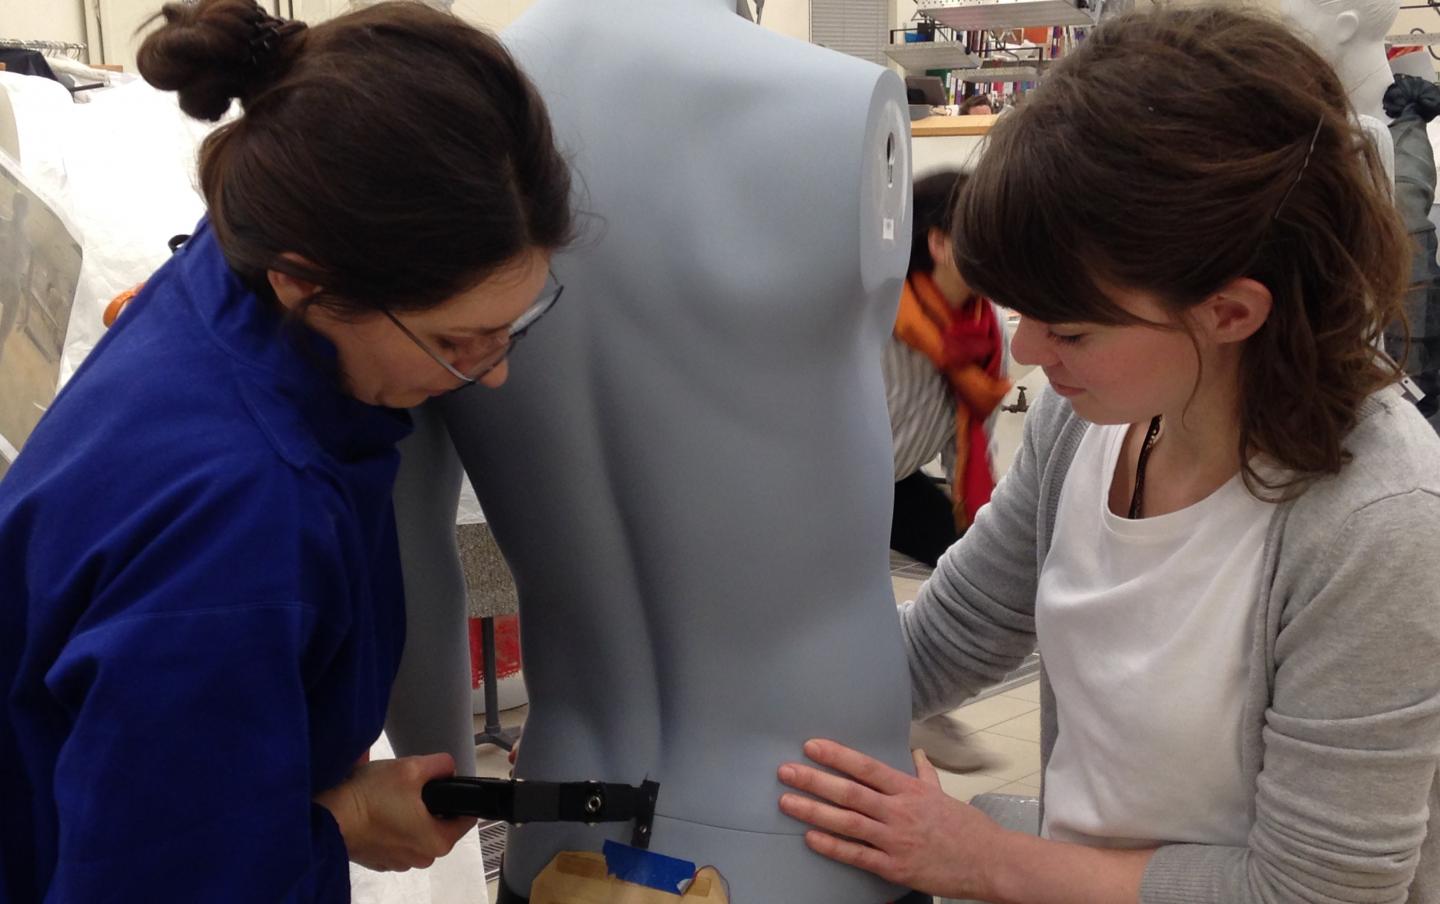
Lilia riveting the torso and legs of a mannequin together
Smart padded folders
For transporting smaller flat textiles the V&A Textile Conservation studio prepares padded folders, which I found very practical and neat. Although I did not have the chance to make one there, I took the idea away: they inspired some of the packing solutions for the RMG’s new exhibition, ‘Death in the Ice’. I modified the folders to meet the needs of fragile, three-dimensional objects.
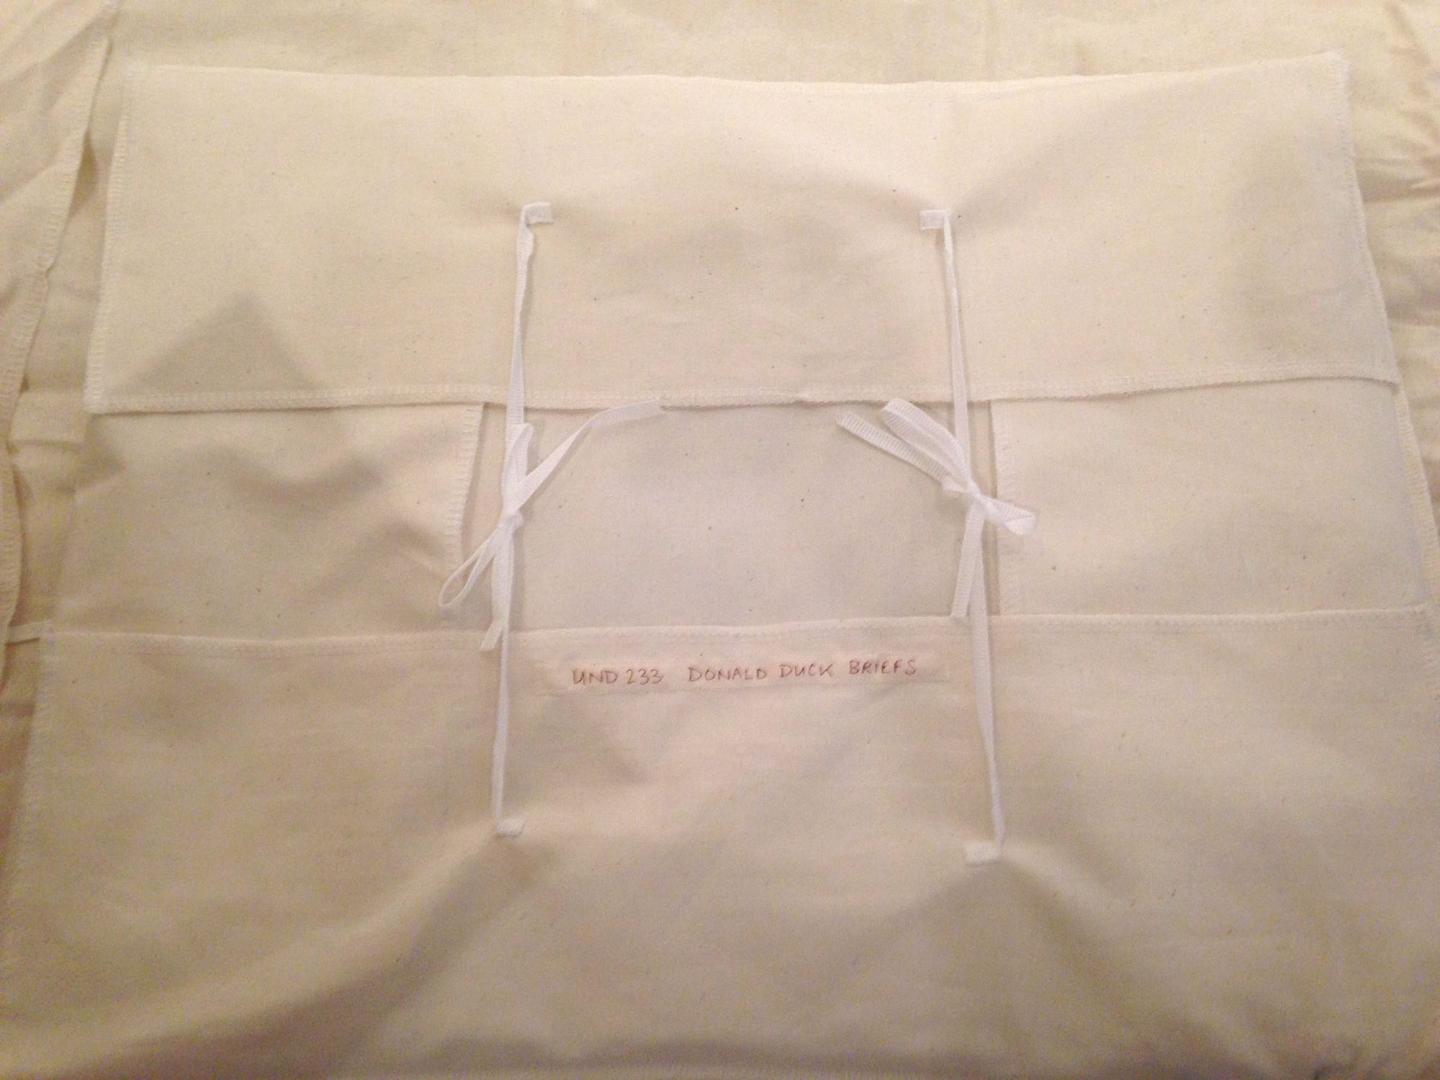
Example of a padded folder in the V&A
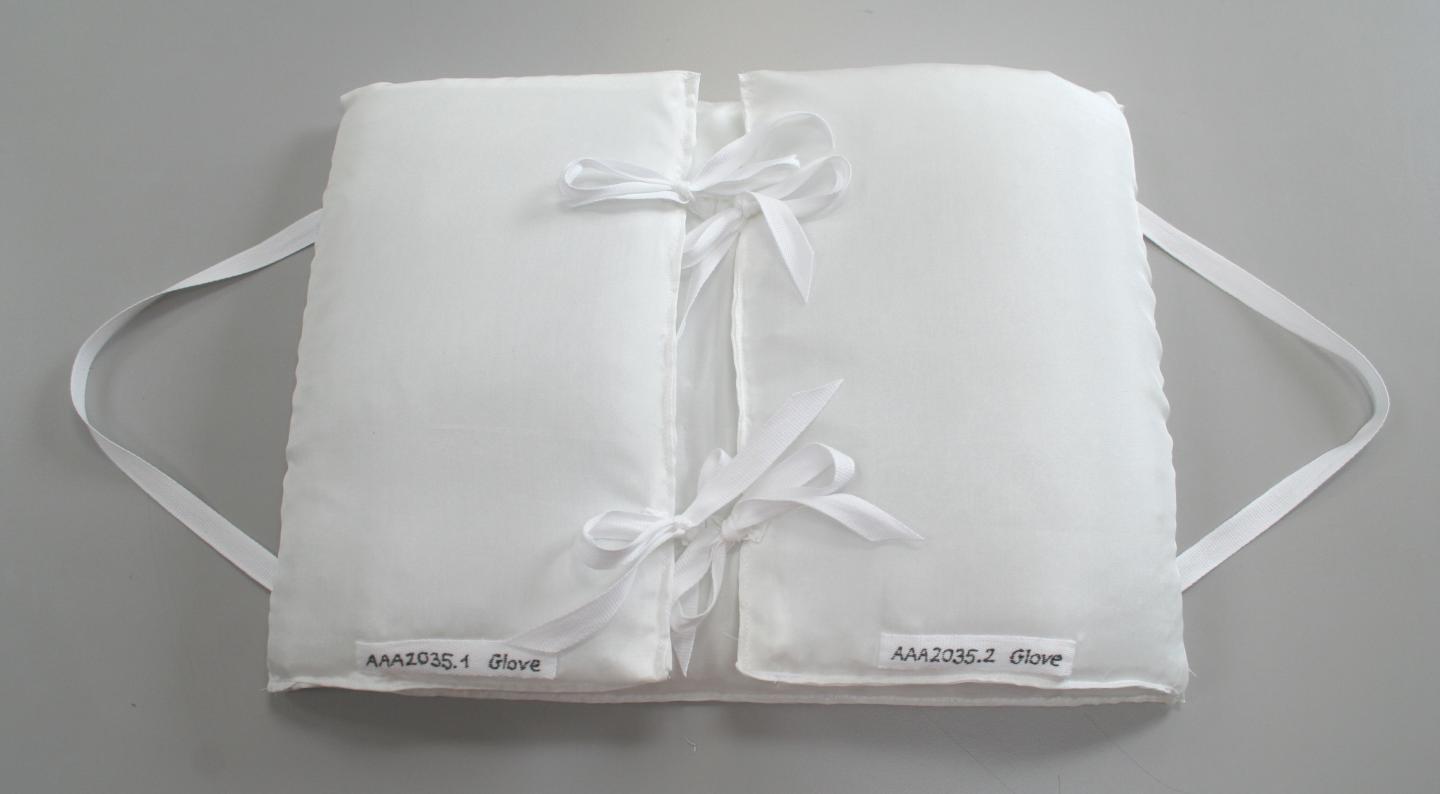
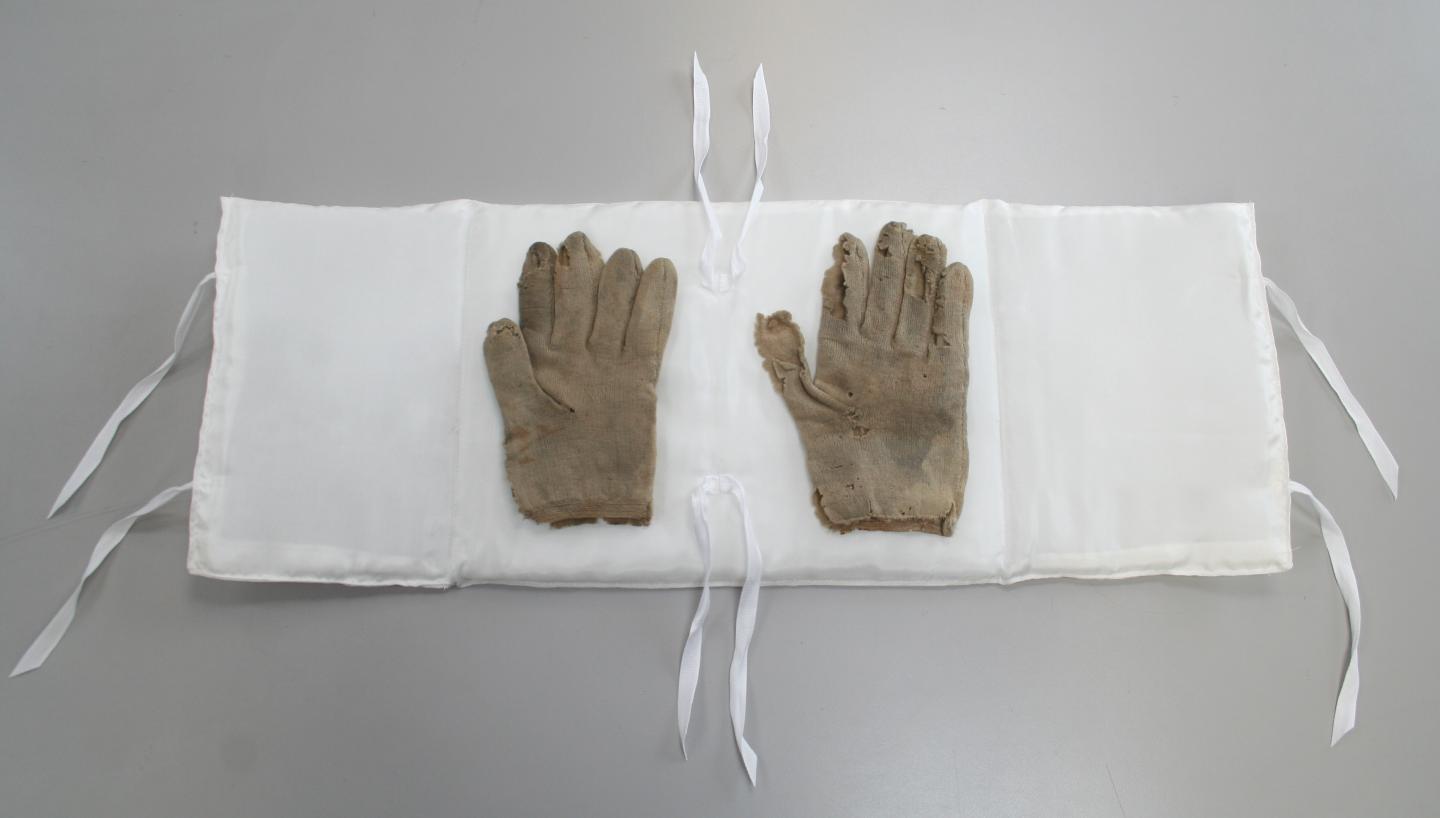
Padded transport folder for a pair of gloves in the ‘Death in the Ice’ exhibition, going on tour from the RMG in 2018
Inspiring experience
All in all, my placement in the V&A’s Textile Conservation studio was hugely inspirational. I learned a great deal and I am very grateful to the studio members for being so helpful and encouraging. I particularly would like to thank my placement supervisor Elizabeth-Anne Haldane, and Frances Hartog for their guidance.