
Queen Elizabeth I is well known as a monarch who liked to present a certain image of themselves to the public. The Armada Portrait is a great example of where Elizabeth used symbols to present an image that represented power, strength and monarchy.
In this activity, you can create your own royal ruff and cuff, inspired by those in the Armada Portrait.
You will need
2x A4 pieces of paper
2x A3 pieces of paper
Scissors
Tape
Hole punch
Ribbon/string
Create your cuffs
Step 1
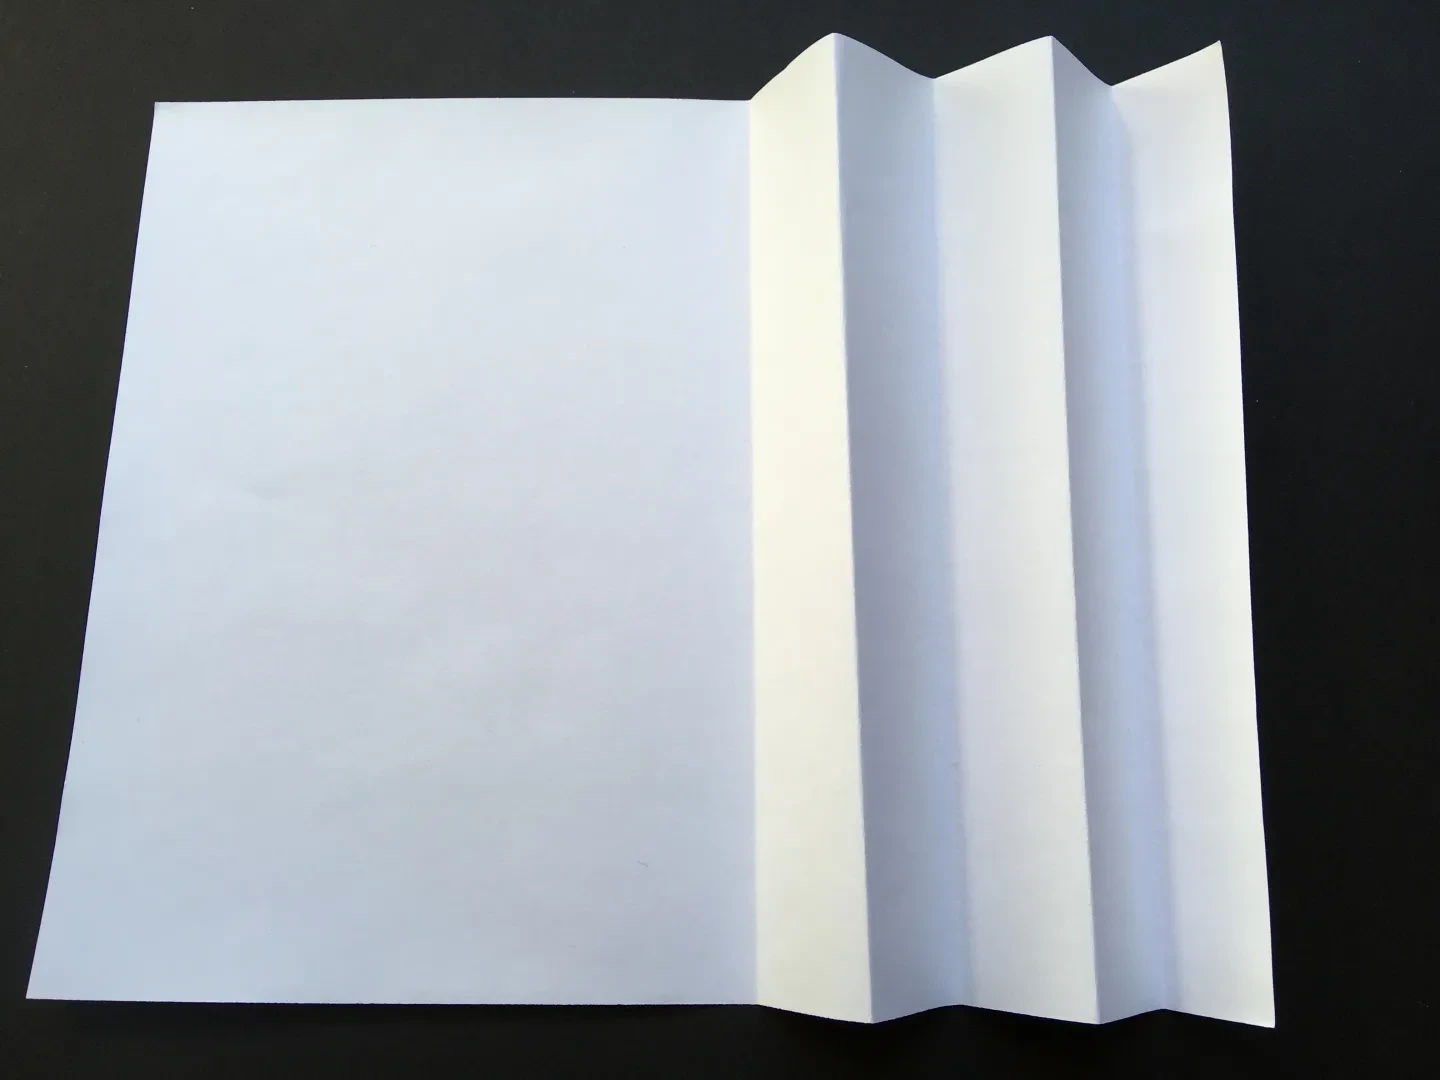
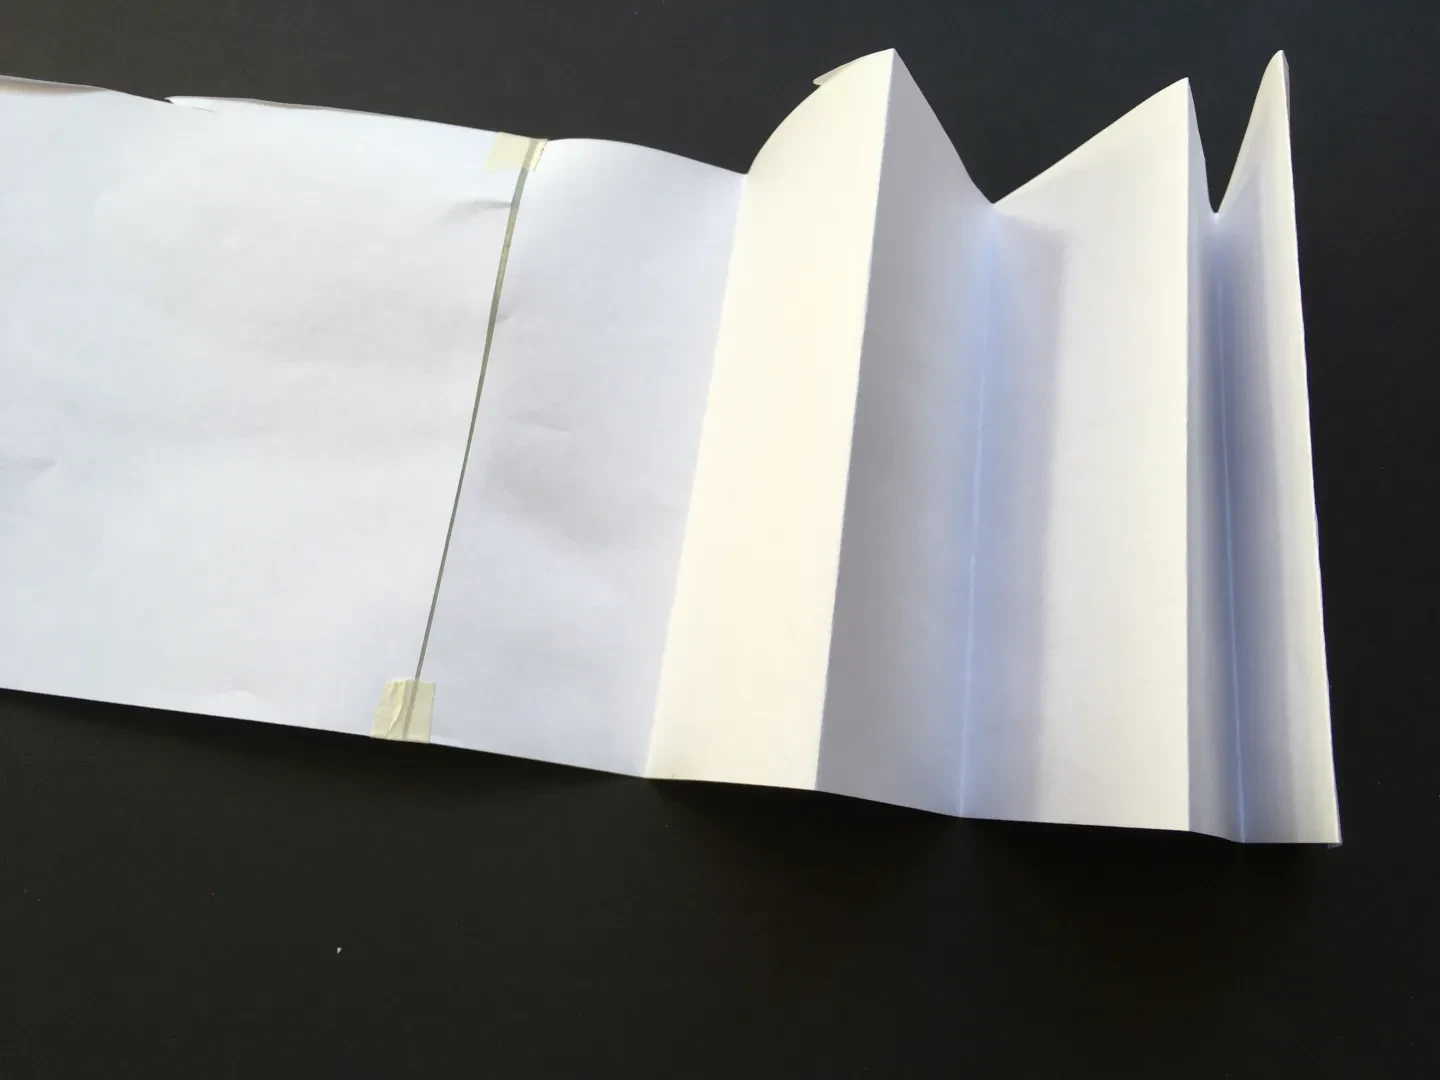
Take a piece of A4 paper and pleat it backwards and forwards as if you were making a fan.
To create two cuffs, make sure you repeat each step on a second piece of paper.
Step 2
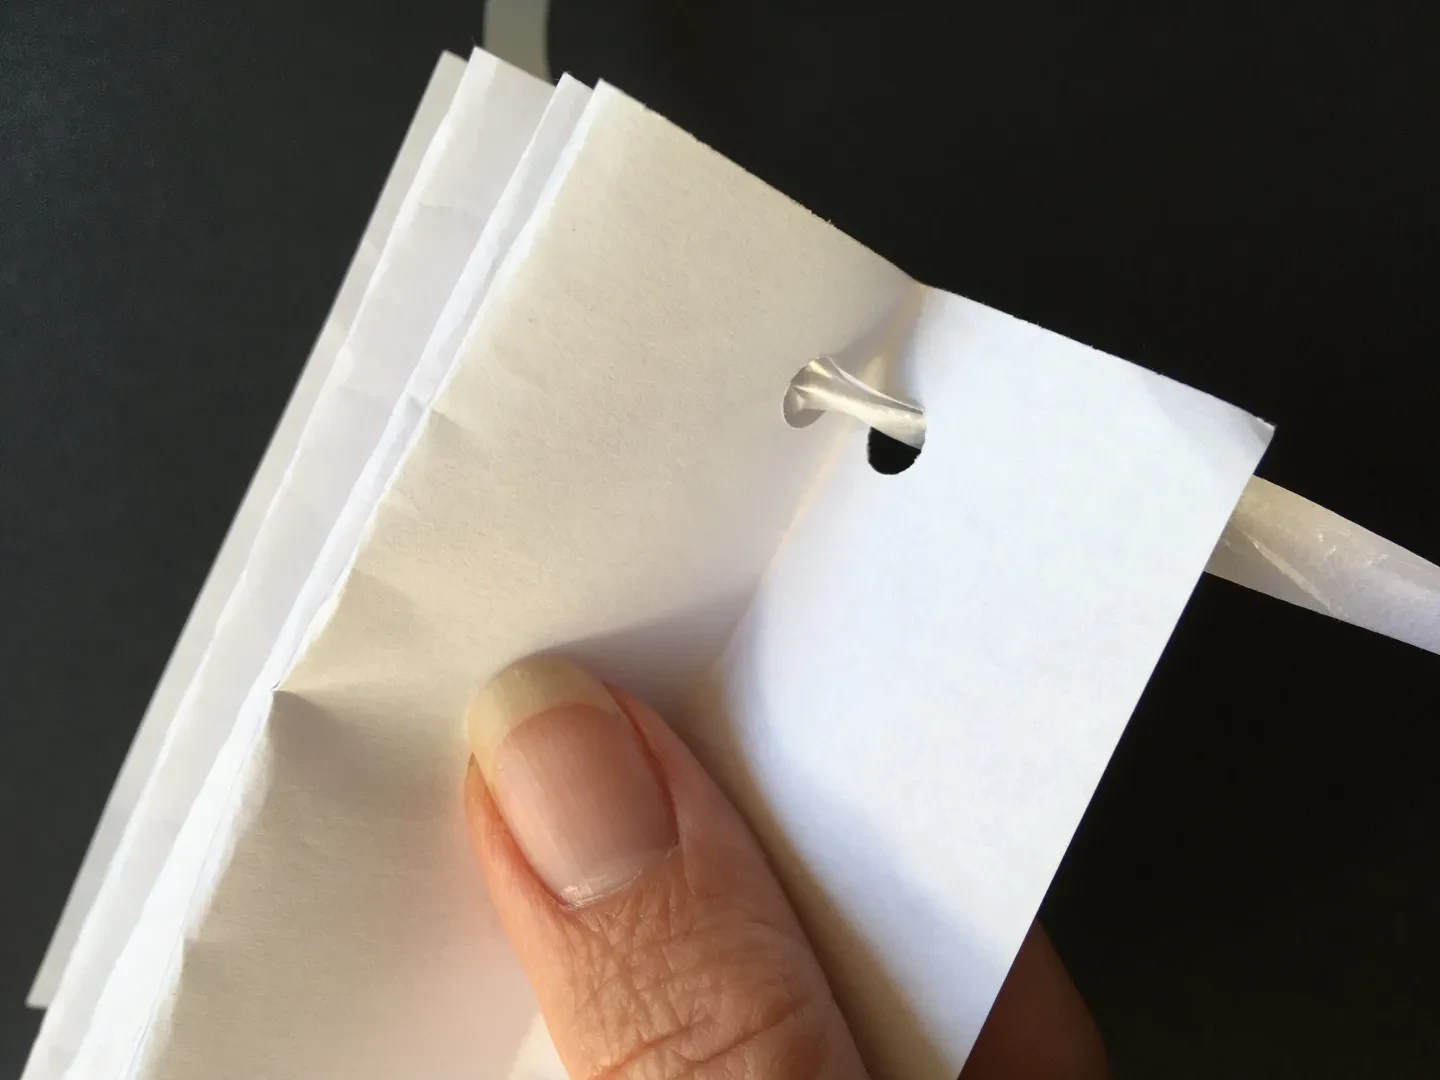
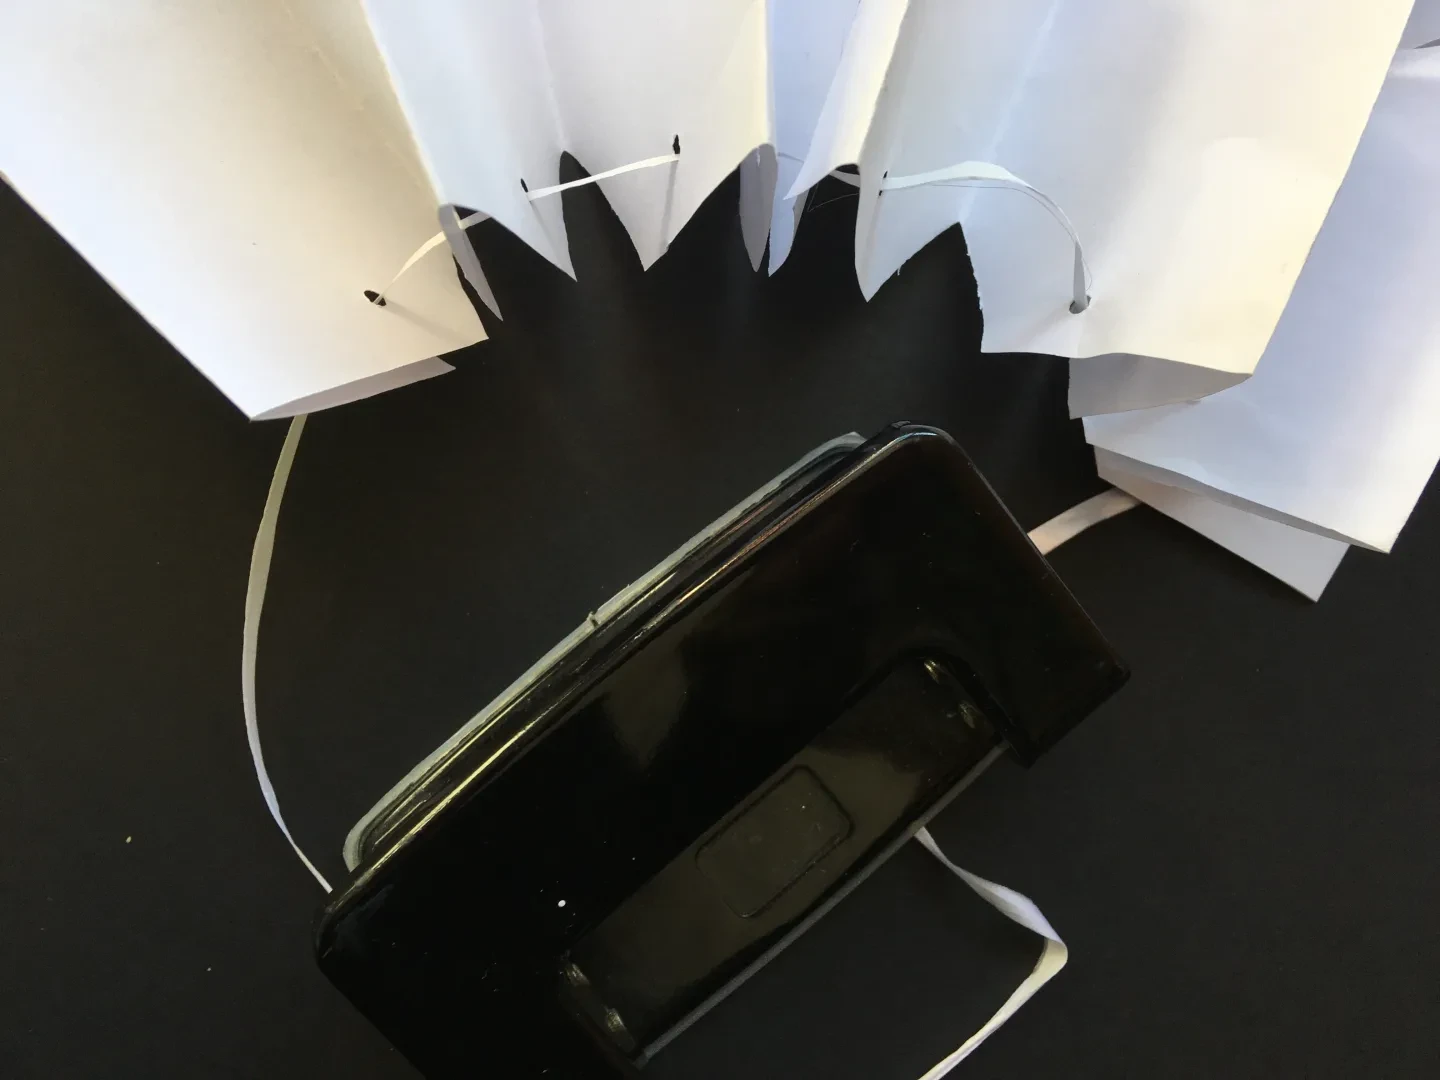
Holding your pleated paper tight, take a hole punch and a make hole in the centre at one end.
You may have to hole punch in sections if the fold is too thick for your hole punch.
Then thread your string or ribbon through the hole.
Step 3
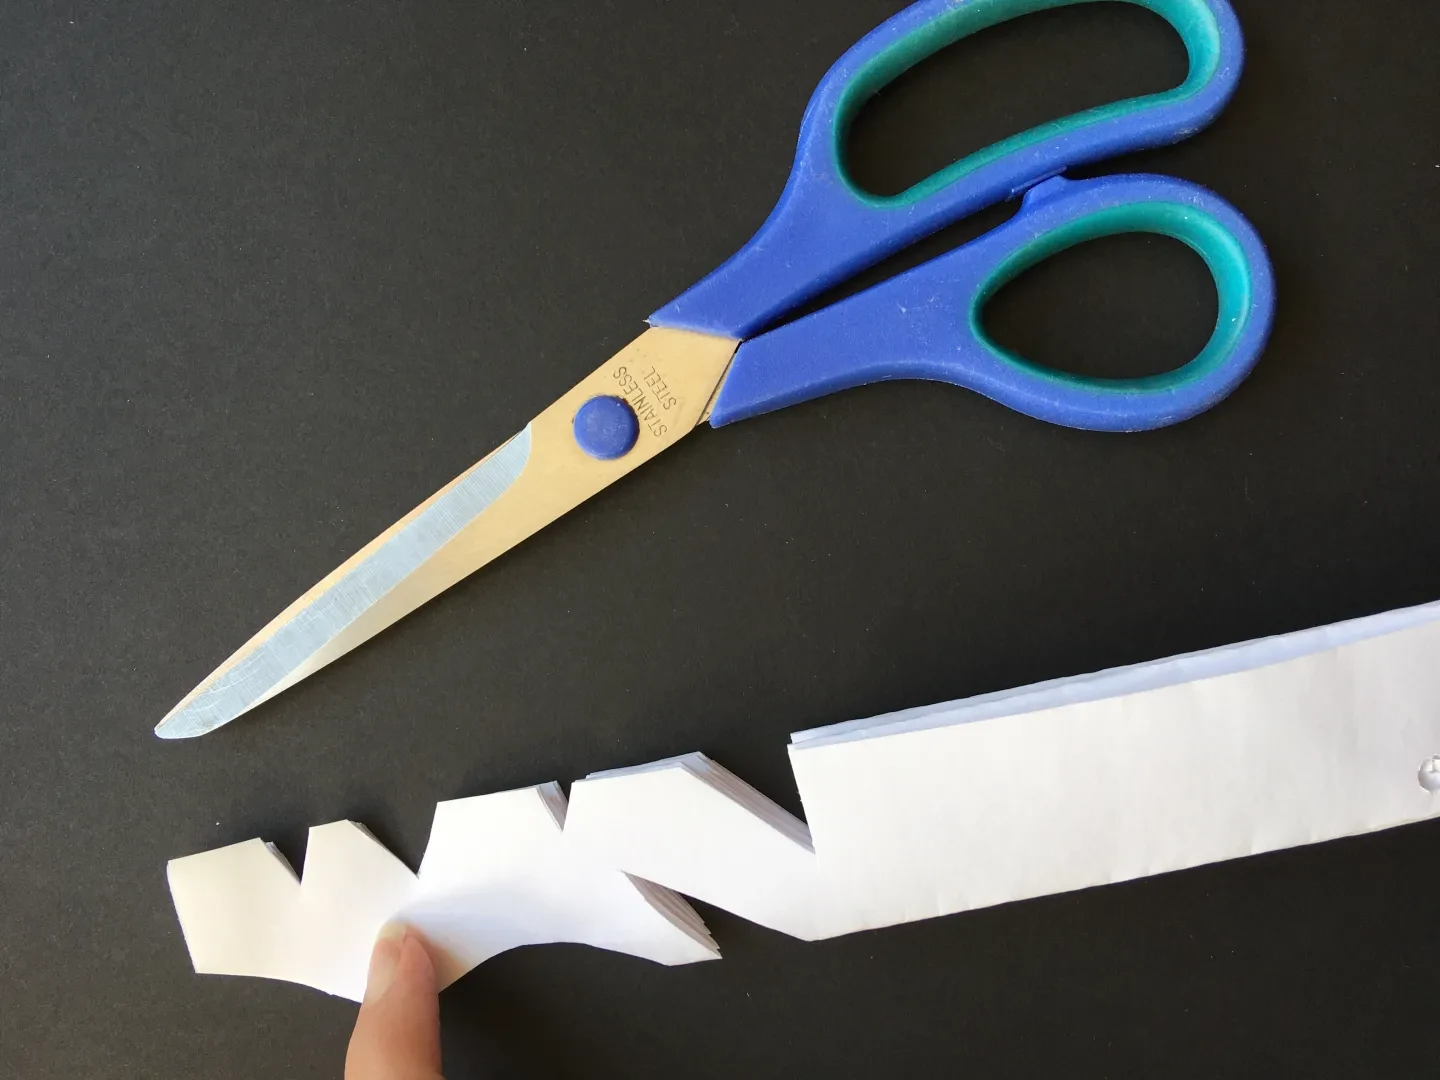
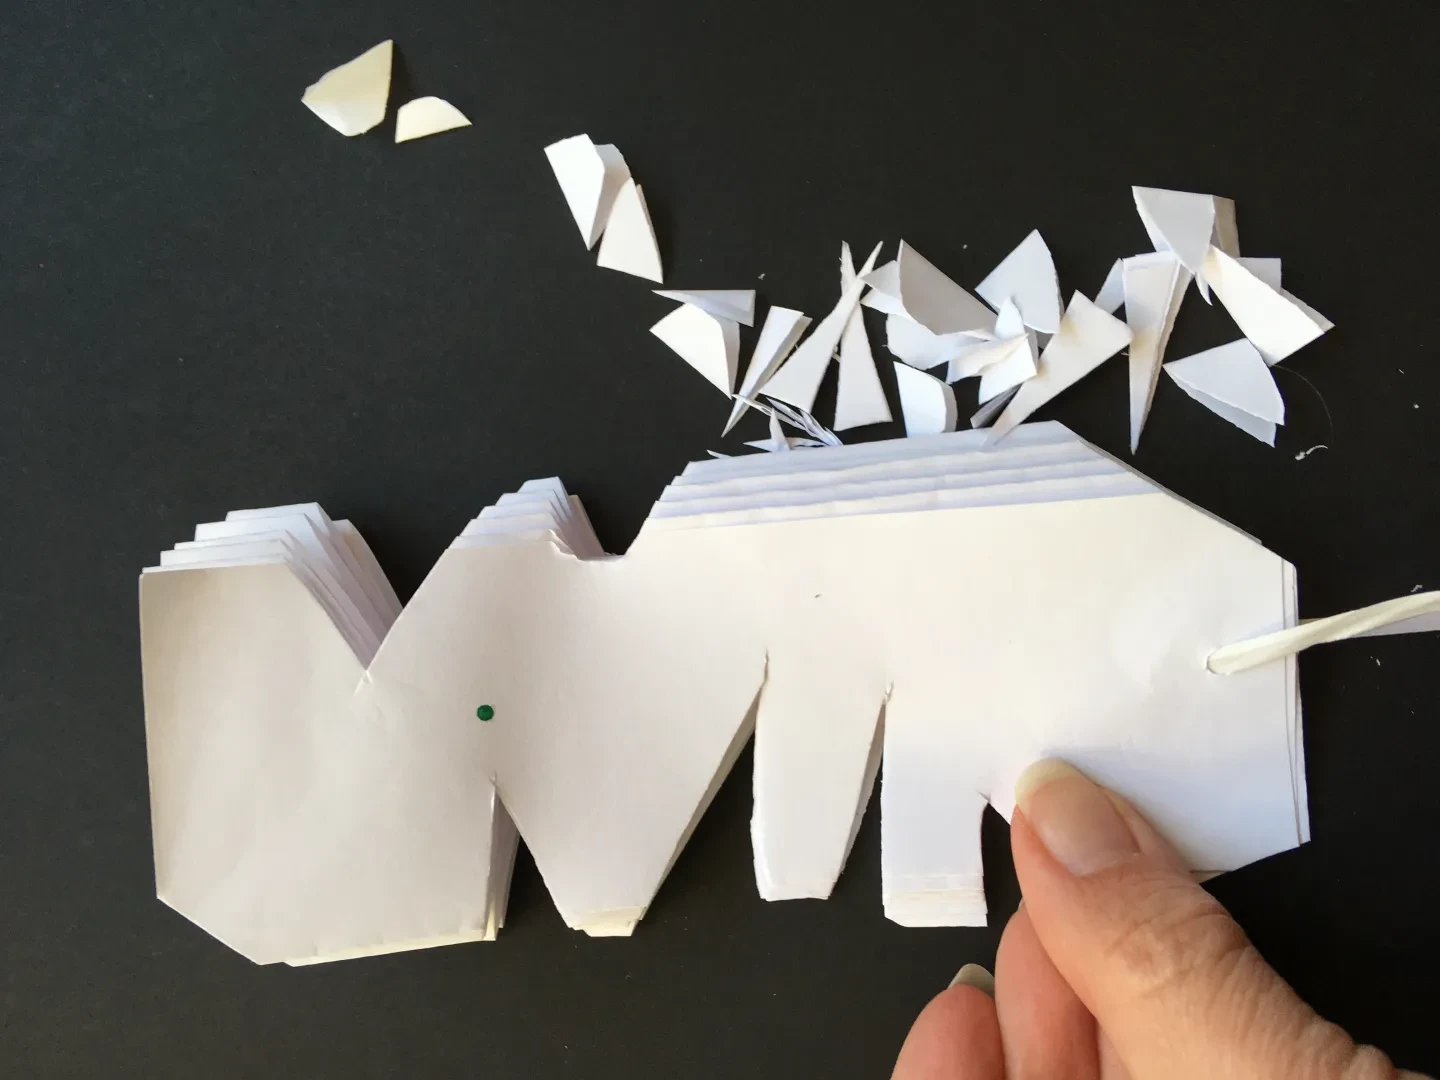
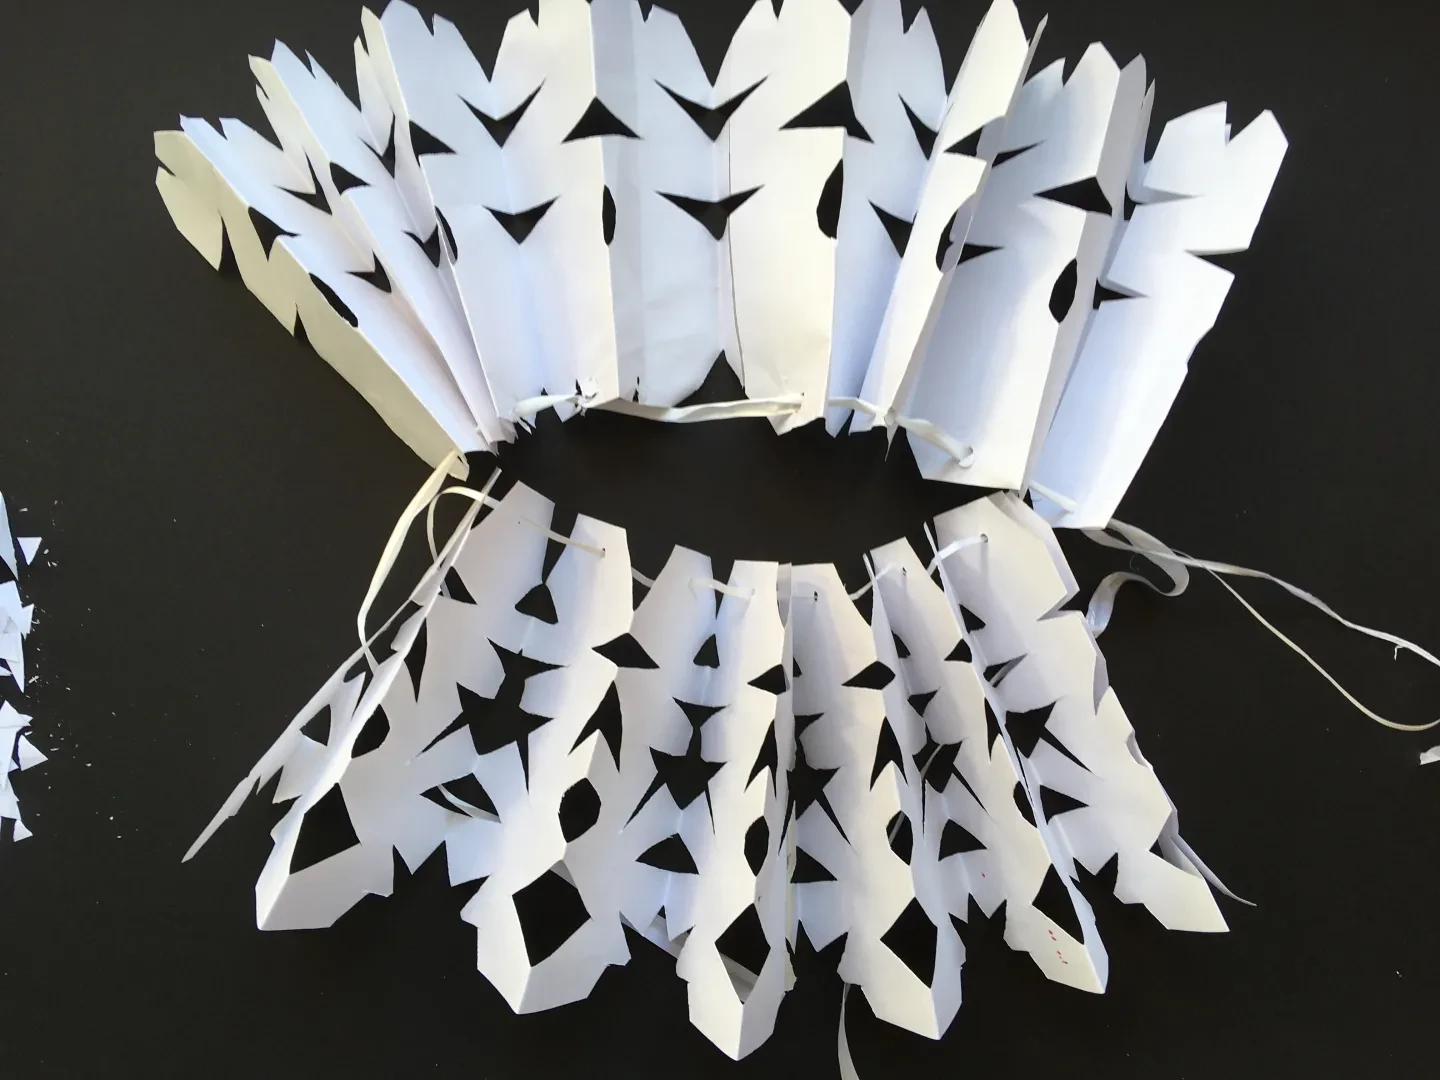
Hold your pleated paper tight and cut small shapes as if you were making a snowflake.
Step 4
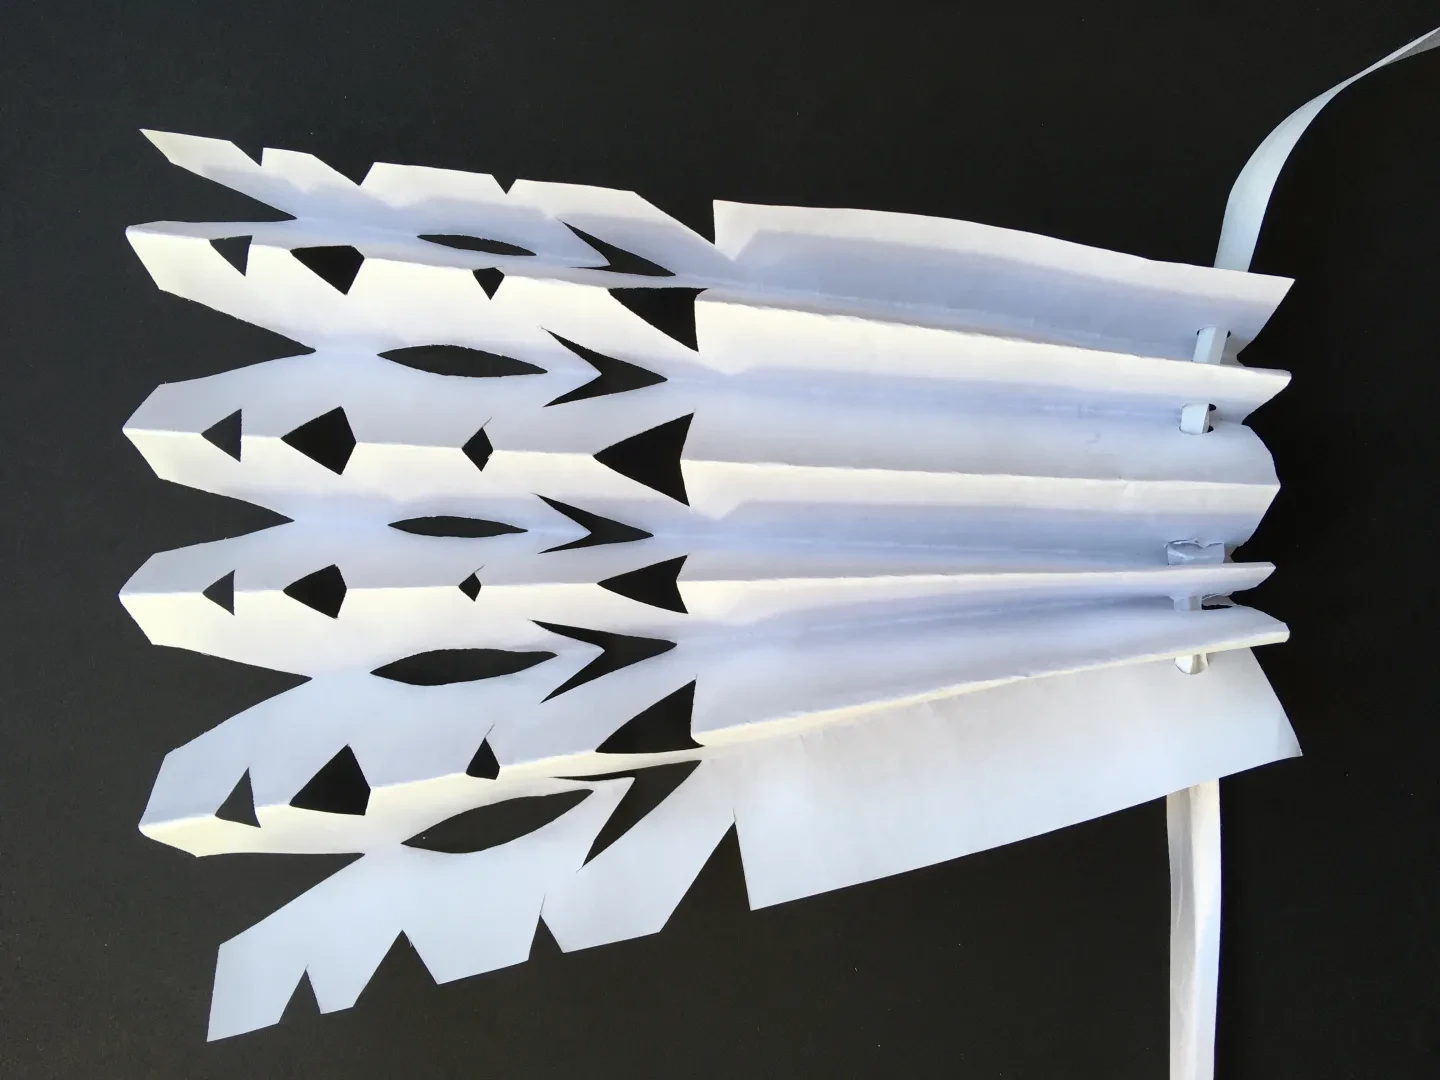
Unfold your paper to reveal the completed design.
You can now tie your cuff onto your wrist.
Create your ruff
Step 1
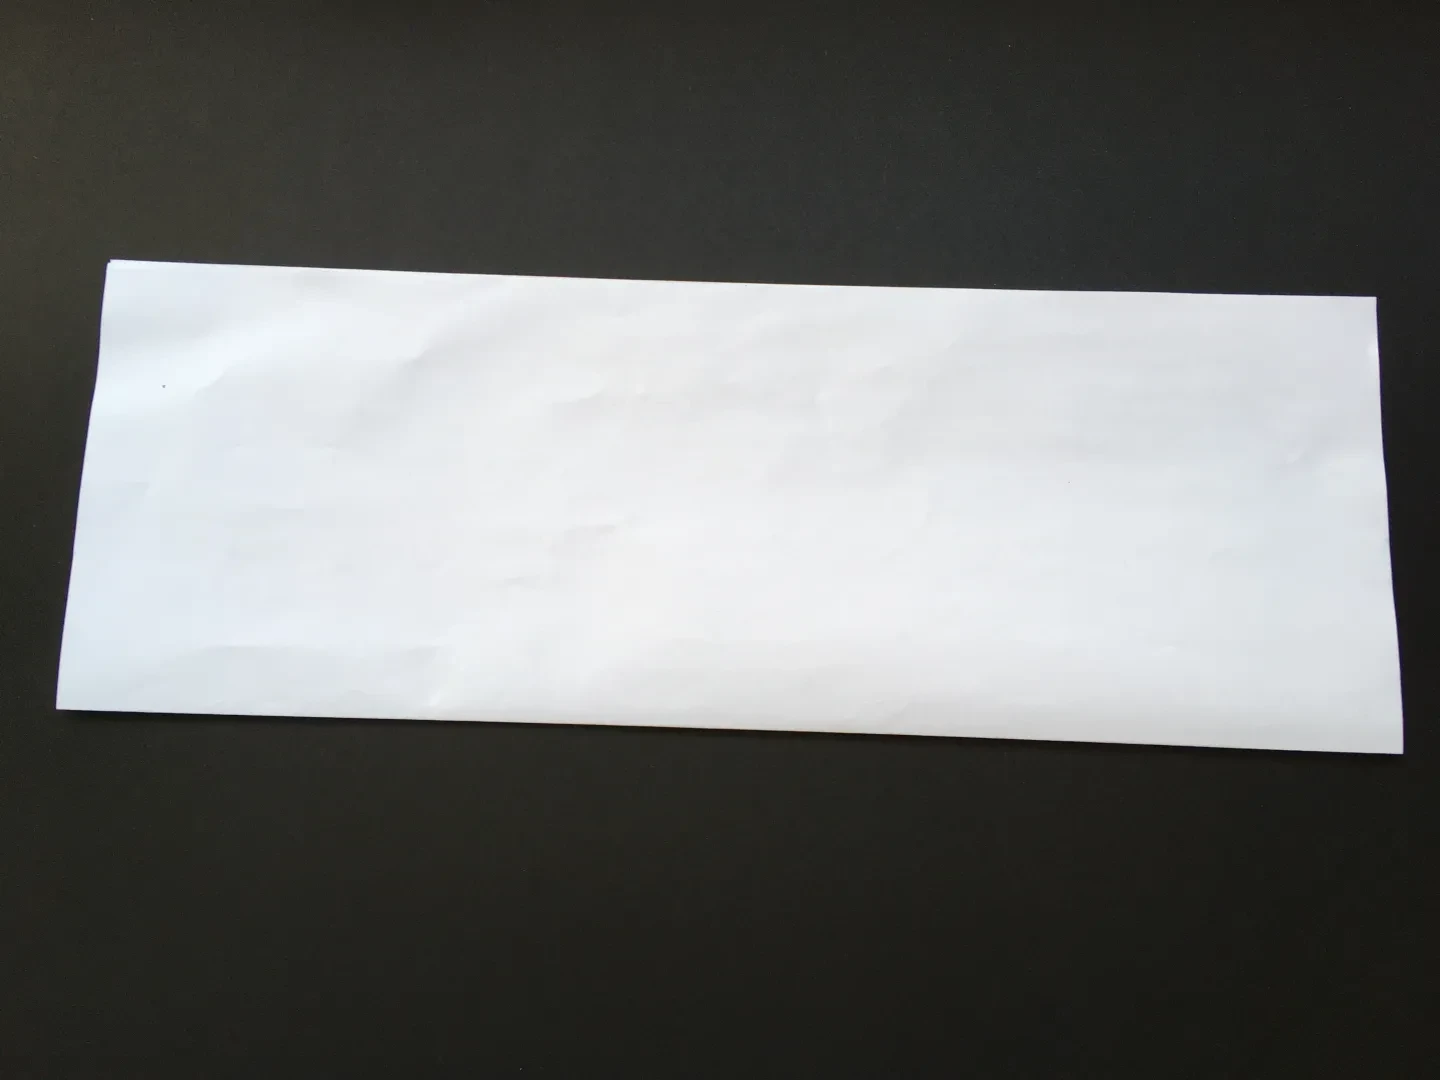
In order to make your ruff, take an A3 piece of paper and fold it in half longways. Cut down the fold.
Step 2
You will now have two long lengths. Stick both pieces together at the shortest end to make one long piece of paper.

Step 3
Take your now long piece of paper and pleat like you did when making your cuffs. The pleats can be bigger this time.
Step 4
Using your hole punch, make a hole through each pleat in the centre of one end. Then thread your string or ribbon through the holes.
Step 5
Holding your pleated paper tightly, cut patterns into the paper. This will make your ruff look like it is lace, like the one in the Armada Portrait.
Step 6
Repeat steps 1-5 to create the other half of your ruff. When both pieces of ruff are on your string, open them up.
Congratulations
Well done on creating your royal ruff and cuffs!
You can wear these with pride at home or out and about. Share your pictures with us on social media @RMGreenwich
Why not come and see the Armada Portrait at the Queen's House with your family?

The Armada Portrait
Learn about the story of the Armada Portrait – and the special things you can see in the painting