
Every year the Royal Observatory Greenwich hosts the Astronomy Photography of the Year competition. Here, our astronomers look at some of the solar photographs submitted to the competition and explore solar astrophotography. What does it reveal and why is it such a challenge?
Read more solar astrophotography tips from our Astronomy Photographer of the Year alumni below.
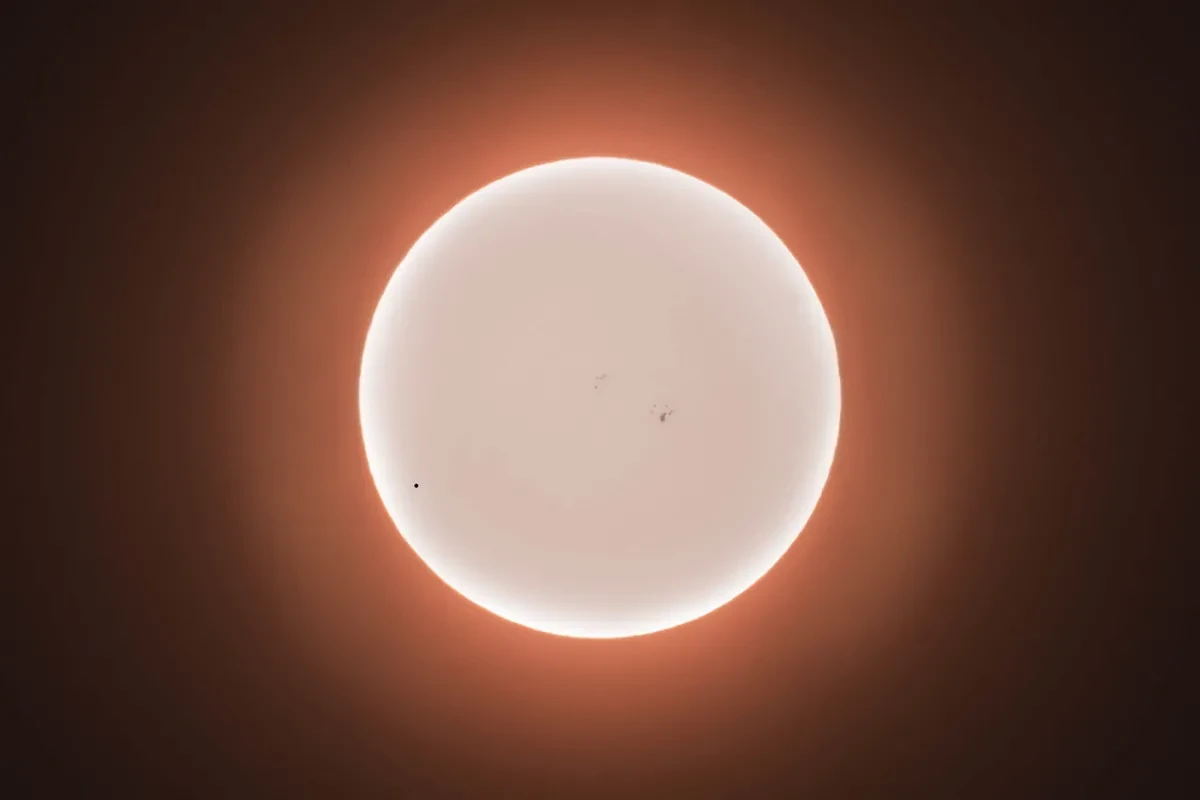
Image
How to photograph the Sun: the basics
By Scott Tully, shortlisted, Our Sun, Astronomy Photographer of the Year 2017
- When photographing the Sun you will need to use a special solar filter
- A large size lens or telescope can give good details and a tracking mount is helpful
- The best time to photograph the Sun is early morning, before the atmosphere becomes heated and unstable.
Photographing the sun: safety tips
Do not look at the Sun:
- Through your naked eyes without protective glasses
- Through a telescope or camera lens without a proper solar filter
Looking at the Sun or pointing a camera at the Sun without sufficient protection could result in:
- Permanent damage to your eyesight, and even blindness
- Damage to your camera. Optics can magnify the intensity and brightness of sunlight, and this can cause damage to your equipment.
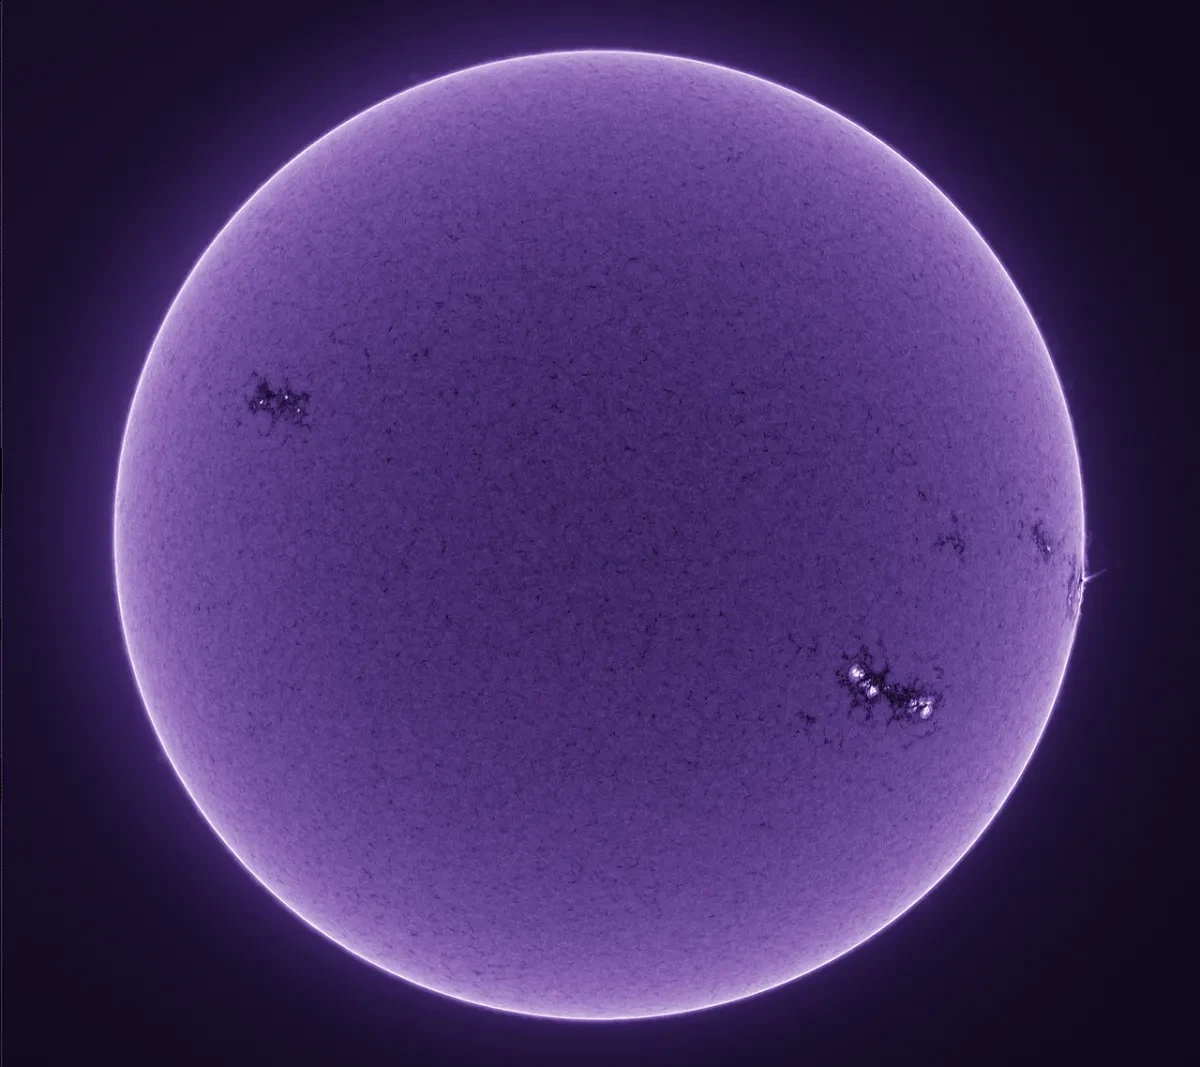
Image
Sun photography gear guide
Michael Wilkinson, Highly Commended, Our Sun, Astronomy Photographer of the Year 2017
Camera
- For photographing white light, which shows the solar photosphere with the sunspots, a simple DSLR is fine. However, a special "planetary camera" (a kind of webcam on steroids) will give better results.
- A monochrome (black-and-white) planetary camera is best to see the layer of the sun just outside the photosphere called the chromosphere.
Solar filters
- For white light, a simple "solar film" filter in front of the telescope will do.
- When photographing the chromosphere, you need rather more expensive kit: an H-alpha filter or a Ca-K. H-alpha filters require careful tuning for optimal results.
Processing Sun photographs
In all cases, multiple images are taken, and special "stacking" software is used to select the best shots and add them together to reduce noise. Further postprocessing is done to enhance the detail.
In one sense solar imaging is much easier than many other forms of astrophotography: there is plenty of light (too much) and getting the data you need does not take long at all. Tracking (correcting for the earth's rotation) is needed, but need not be very accurate for good results. It is also nice and warm, as a rule.
Buying top class equipment is no guarantee of success. It is better to practise on simpler kit, gain experience, and only move on to more expensive kit when you have mastered the technique. I started narrow-band solar imaging with a second-hand 35mm solar scope. I had a load of fun with that scope for years, and only when I felt I was limited by the scope rather than by my skills - and I was sure my interest in solar imaging was an enduring passion - did I get a bigger solar scope (also second hand).
Image
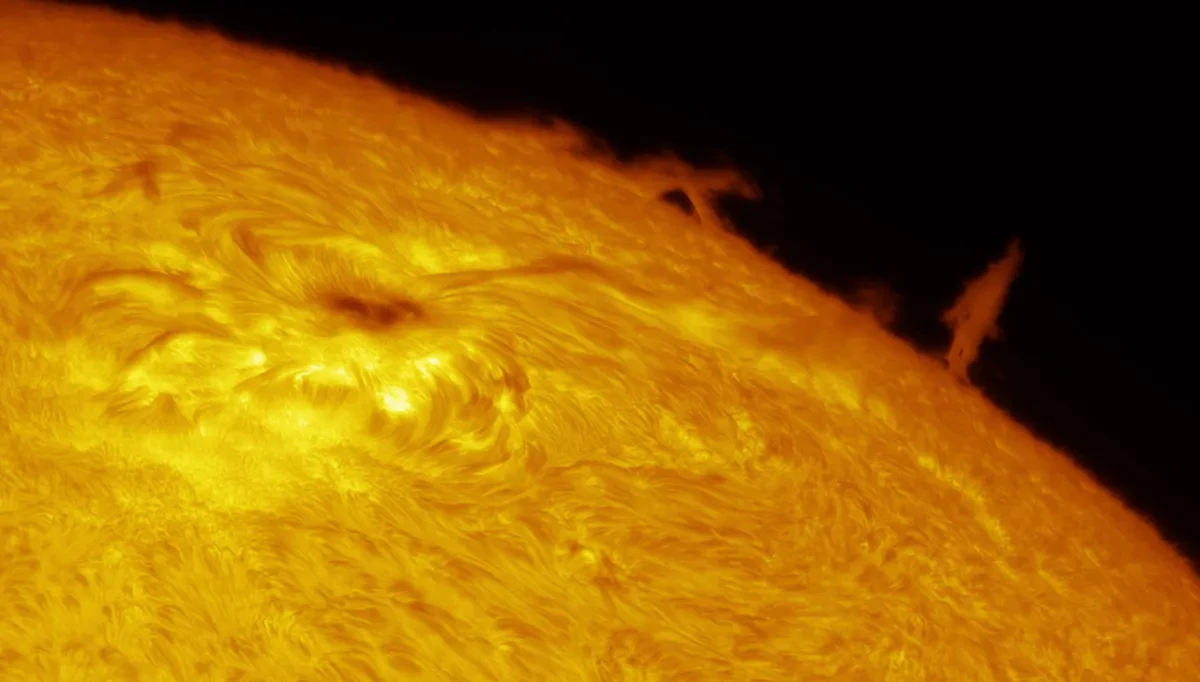
Incredible photographs of the Sun
Eric Toops, Runner-up, Our Sun, Astronomy Photographer of the Year 2017
"The spring is the best time of the year for imaging the Sun, and a cool breeze and good viewing conditions make for a pleasant time. I used Lunt H-alpha filters in a custom-made telescope to bring details of the solar activity out using high magnification. Several photos were stacked to stabilize the image and the ‘seeing conditions’ (the blurriness of the Earth’s atmosphere). Solar limb images often have a 3D appearance, as in this image."
More astrophotography...
Our Sun 2022: Astronomy Photographer of the Year
See the stunning winning and shortlisted images in the Astronomy Photographer of the Year 2022 Our Sun category

How to photograph the Moon
Learn how to get started in astrophotography with our step-by-step guide to photographing the Moon
How to photograph comets
Learn how to photograph comets with our step-by-step astrophotography guide

Astronomy Photographer of the Year exhibition
See the world's greatest space photography at the National Maritime Museum Greenwich