Comets are arguably some of the most dramatic things to photograph in the night sky, but it can be a challenge to commit them to camera as they streak through the cosmos.
In this guide, professional astrophotographers give their advice for photographing comets. This includes Gerald Rhemann, who won the 2022 Astronomy Photographer of the Year competition with his outstanding photo of Comet Leonard.
Gerald Rhemann
Preparing to photograph a comet
I use a planetarium program where I can see all comets that are actually visible. Based on my many years of experience, I can assess whether the comet will be impressive. Then, the most important thing is to stay tuned every clear night so I don't miss an appearance in the tail.
Photographing the comet and processing the image
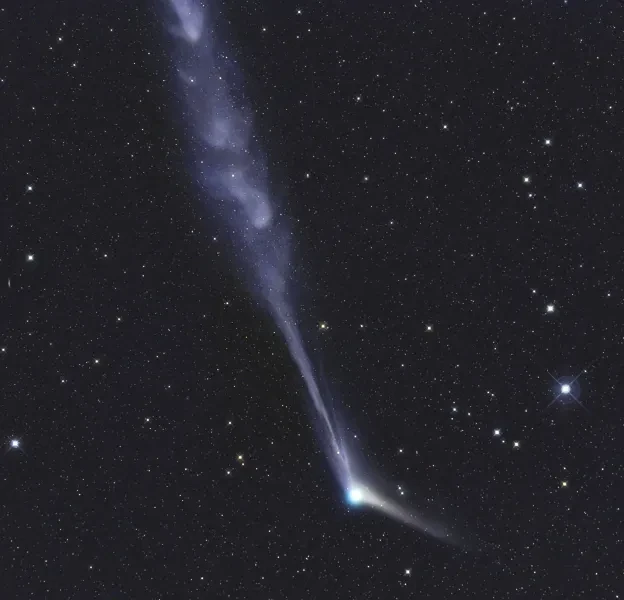
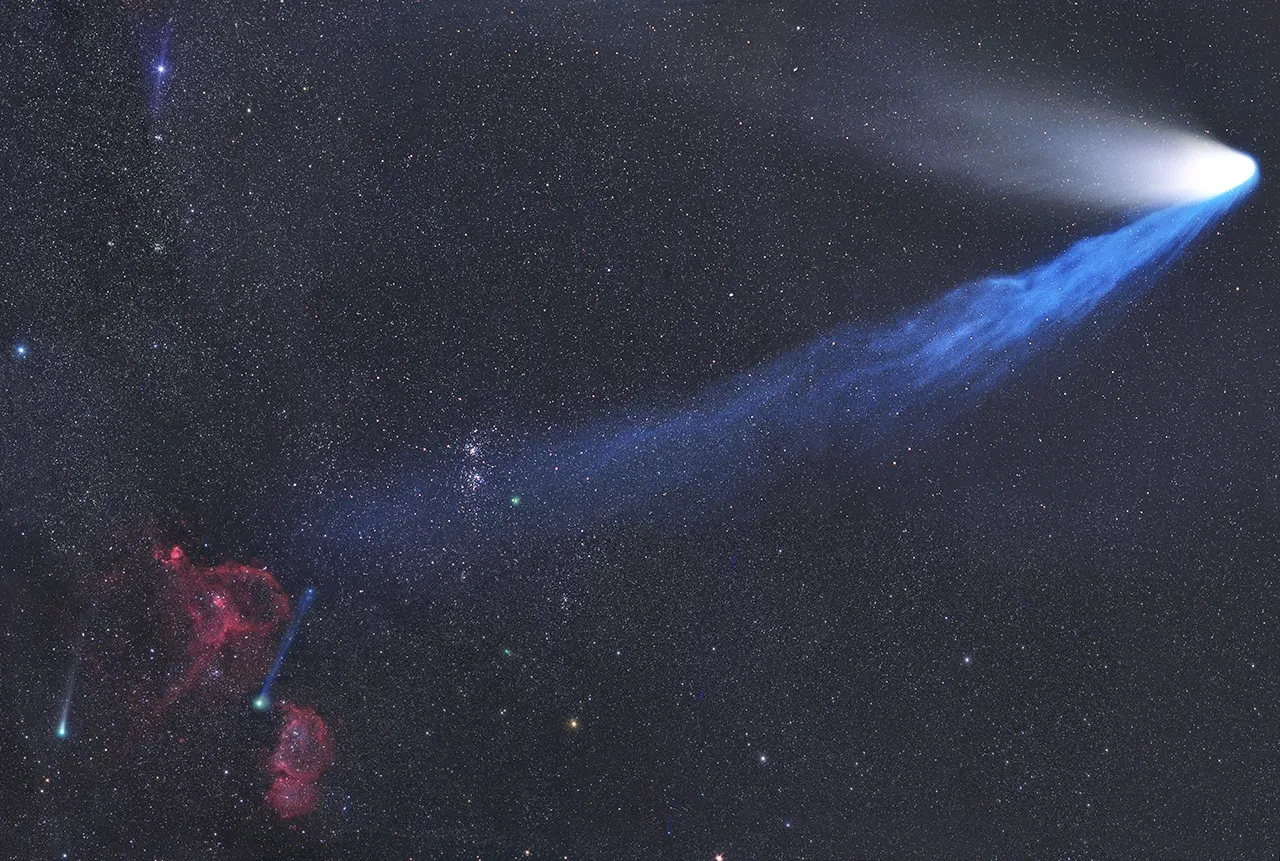
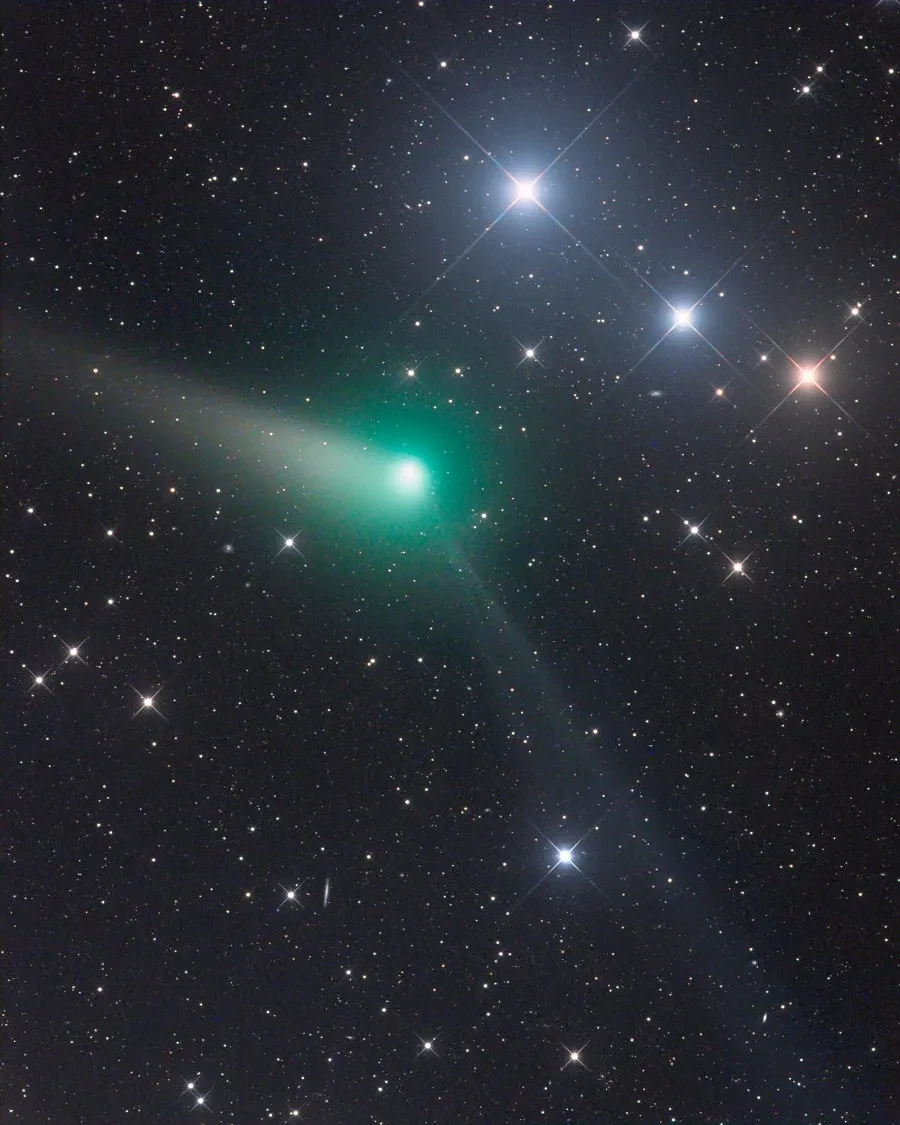
On December 25 2021 a dramatic tail disconnection event happened. A piece of Comet Leonard´s tail was pinched off and carried away by the solar wind. I was very lucky that the weather in Namibia was still excellent after I opened the roof of the observatory. As I recognized that the tail looked dramatic in the image of the first field, I decided to extend the image with an additional field. This was fine, because that´s where the disconnection happened.
For imaging, I use a 12" f 3.6 ASA astrograph and an ASI ZWO 6200 MM Pro camera with filter wheel and LRGB filters housed in an observatory.
The exposure time of each image must be short enough that the movement of the comet is not visible, which depends on the speed of the comet and finally on the focal length.
The calibration processing of the data corresponds to deep sky imaging. Therefore, you need darks, bias and flat fields to get clean results.
Then I start stacking all the images by aligning on the comet's head. After removing the stars, I combine the comet's LRGB data alone in Photoshop and return the stars by layer.
If everything goes perfectly, I am happy with a wonderful image that is worth every effort.
Equipment used to take Disconnection Event: ASA 12” Astrograph telescope, ASA DDM 85 mount, ZWO ASI6200MM Pro camera, 1076 mm f/3.6, mosaic of two LRGB composite panels, 400-second exposure per panel.
More of Gerald's comet photography
More of Gerald's comet photography
1 / 7
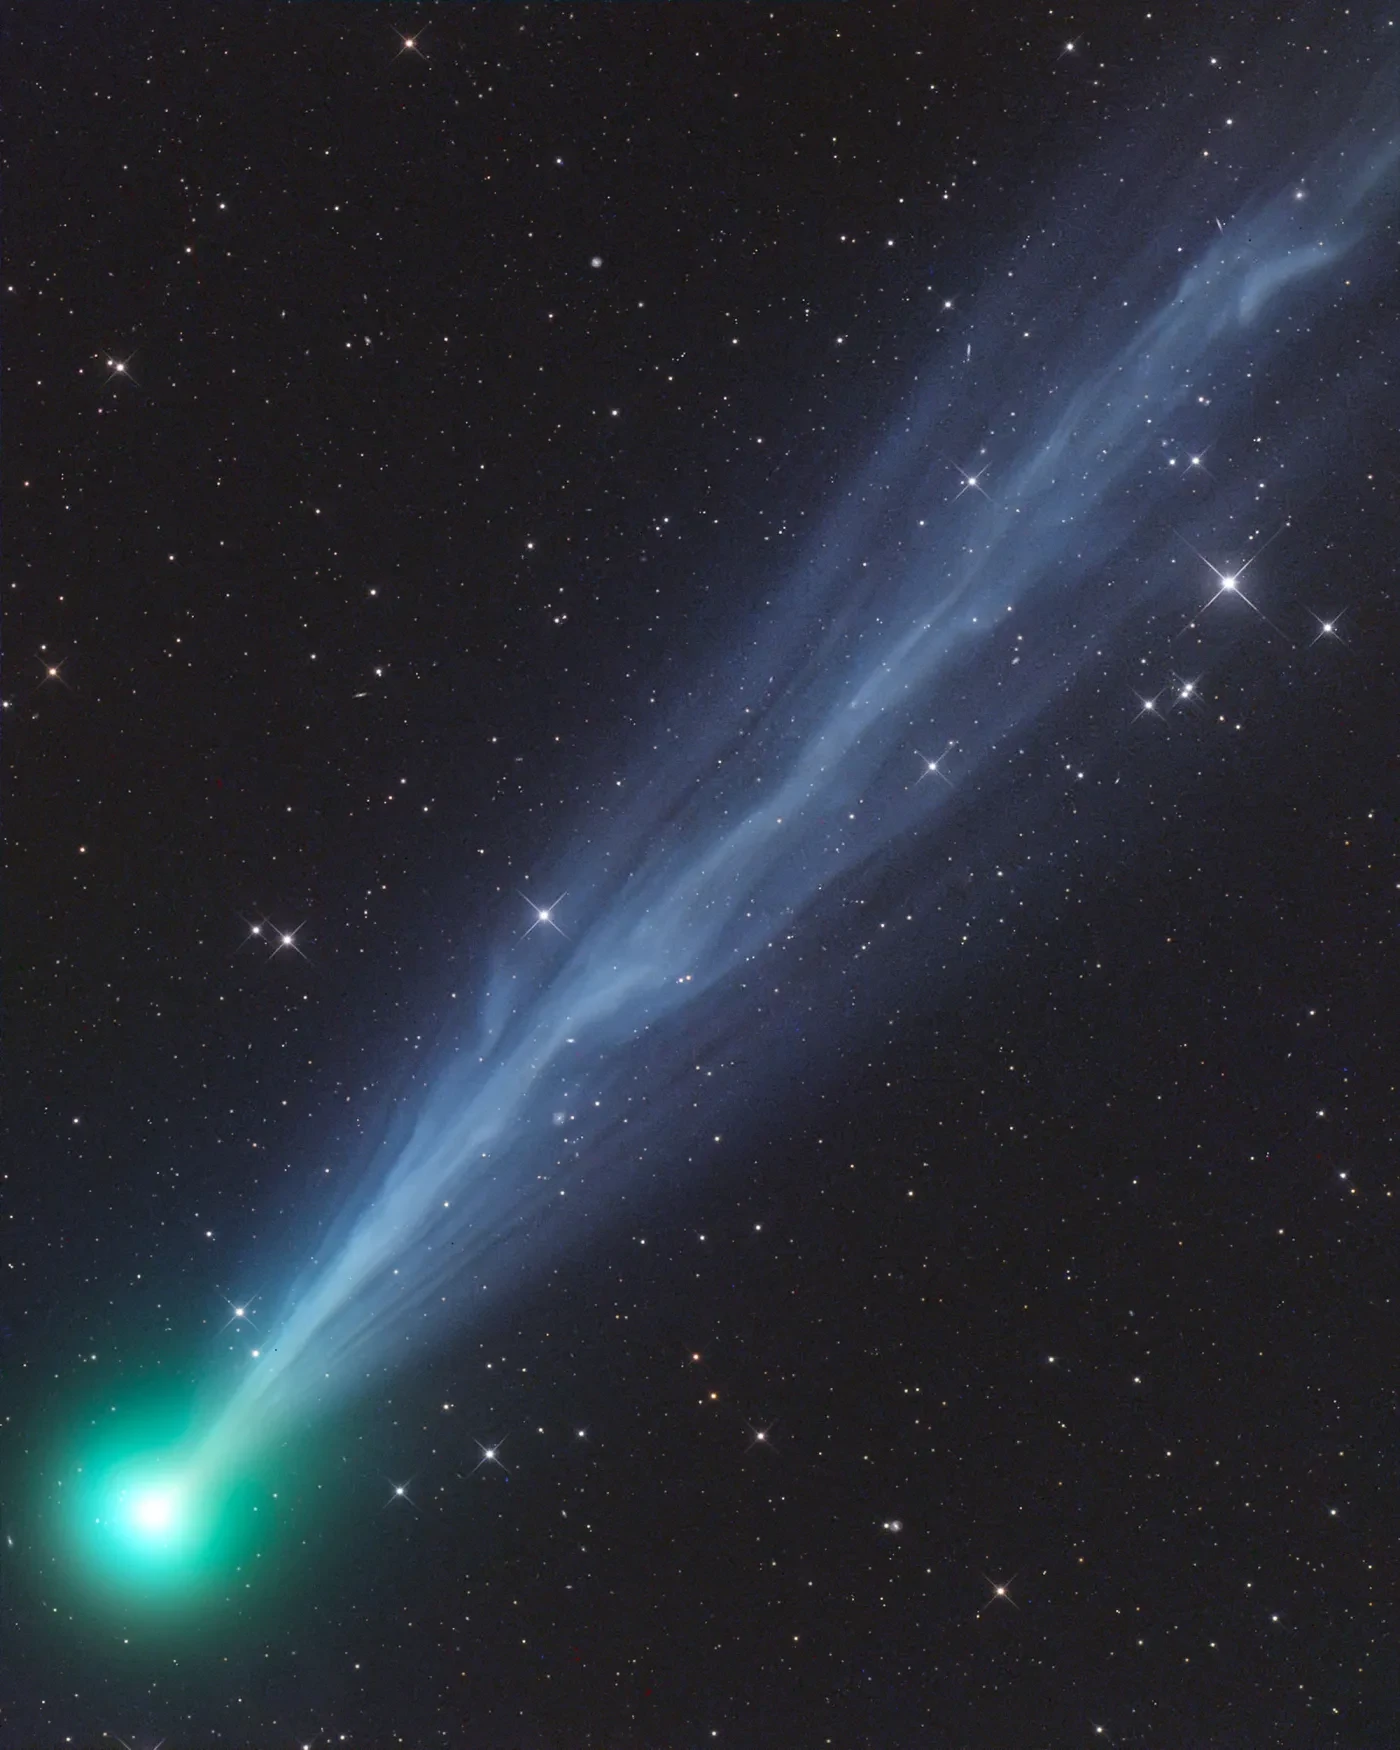
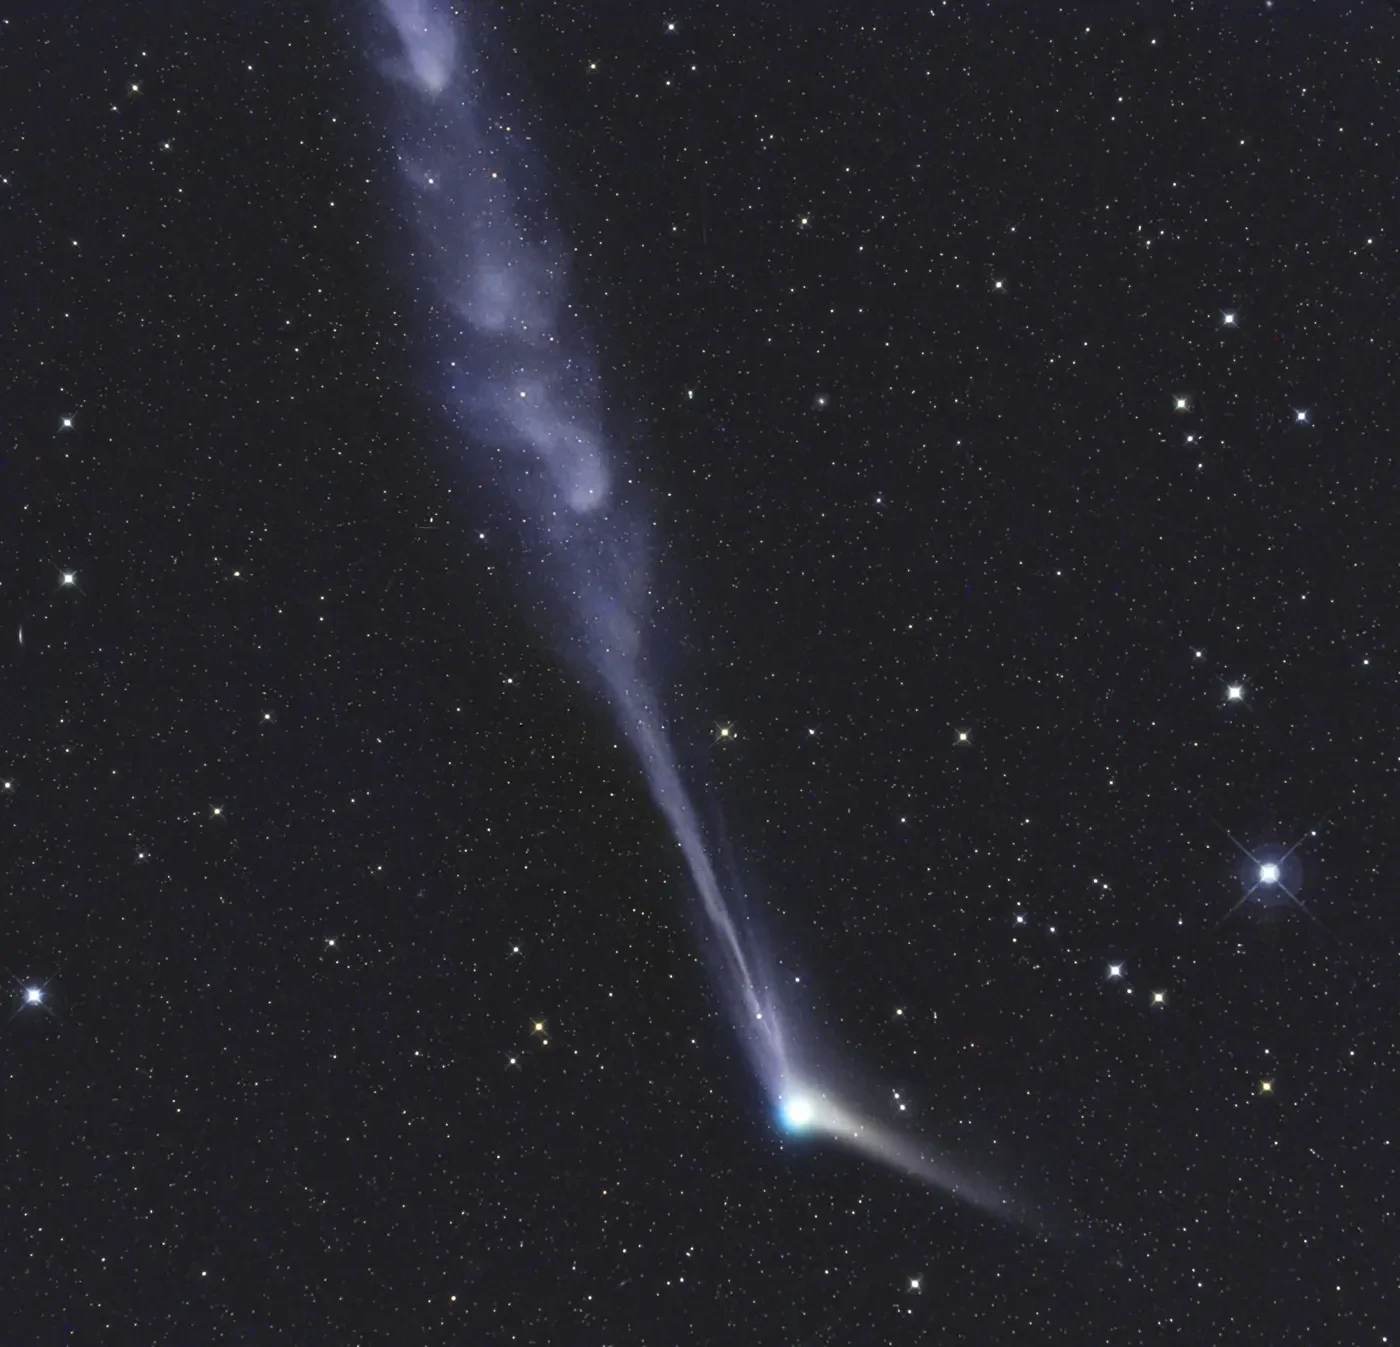
The exceptionally active ion tail of comet 2020F8 SWAN © Gerald Rhemann, Astronomy Photographer of the Year 2021
2 / 7
Comets Traffic in Constellations Perseus and Cassiopeia 1 © Gerald Rhemann, Astronomy Photographer of the Year 2020
3 / 7
Comet Catalina © Gerald Rhemann
4 / 7
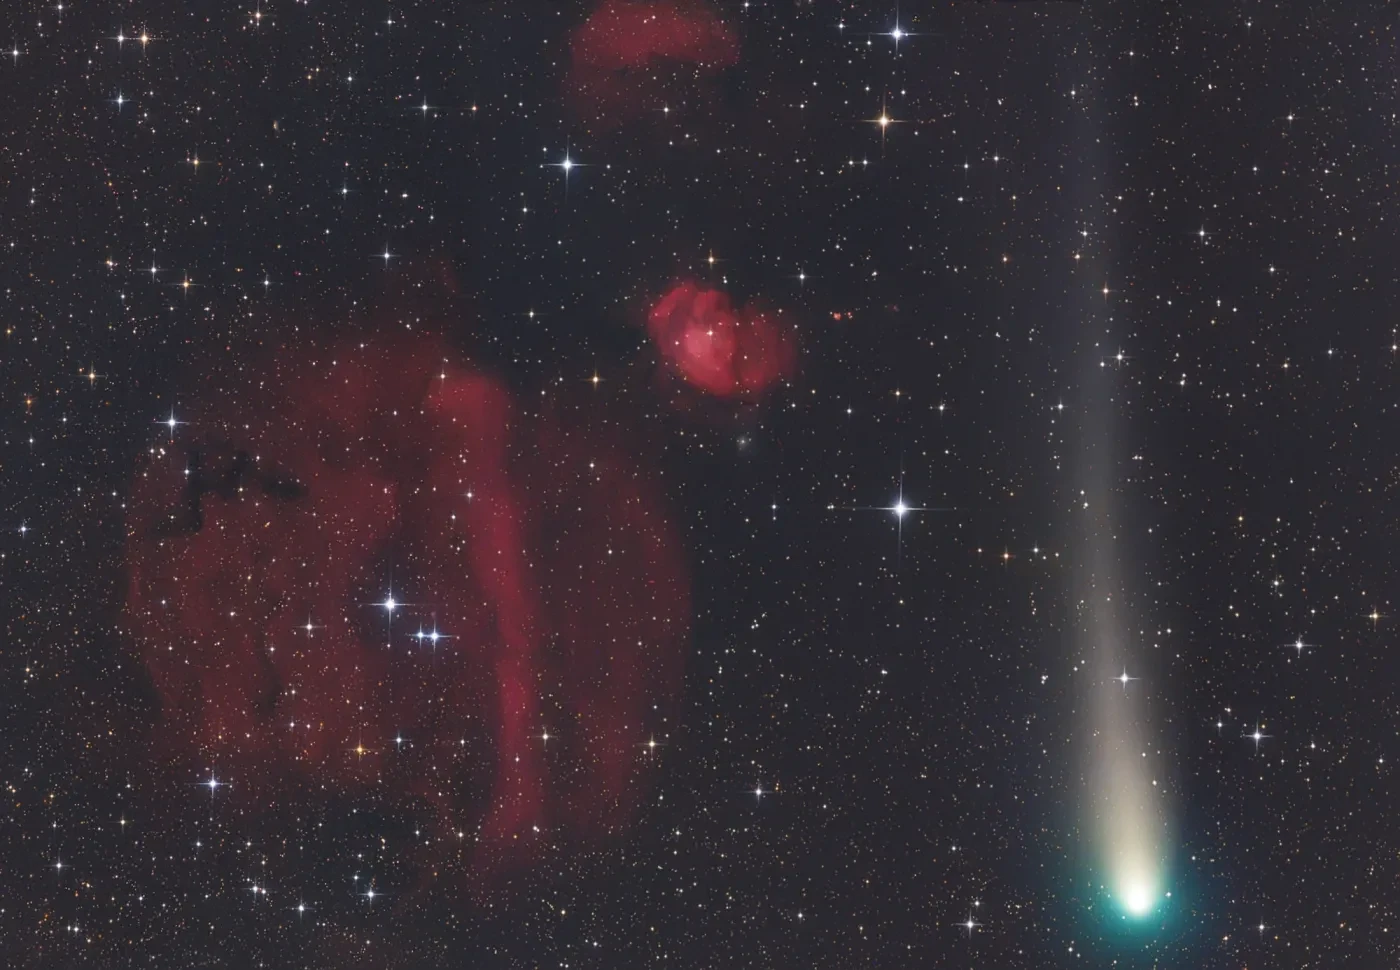
Colourful Encounter © Gerald Rhemann
5 / 7
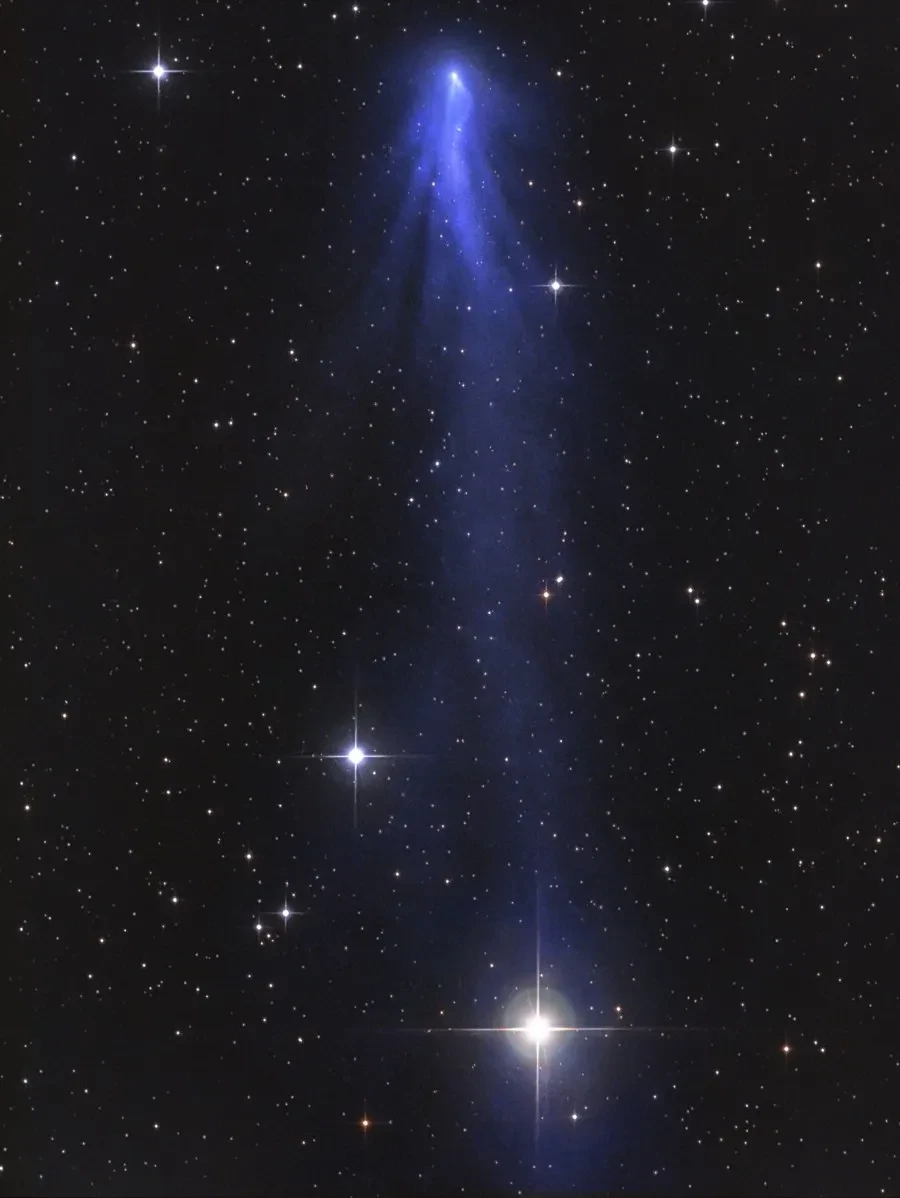
Comet C2016 R2 Panstarrs the blue carbon monoxide comet © Gerald Rhemann
6 / 7
Comet C2015V2 Johnson in constellation Bootes © Gerald Rhemann
7 / 7
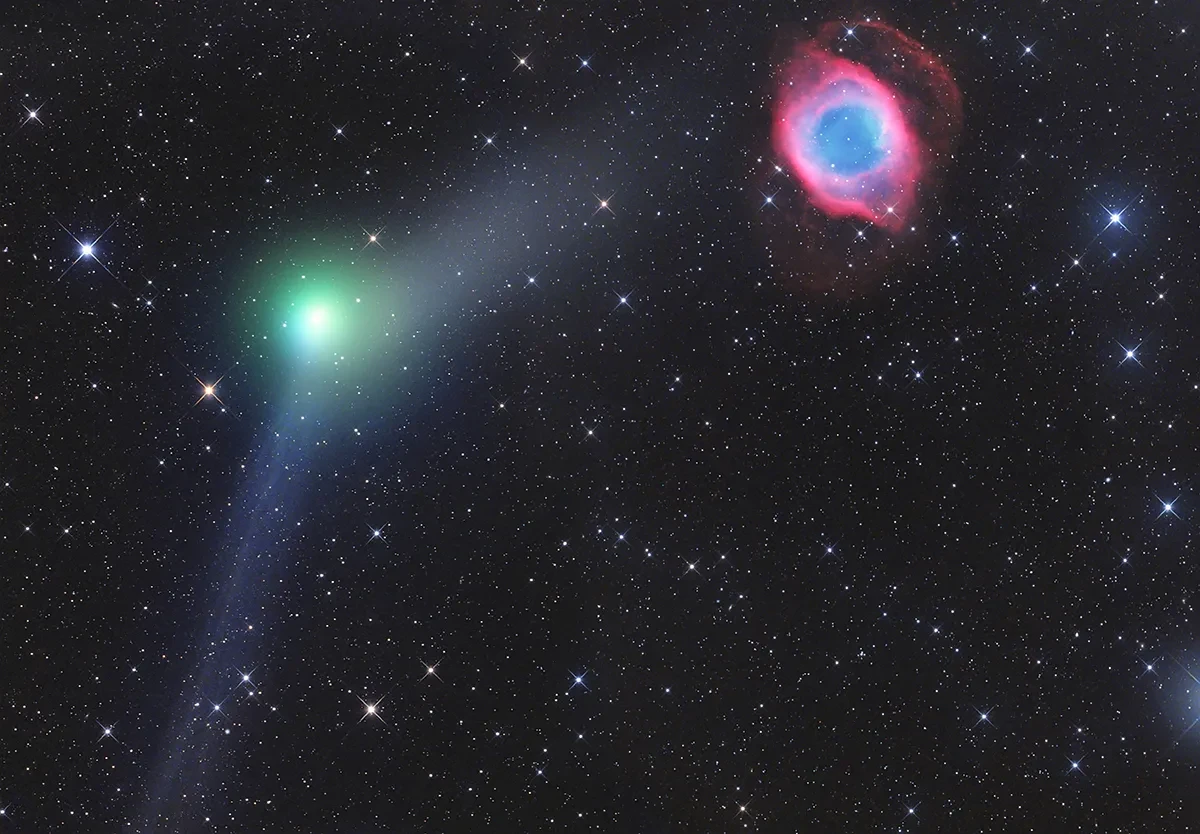
Encounter of Comet and Planetary Nebula © Gerald Rhemann
Richard Higby
Little compares to witnessing the magnificent raw power of these unique and unpredictable alien visitors - and managing to get them on camera.
Getting the equipment to photograph a comet
As a minimum, you need a digital single lens reflex (SLR) camera plus cable release or a point-and-shoot camera with the ability to zoom in 6 to 12 times, a sturdy tripod, binoculars and a star chart or app.
If a comet appears large enough in the sky you can get great shots with a handheld SLR and a 300 mm telephoto lens. For the best images you need an astronomical telescope (of 500 mm focal length or more) and a cooled charge coupled device (CCD) camera.
I use a colour CCD attached to a small 90 mm apochromatic (APO) refractor telescope with a polar-aligned equatorial mount.
Picking the place to spot a comet
Read astronomical magazines and contact your local astronomy club to research information about the date, time and position of visiting comets.
When you know the time and approximate location of a comet, set up your tripod to give an uninterrupted view of that part of the sky – the later after the end of twilight and the further away from city lights the better.
Taking the shot of the comet
If you are using a camera and tripod, set your aperture to maximum, your manual focus to infinity and confirm focus is OK by taking a 30-second exposure of a star in the general area.
Next, take a one-minute exposure with a standard 50 mm lens at ISO 1600. Enlarge the image to look for the tell-tale small fuzzy patch which means you have caught a comet.
Change to a longer lens (200 to 300 mm), zoom in and take several identical images of 30 seconds each. Longer exposures will be blurred due to the Earth’s rotation, but you can enhance the visible detail of these short-exposure shots by stacking and processing them later.
With a telescope and astronomical CCD, use the native focal length of the telescope and take a 60-second exposure of the general area. Check the image on your laptop screen and move the telescope to best frame the comet. Using polar-aligned tracking, take a series of exposures of about 300 to 900 seconds.
Longer exposures tend to be counterproductive, burning out the detail of the comet’s nucleus. Setting the telescope and camera to track a chosen star keeps the stars in the image focused and round and exaggerates the comet’s speed and power by slightly blurring and elongating it. Alternatively, track the comet and let the stars trail in the background.
In order to process out the noise associated with all digital cameras, make sure you capture a set of ‘dark frame’ calibration exposures, using the same settings as your main images but with the lens covered.
Processing your comet photograph
Processing to me is magical. It can often take longer than the set-up and capture of your starting images but I find it the most rewarding stage of photographing comets.
Discard any poor shots and use stacking software such as ImagesPlus or CCDSoft to subtract dark frame data from your shots before stacking them into one single image.
Bring out dim detail by varying the brightness and contrast of your stacked image within the curves function of an editing program such as Adobe Photoshop. Make your sky a deep black by setting black and white points in the levels function. Improve soft and mildly blurred stars and extract the fine details of your subject with the unsharp mask function.
My top tip: be prepared for the unexpected
Eager to capture as many images of Comet Lulin as possible, I rushed home on at least three nights when the comet was at its closest, only to have clouds or strong winds kill the opportunity. Days later the forecast predicted a break in the clouds. I set up, polar-aligned the mount, slewed the telescope to the approximate position and took a test shot.
Spotting the small smudge in one corner, I placed the comet in centre frame and started taking 300 second exposures. The clouds reappeared. When the cat began playing with the camera cables I took a tea break.
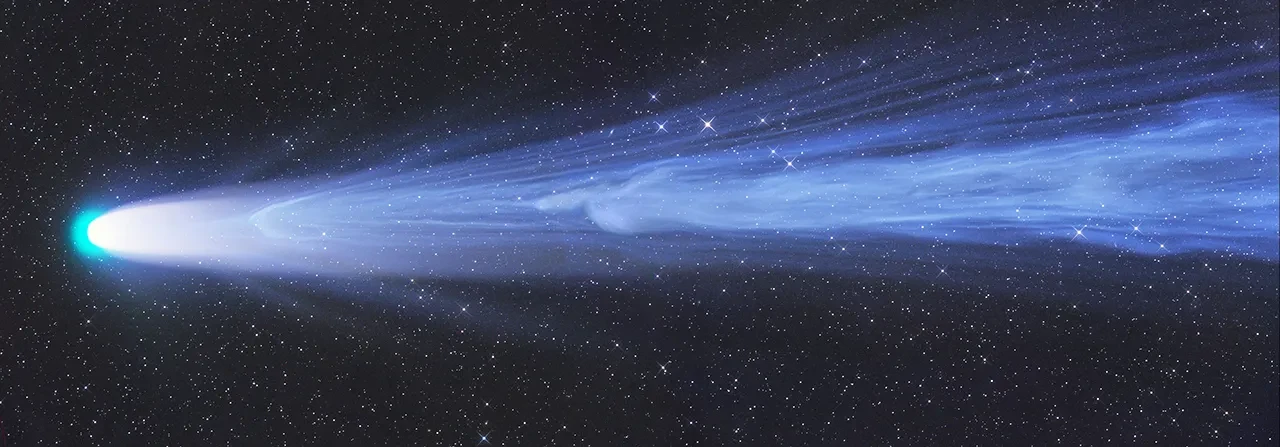
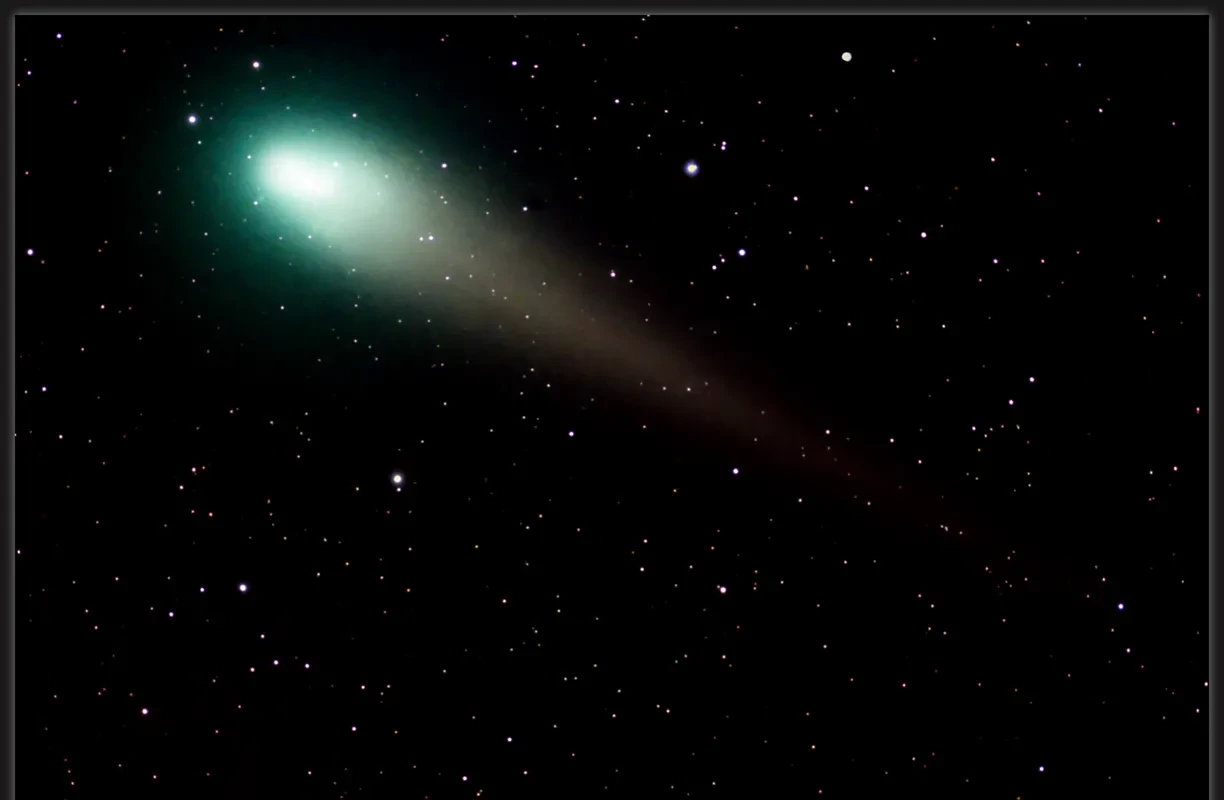
After a two-hour wait the clouds briefly parted and I got just four in-focus 600-second exposures. In their raw state the images were interesting, but the processing brought out the green alien – arguably the most exciting image I have ever captured, and one which I can never repeat.
Four stacked and processed shots of Comet Lulin make a unique image: the magnificent green colour of my final image - 'The Green Visitor' - is caused by gaseous diatomic carbon in its local atmosphere, which glows green when illuminated by sunlight in the vacuum of space.

Visit the Astronomy Photographer of the Year exhibition
See the world's greatest space photography at the National Maritime Museum Greenwich