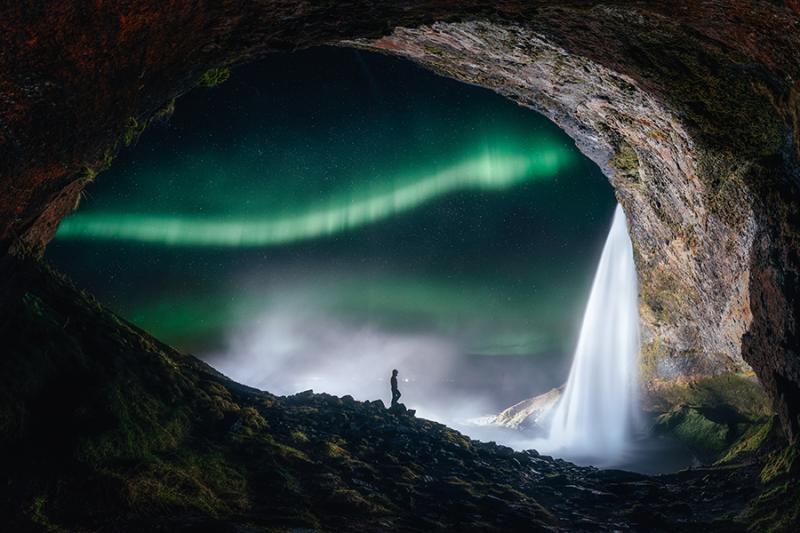
Aurora photography provides a great opportunity to escape from the daily hustle and bustle to a world with just you, your camera and the Universe.
Far away from light pollution, in the purest quiet you can imagine, the colours and movement of aurora in the sky create one of the world’s most spiritual sights.
The best equipment to photograph aurorae
You will need a weatherproof single lens reflex (SLR) or compact camera capable of taking long exposures, along with a wide angle or fisheye lens, tripod and cable release. Zoom or prime lenses and a torch can also help you get the most creative compositions.
I use a Canon EOS 5D Mark II SLR camera, a Canon 17-40 mm L-Series wide angle zoom lens and a Sigma F/2.8 15 mm fisheye lens. My Manfrotto tripod withstands the cold more than those with plastic parts, and the ballhead makes it quick and easy to swap between horizontal and vertical shots.
Picking the place to see the aurorae
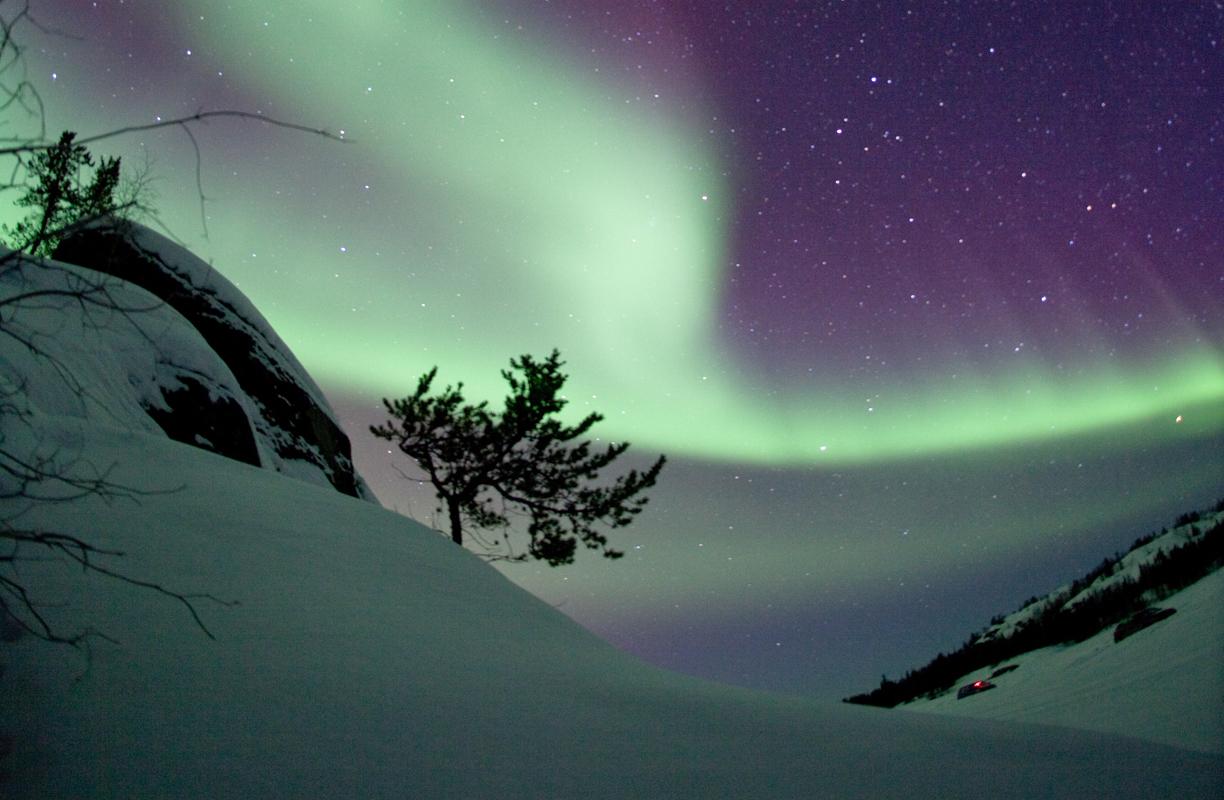
The frequency of aurora generally increases the further north you go, with prime viewing locations at around 60-65˚ north. The winter months between late August and early March are the best time of year for viewing. Although the aurora are present during spring and summer, days of almost 24 sunlight hours make it impossible to see them.
Watch the weather reports and check the sky before you set out. In the winter in Canada, I find temperature a good gauge: cold nights mean clear skies, warmer weather usually means increased cloud cover.
Staying away from light pollution generally allows you to see and photograph the aurora more effectively, but light can also add interesting elements to your images, for example red and orange hues.
Taking the shot
Before you leave home, charge your batteries, preset your manual focus to just less than infinity and brew a strong flask of coffee. Set up to get as much of the sky into the picture as possible and don’t be afraid to turn your camera up on end to compose vertical shots.
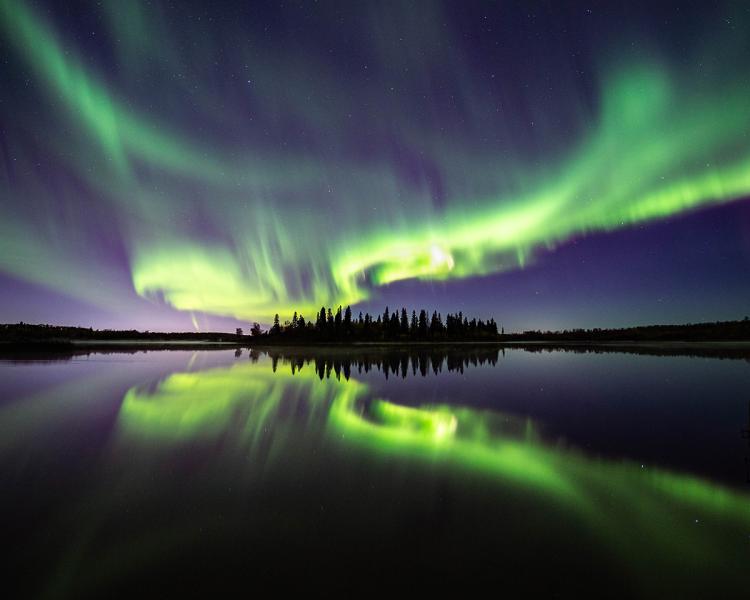
Start by taking a 15-second exposure at ISO 800 and F2.8. The ISO 800 setting keeps image noise down without the need for overly long exposures; apertures between F2.8 and F5.6 will also keep your exposures below 30 seconds, enabling you to clearly define the aurora.
With longer exposures, the aurora can show up as a green haze rather than distinct, vibrant bands. On bright moonlit nights shutter speeds as low as 5-7 seconds at ISO 400 work well.
After taking a shot, check the viewfinder or review display for possible problems. A dark image means you might need a longer exposure; a blurry image indicates your focus is not set properly. Experiment with your settings to get the best shot.
While using a fisheye lens allows you to get the entire sky in a photo, zoom lenses can help you focus in on a distinct band, or foreground element, as your artistic senses dictate. Fast lenses, such as the Canon EF F/1.4 50 mm prime, capture really fast shots on those nights when the aurora are particularly bright or are moving rapidly across the sky.
Once you’ve mastered the art of imaging aurora on their own, give some attention to your surroundings. My million-dollar tip is to liven up flat scenes by including something of interest in the foreground, which you can light up with a torch during lengthy time exposures.
Processing your photograph of aurorae
If you have got your exposure right at the start, post processing isn’t really needed. I sometimes use the fill light function in Adobe Photoshop Lightroom ® to lighten and emphasize a foreground element, but I never touch the lights.
My top tip: weatherproof everything
Winter temperatures in my home town of Yellowknife, Canada are well below freezing, with the best aurora seen on clear cool nights of -20 to -40°C. At these extremes, plastic tripods shatter, snow sticks to everything and your hands turn to stone.
I protect myself with a full-body polar suit, good winter boots, waterproof gloves, balaclava and toque hat. Good quality cameras should be fairly weather resistant but I have still witnessed a National Geographic photographer sticking strips of duct tape over all the seams in his camera body to keep out moisture. Not pretty, but much better than a fried camera.