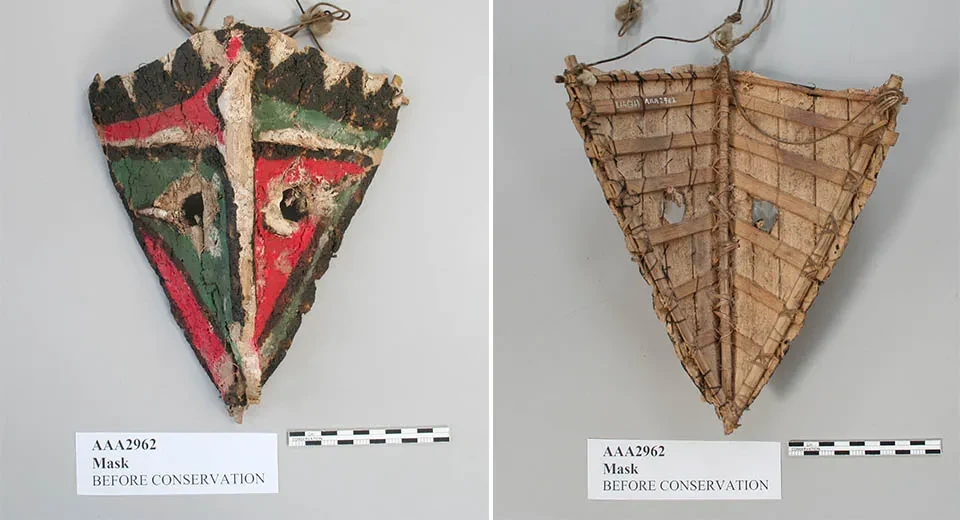
Cleaning and consolidation of a 19th century mask from Vanuatu, Melanesia
Object Conservator, Karen Jensen and Textile Conservator, Nora Meller brought two different skill sets to solve the conservation challenges. During the treatment we understood more about the construction of the mask and ensured its long-term preservation.
Caring for the whole collection
One of the primary aims of the National Maritime Museum is to care for its collections. During a recent rehousing project of a large number of ethnographic objects, this mask was identified as being so fragile that it needed an interventive conservation treatment. Its surface was crumbling which was worsened by its flexing along the central line (the ‘nose’). Therefore, we had to come up with creative solutions for its stabilization and protective storage.
Construction and condition
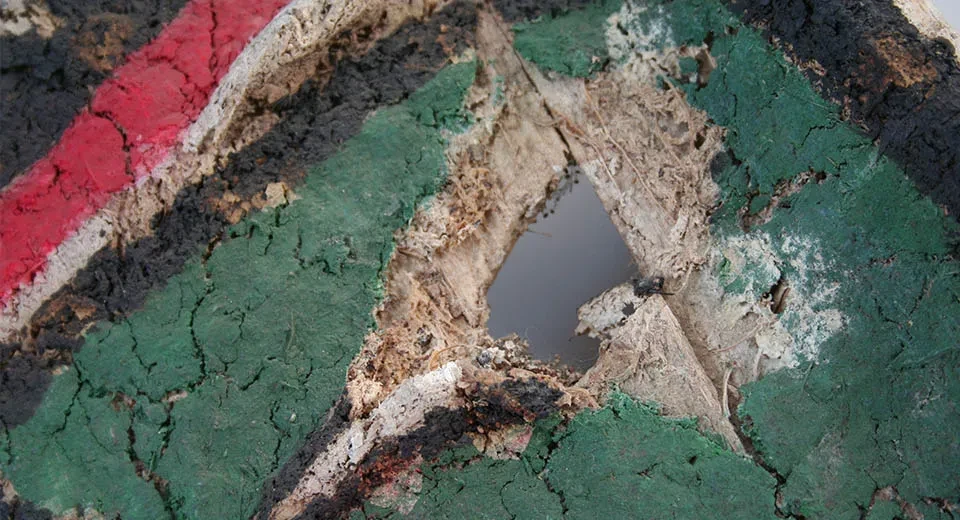
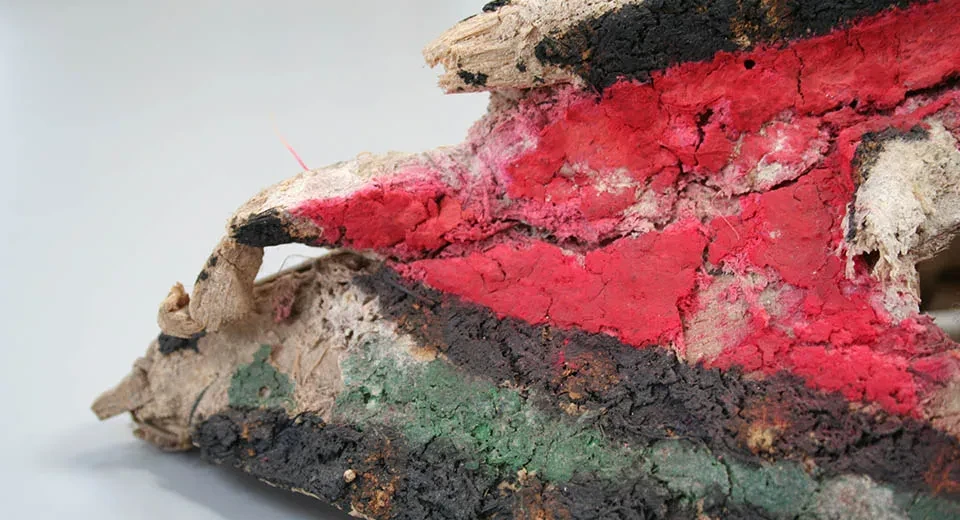
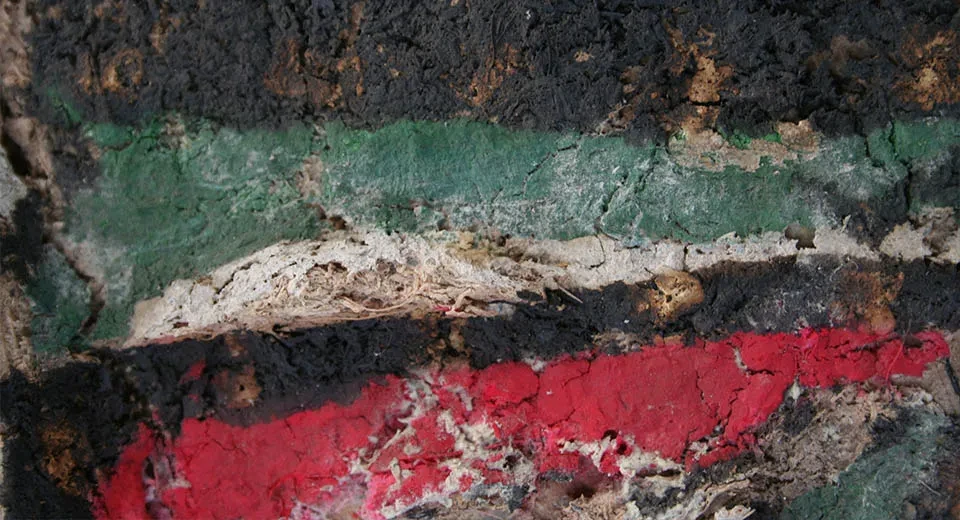
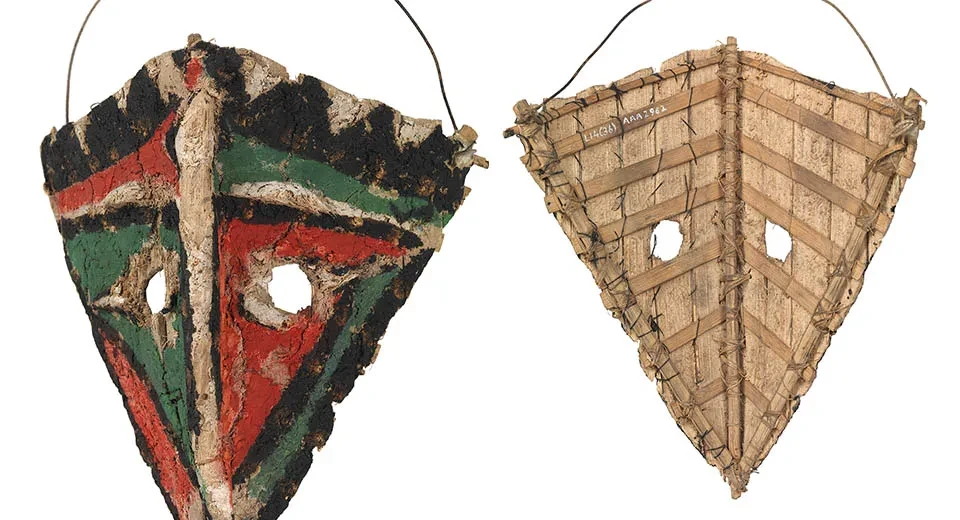
The mask is constructed of plant stalks stitched together. This is covered on the outside with a fibrous ground layer which is a mixture of plant fibres and an unknown binder. The ground layer is covered with white pigment paint and further decorated with red, green and black pigment paints. The colours are incredibly vivid and well preserved.
The fibrous ground layer had become very crumbly probably due to ageing, humidity fluctuations in the environment and handling, thus pigmented fragments kept detaching when the mask was being moved or flexed. Substantial amounts had already been lost from the more three-dimensional areas around the eyes. Moreover, the areas of red pigment paint had become powdery.
The piece we called the ‘chin’ of the mask had bent and was only held on by a few fibres.
After detailed examination it became clear that the mask was also affected in the past by mould and moth infestation. Even though both seemed to be inactive, they were disfiguring and mould posed a health hazard to anyone handling the mask.
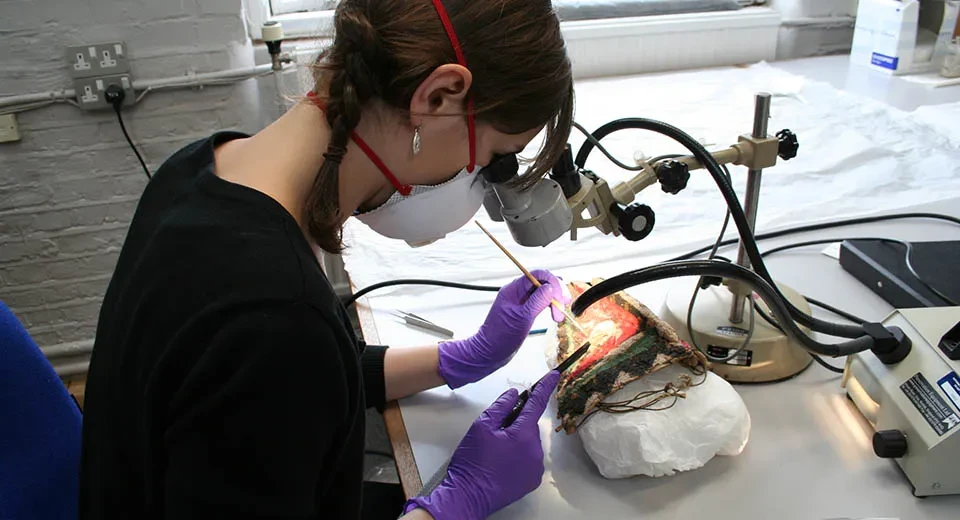
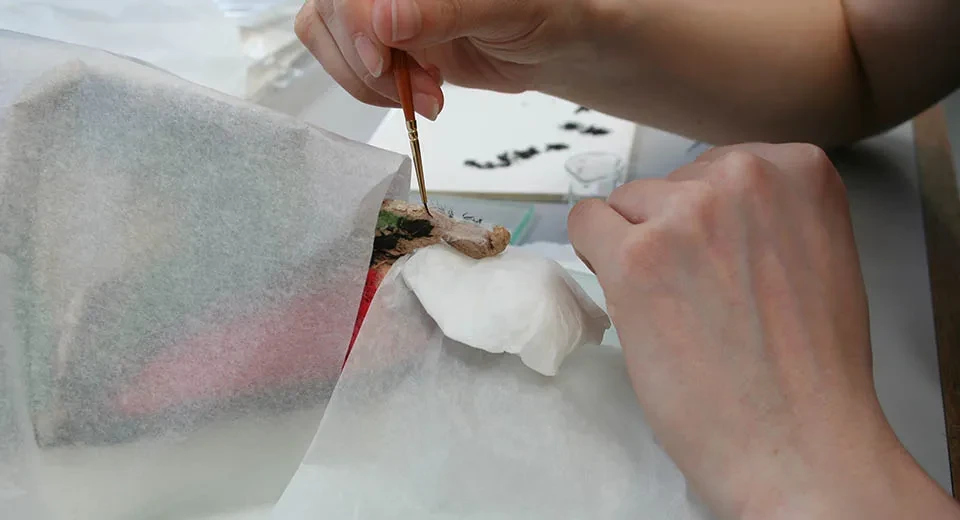
Cleaning process
First we cleaned the white, sticky and fluffy mould residues, moth webbing and frass (insect excrements) from the surface of the mask. This had to be done very carefully using a protective mask, gloves and a vacuum cleaner fitted with HEPA filter due to the health and safety risks of mould. We used low power vacuum suction with a small nozzle; the nozzle was fitted with nylon net mesh to catch any detached fragments. Soft brushes and fine tweezers helped to dislodge the unwanted residues.
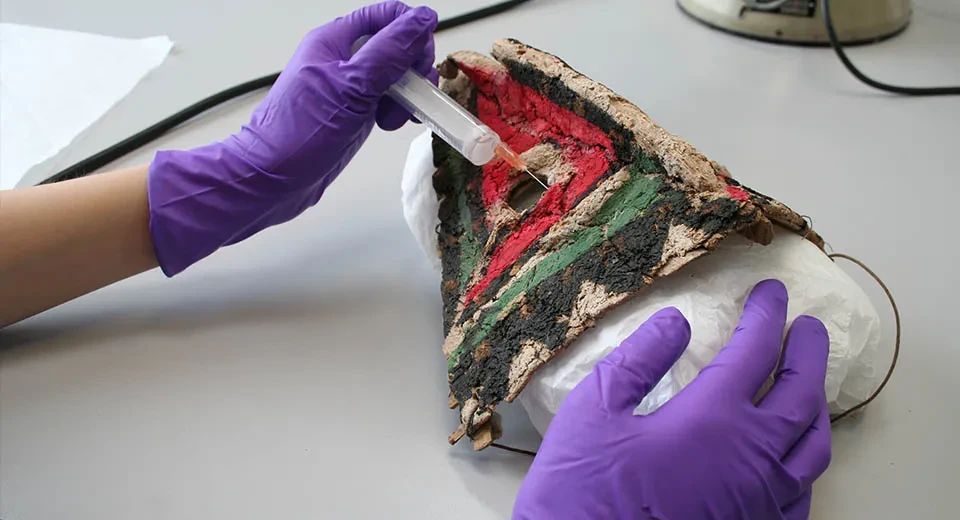
Consolidation of the surface
We decided to do the consolidation process in two stages: first, adhere the larger, loose or detached fragments by brushing or injecting a thicker consolidant underneath them, and then to use a more dilute consolidant in a mist form in order to secure the powdery pigments to the surface.
We chose a cellulose-based adhesive called Klucel G™ due to its properties: it has a matte finish, good strength, and was sympathetic to the material of the object. We diluted it in alcohol when we applied it underneath the fragments, and mixed it in a 7:3 alcohol-water solution for the spray application. Using the alcohol-water mixture may also have helped to denature any mould residues which remained on the mask after vacuum cleaning.
Klucel G™ was effective in consolidating the ground and pigment paint layers, and it did not leave a glossy surface, however the process has slightly saturated the colours.
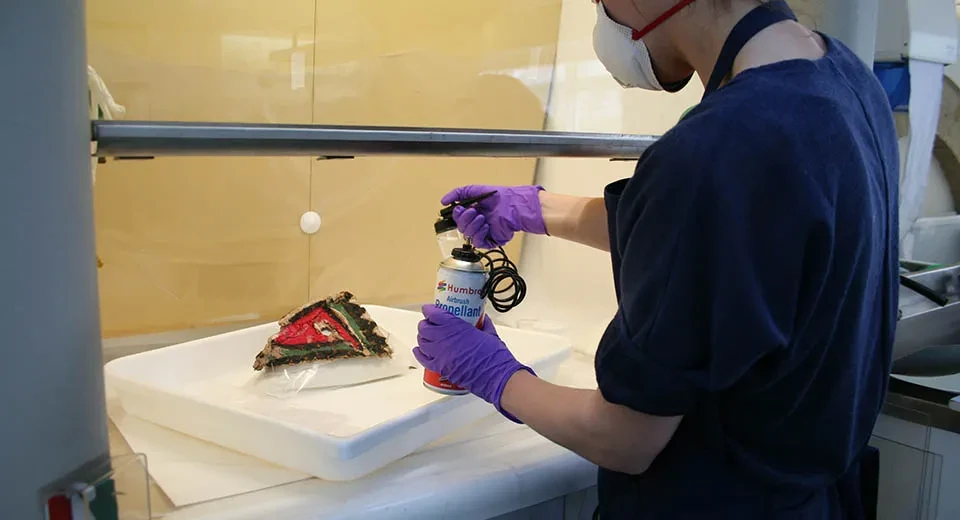
Japanese tissue support
To enable the re-shaping of the ‘chin’ we used an ultrasonic humidifier filled with deionised water. The cold mist softened the fibres enough so that the bent piece could be re-aligned.
We fixed the ‘chin’ in this position using re-moistenable Japanese tissue coated with a Klucel G™ solution, which was dry at the time of the application. We tore small patches of the tissue and feathered their edges, and placed them around the broken area. When the patches were in position, we reactivated the adhesive by gently brushing them with a 7:3 alcohol-water mixture. We also toned the tissue with acrylic paints so that the conservation repair matches the colour of the supported area.
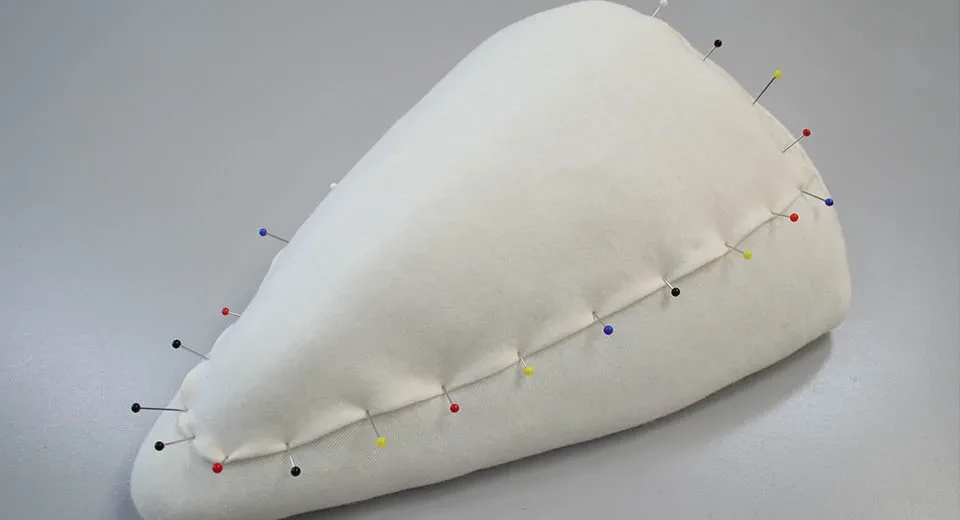
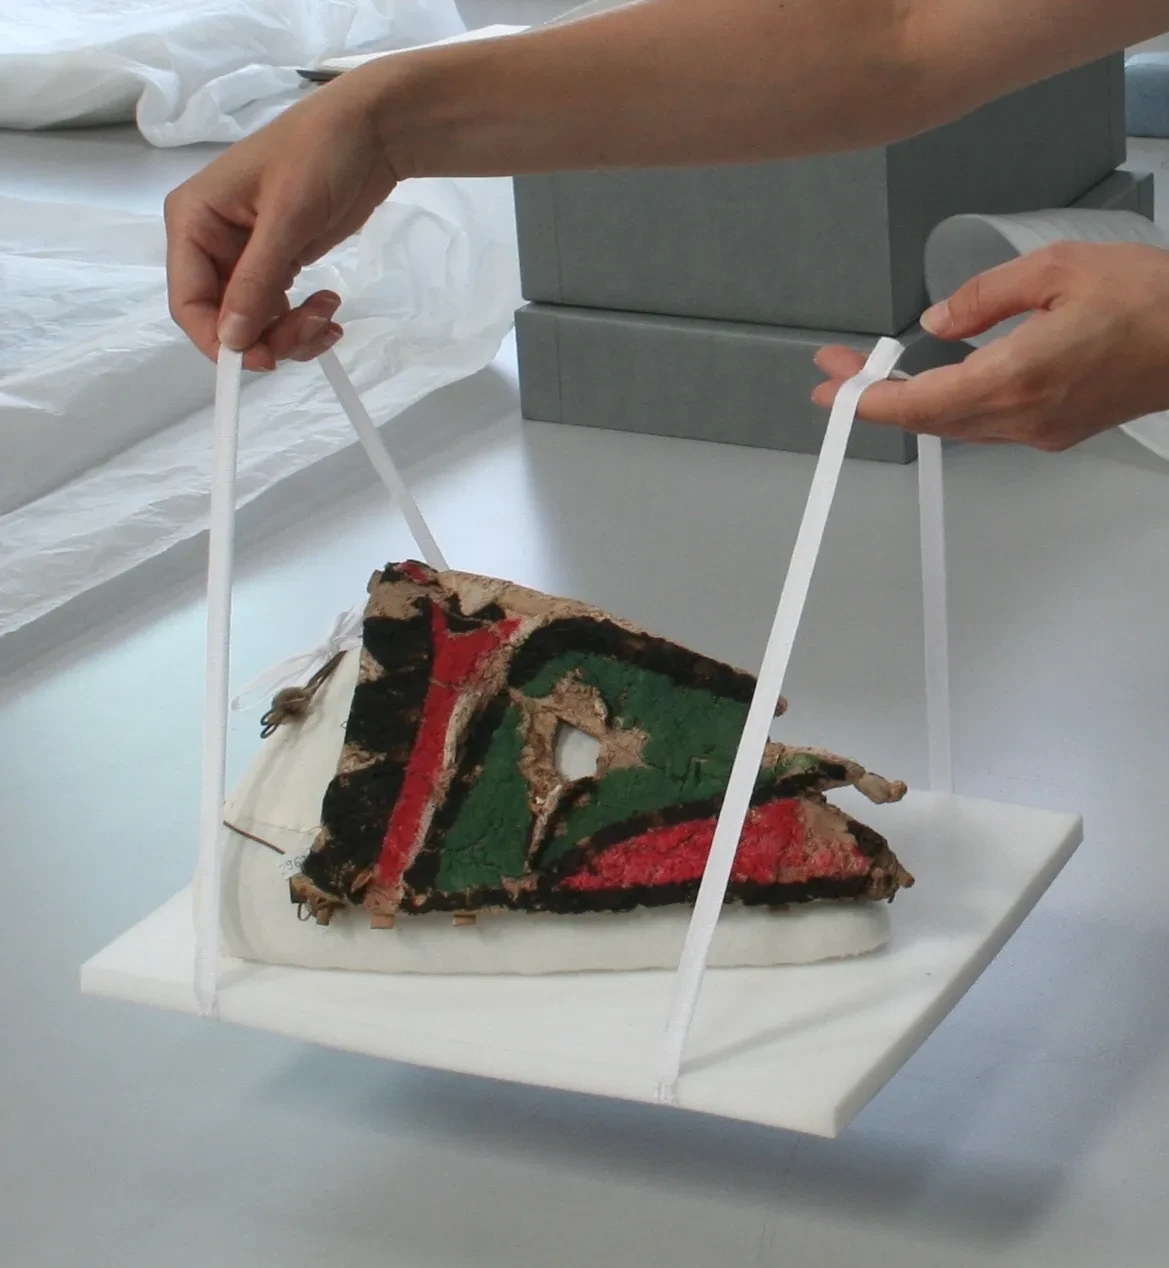
Mounting and packing
Mounting was the last step of the treatment as we needed something to support and protect the mask in storage. We made a soft padded mount which moulds to the mask’s shape and protects it from flexing and moving about in the storage box.
To create the mount we measured the mask, and carved out the rough shape from a conservation grade polyethylene foam called Plastazote®. To make it softer and to achieve the exact shape, we padded it with polyester wadding and finally covered it with smooth cotton jersey.
We then stitched the mount onto a sheet of Plastazote® foam and attached cotton ties onto its edges, so that it can be lifted out from the storage box. We made the box out of acid free card and labelled it with the mask’s unique reference number and photograph to reduce the need for handling the object.
Conclusions
The conservation and rehousing of the mask did not only provide it with physical stability but also enhanced its accessibility. Curators, researchers will be able to study it safely and we hope that one day more will be revealed about its history.
As conservators, we have learnt much from this complex project and hope that you have enjoyed looking behind the scenes.